

JumpCloud
Log in to ReadMe using JumpCloud
Connect JumpCloud as a SAML SSO provider to allow members of your organization to authenticate with JumpCloud and access your ReadMe projects.
Create an Application
Start by creating a new SSO application in JumpCloud for ReadMe.
-
In the JumpCloud Admin Portal, go to Access > SSO Applications and click Add New Application.
-
Search the application catalog for ReadMe, select the ReadMe option, and click Next.
-
Enter a display label (e.g., ReadMe SSO), then click Save Application.
-
Click Configure Application to move to the SAML Single Sign-On configuration.
Configure SAML Settings
Next, exchange configuration values between ReadMe and JumpCloud.
-
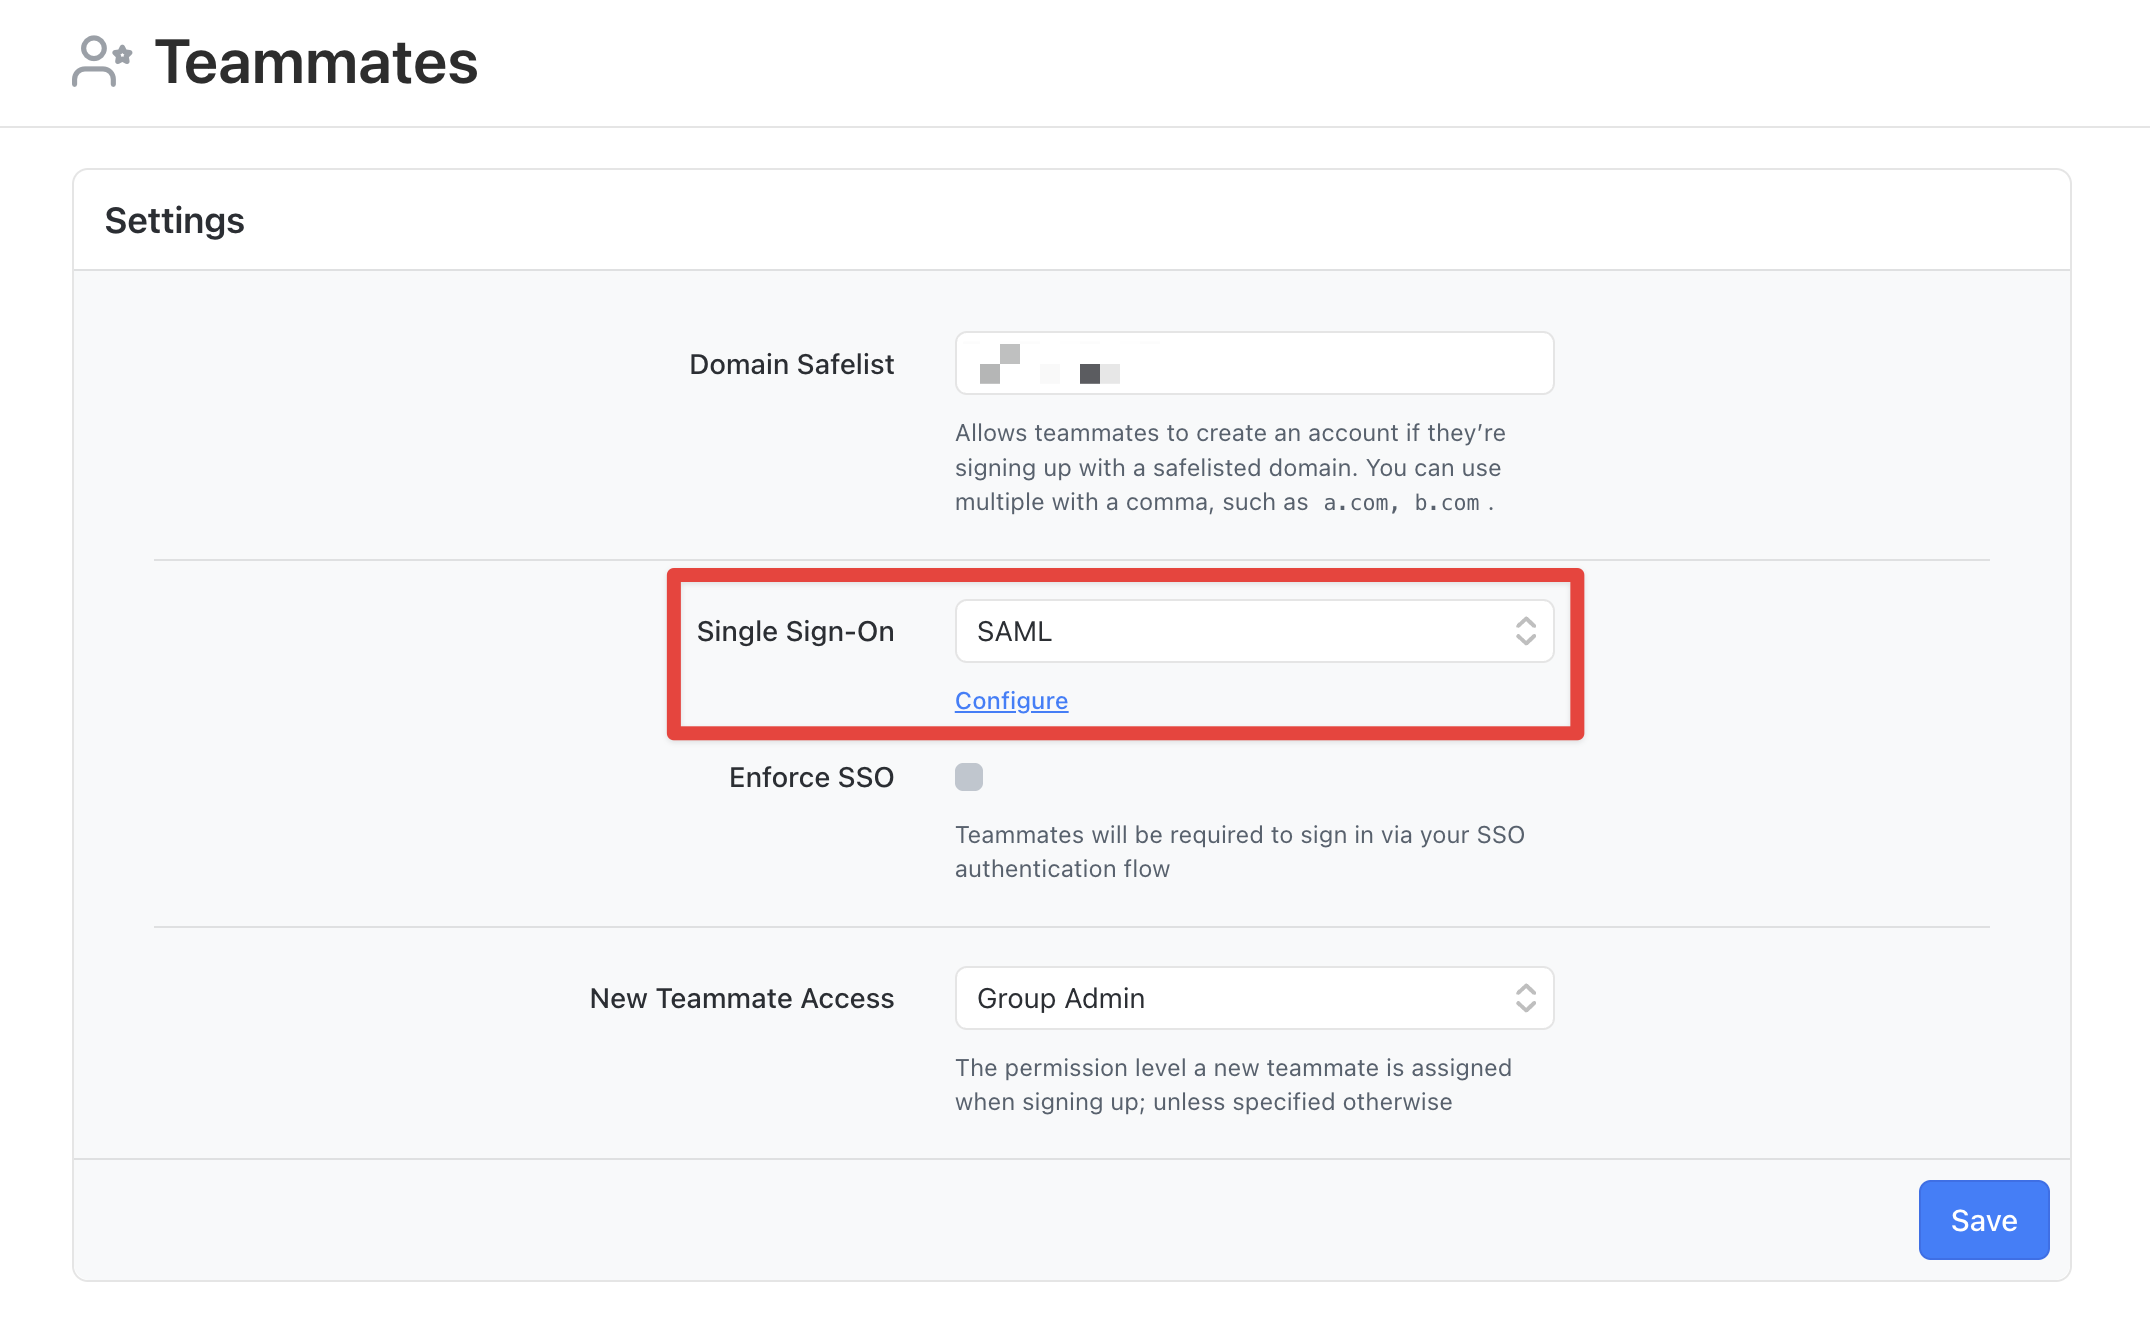
Go to Teammates in your ReadMe group dashboard.
-
Select SAML from the Single Sign-On menu, then click Configure.
-
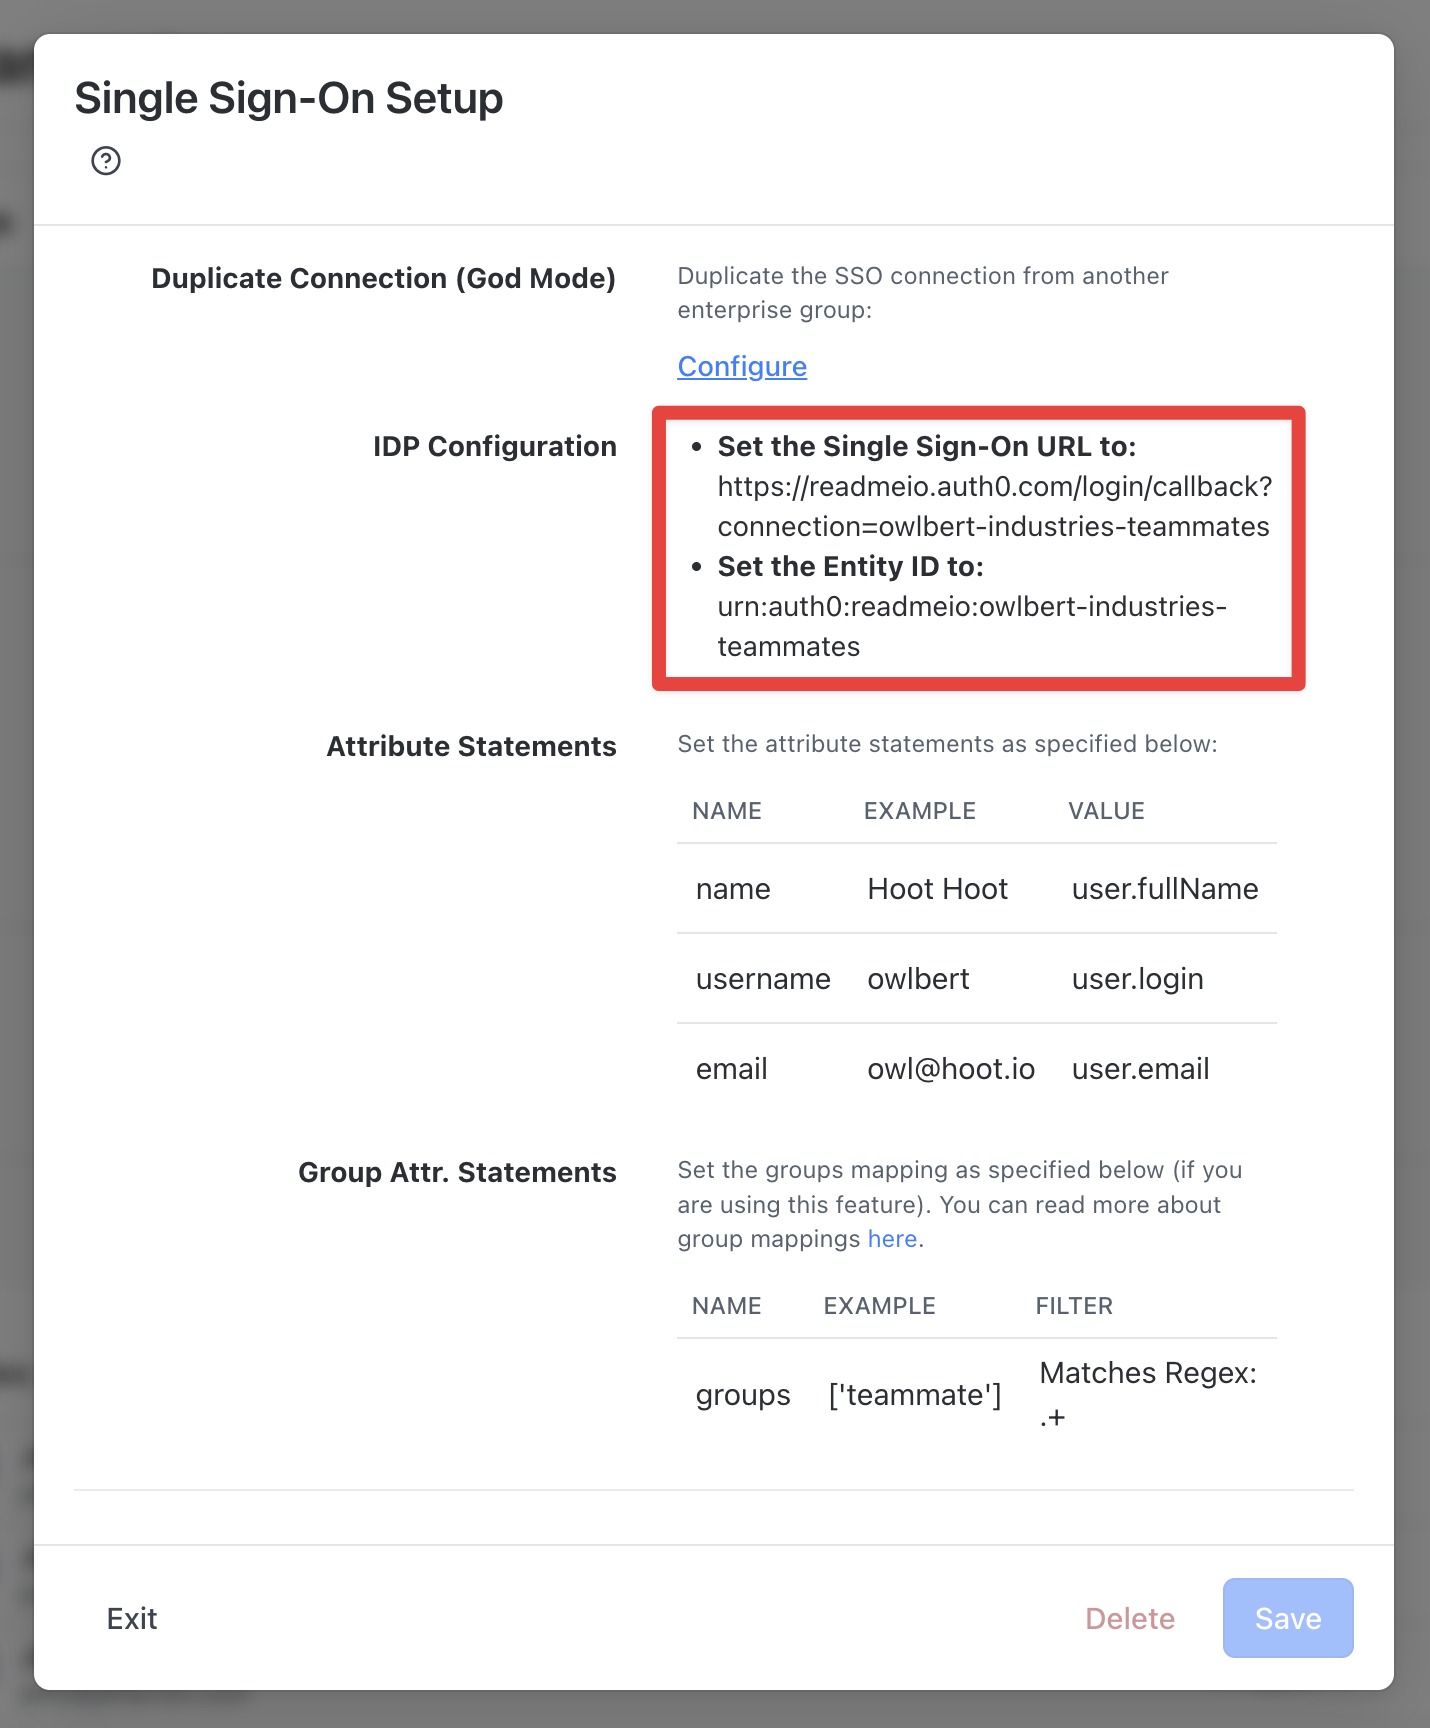
Record the Single Sign-On URL to use in your JumpCloud configuration.
-
Record the Entity ID value to use in your JumpCloud configuration.
-
Leave ReadMe's settings open—you'll return to them later.
-
Return to JumpCloud and open the SSO tab of your new application.
-
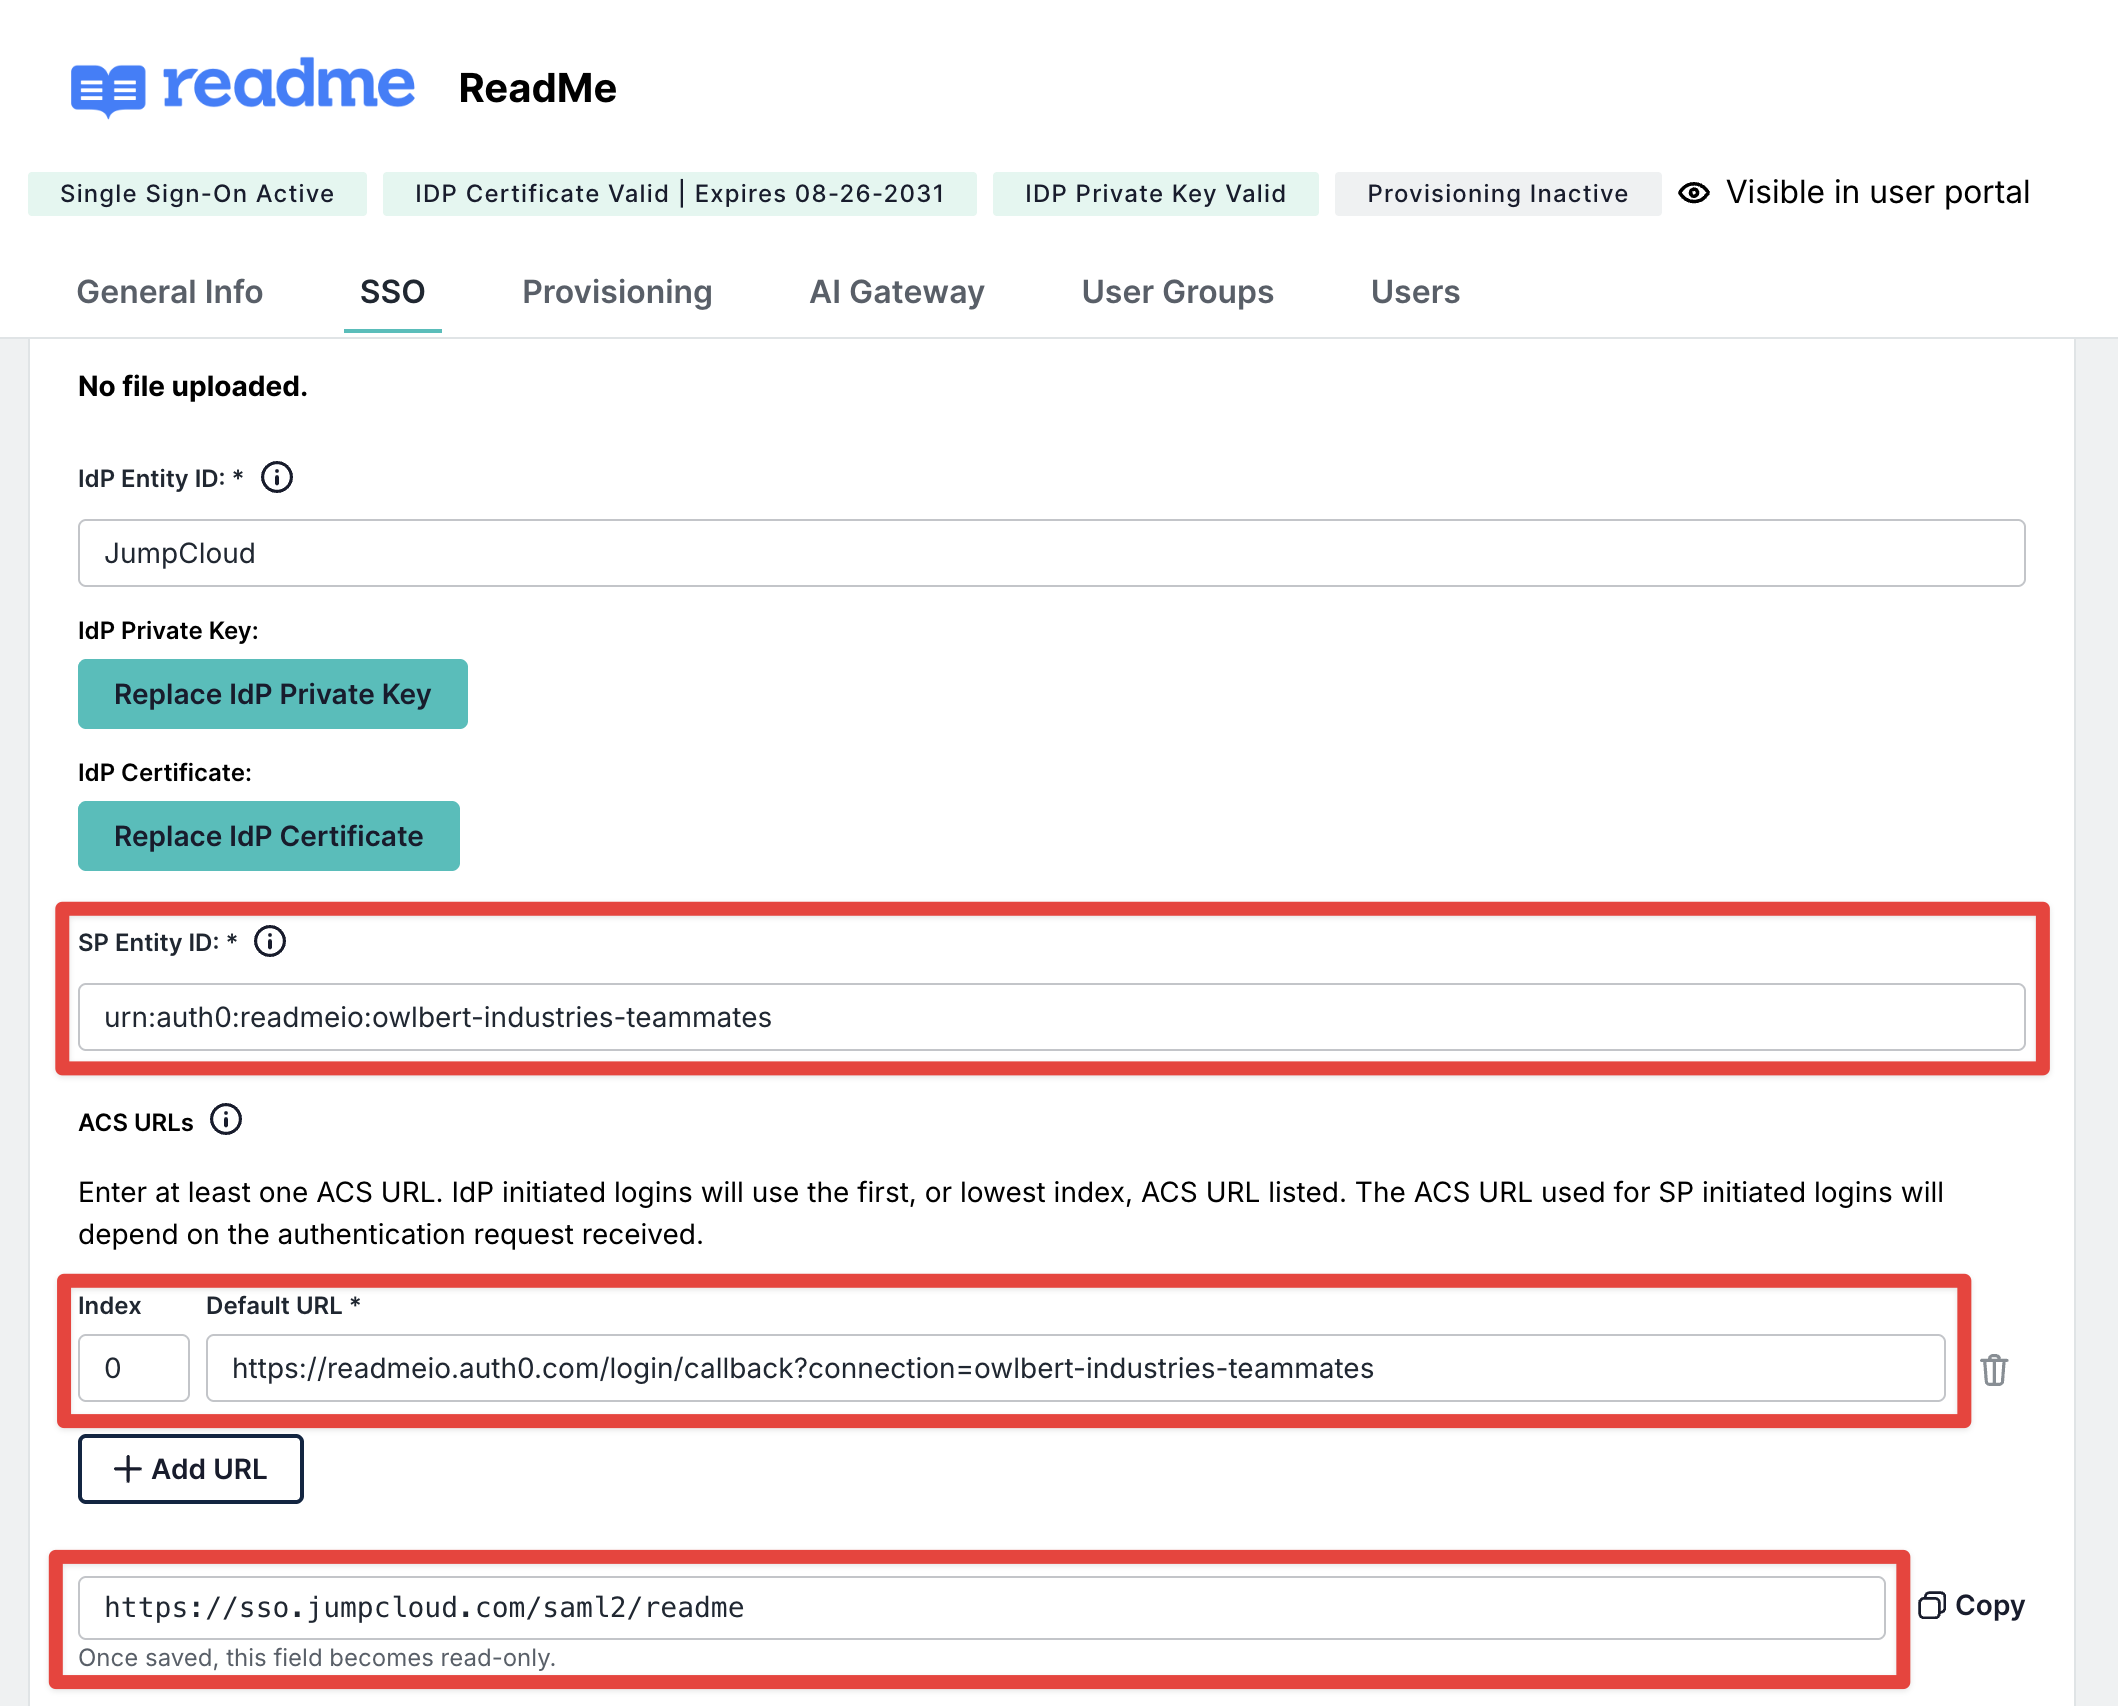
Enter the entity ID from step 8 in the SP Entity ID field.
-
Enter the single sign-on URL from step 7 in the ACS URLs field.
-
In the IdP URL field, append a path that identifies this application (e.g.,
https://sso.jumpcloud.com/saml2/readme). This is the login URL you'll give to ReadMe.
Attributes and Claims
Now match the attribute names ReadMe expects to the claims JumpCloud sends.
-
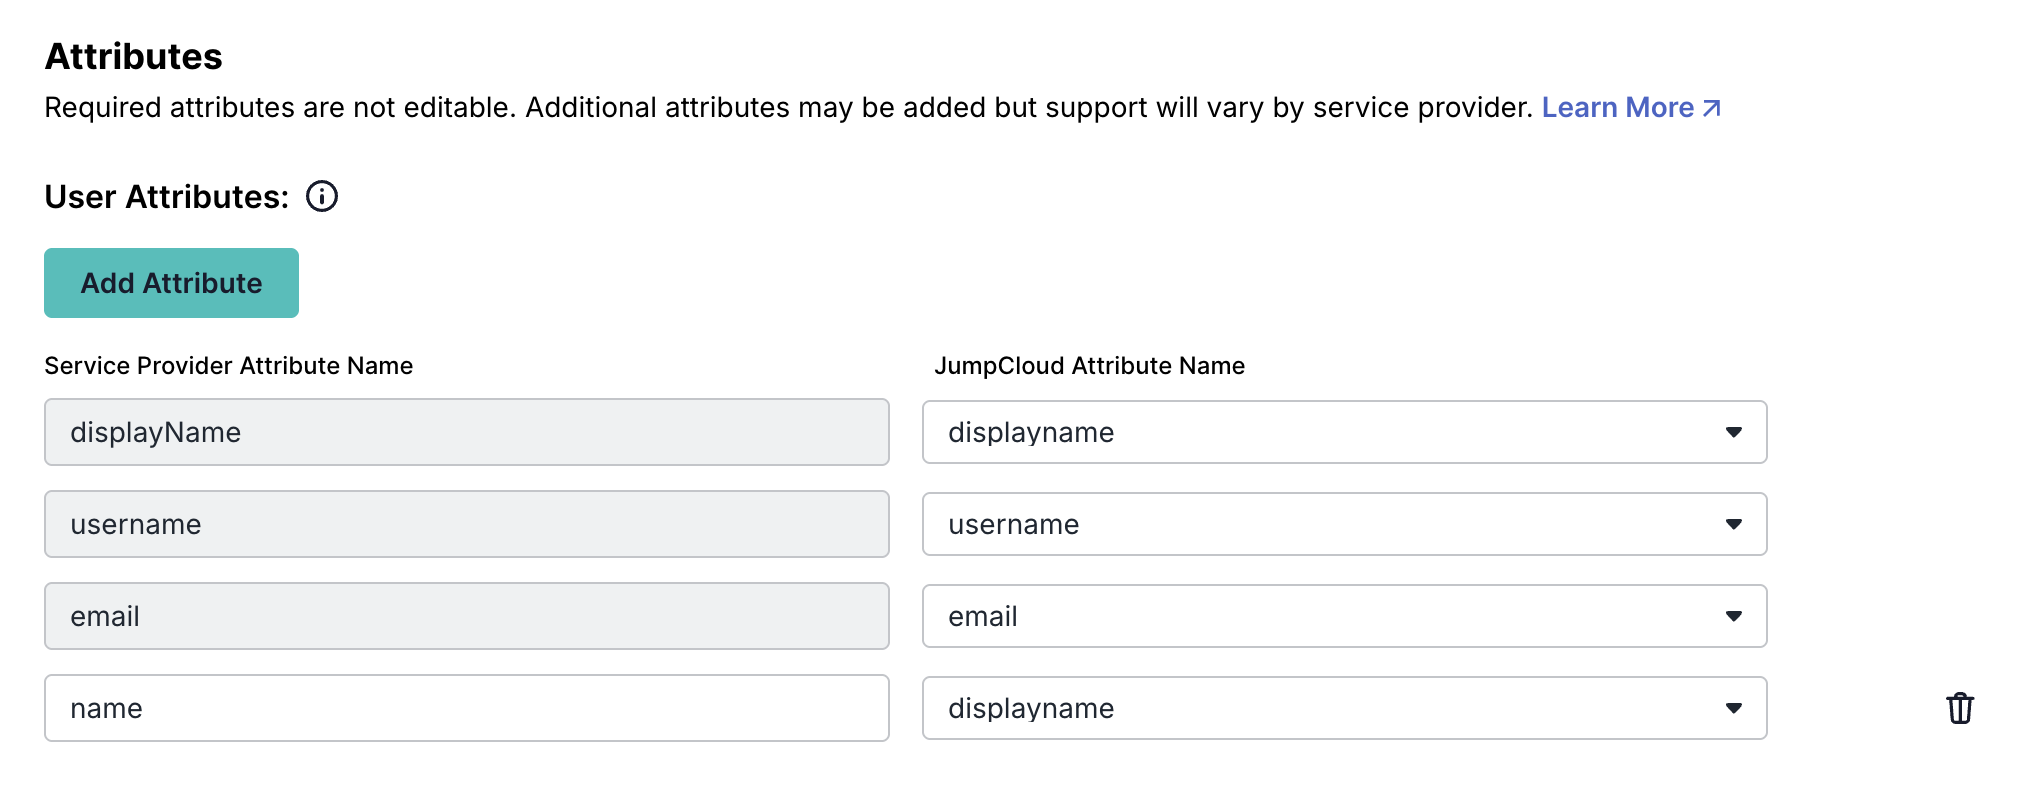
Scroll down to the User Attributes section.
-
At a minimum, you need to send us
email,name, andusernameto sign a teammate into ReadMe. Because you selected ReadMe from JumpCloud's application catalog,emailandusernameare already populated. To addname, click Add Attribute, enter name for the attribute name, and select the corresponding JumpCloud attribute — typically displayname. Confirm that the attribute is populated on your user records before testing.
-
Click Save.
-
Click Exit to close the open modal.
-
Click Save to confirm your SAML settings changes in ReadMe.
Certificate and Login URL
With the basic configuration saved, bring your certificate and login URL back to ReadMe.
-
Within the SSO tab in JumpCloud, click Download Certificate to save a copy of the JumpCloud IdP certificate to your local machine. If your account only offers Export Metadata, download the metadata XML instead. The certificate is the value inside the
<X509Certificate>element. -
Copy the IdP URL you configured in step 13.
-
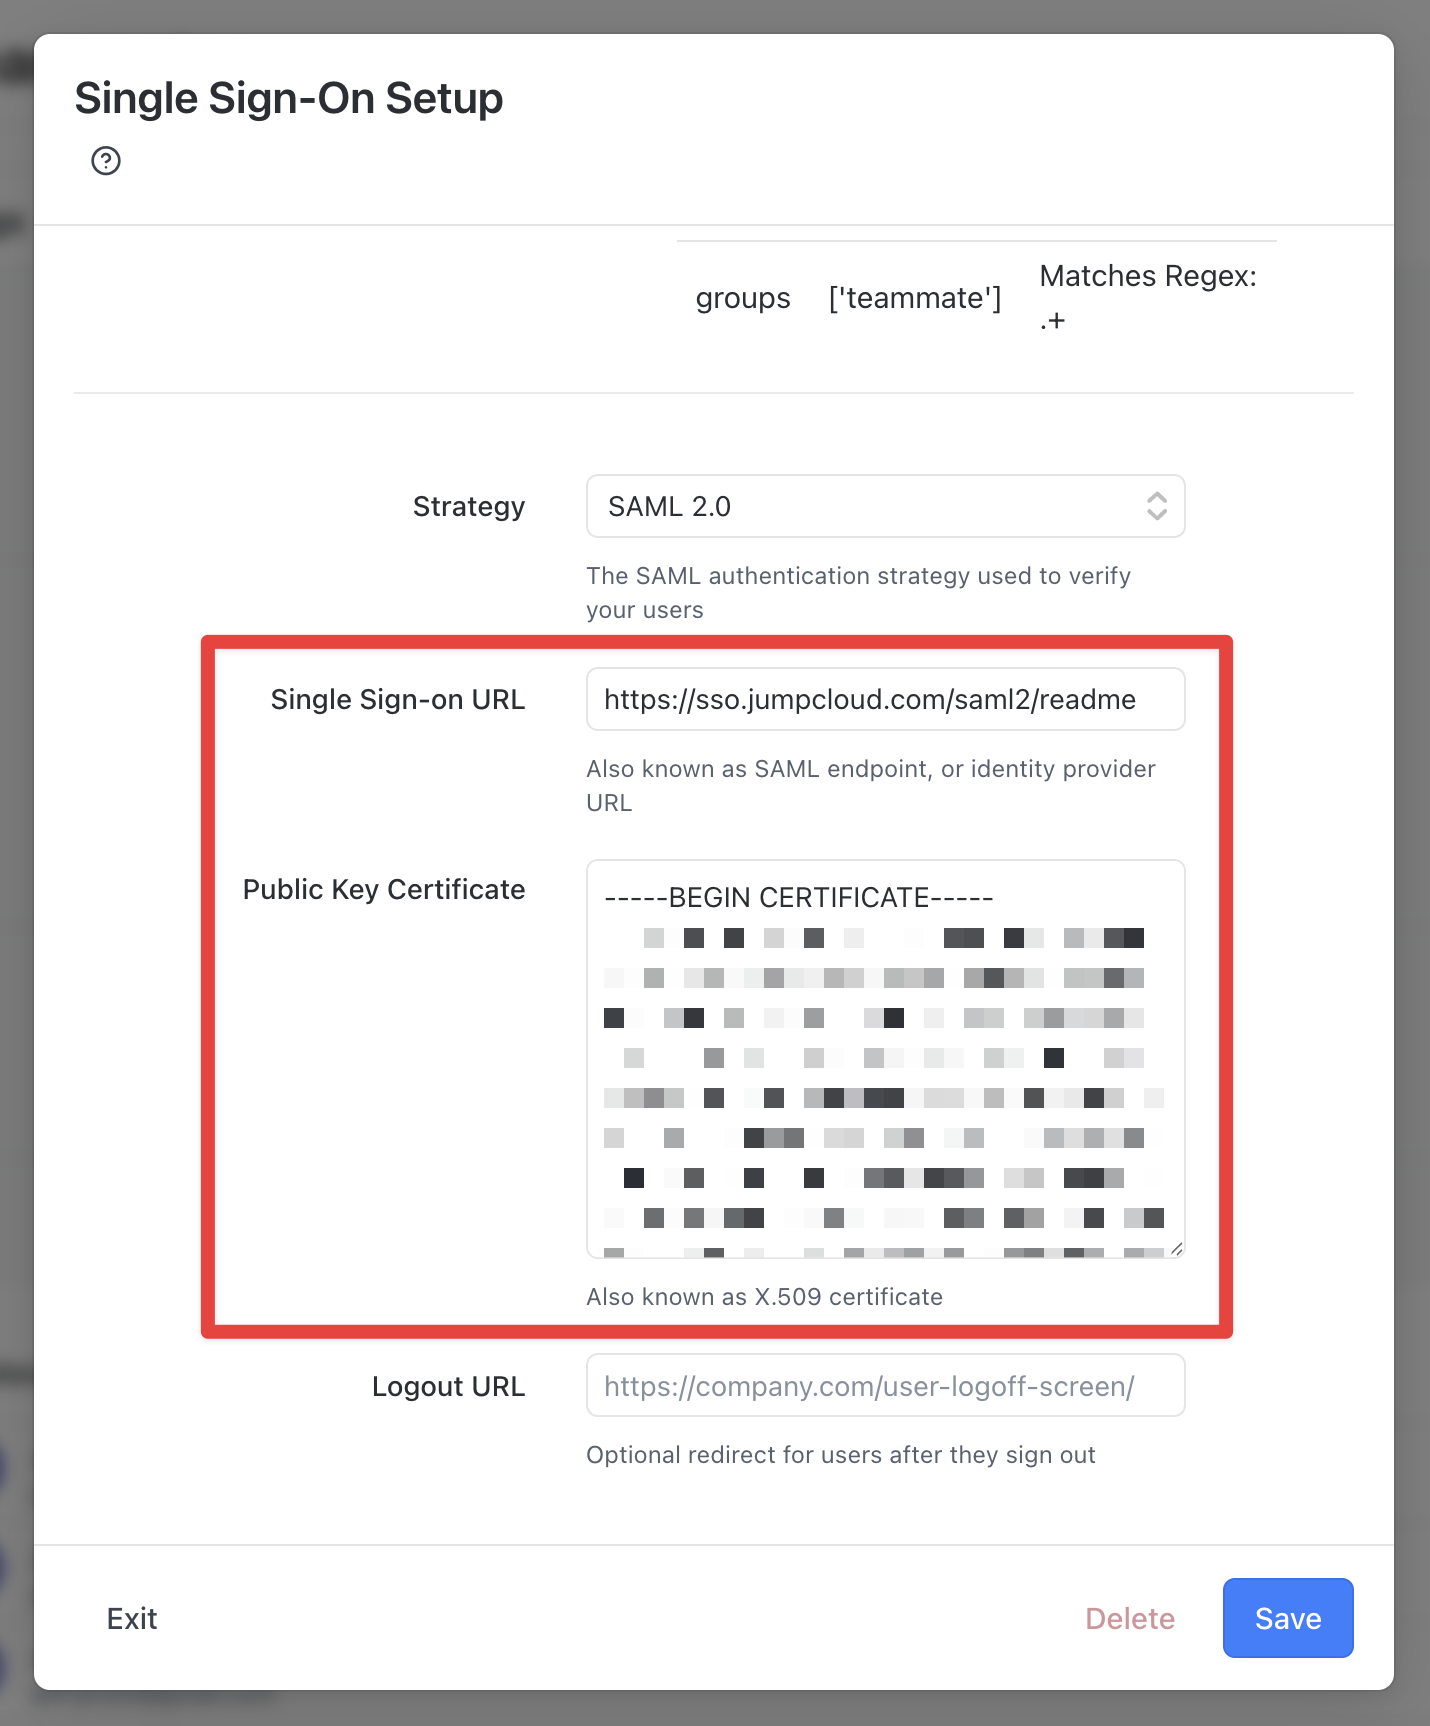
Back in your ReadMe SSO configuration settings, enter the IdP URL from the previous step in the Single Sign-on URL field.
-
Open the downloaded certificate file in a plain text editor, copy its contents exactly, and paste them into the Public Key Certificate field in ReadMe. If you pulled the certificate out of the metadata XML, wrap the value in
-----BEGIN CERTIFICATE-----and-----END CERTIFICATE-----lines before pasting.
-
Click Save.
-
Click Save to confirm your SAML settings changes in ReadMe.
Add Users via Groups
Finally, assign the teammates who should have access to ReadMe.
-
In the JumpCloud Admin Portal, go to Identity Management > User Groups.
-
Click + User Group.
-
Give the new group a name (e.g., ReadMe Teammates), add a description, and select the Users tab.
-
Select the users you want to give access to, then click Save Group.
-
Go to Access > SSO Applications and select your ReadMe application.
-
Select the User Groups tab, check the group you just created, and click Save.
Your teammates can now access the ReadMe tile in their JumpCloud User Portal and log in to ReadMe!
Updated last month