Setting Up Microsoft Entra
Setting up Microsoft Entra ID SAML SSO for ReadMe
The following link are instructions on Microsoft's site explain how to create an app on Entra and configure it to use SAML SSO
Configuration Instructions for Non-Group SSO
This setup assumes you are not using groups in Entra to filter users to specific projects in ReadMe. Group mapping will be cover later in this document.
The following are instructions for configuring your SAML Entra app to work with ReadMe.
1. Create the Entra Enterprise Application
- In Entra ID → Enterprise applications, All application, new application.
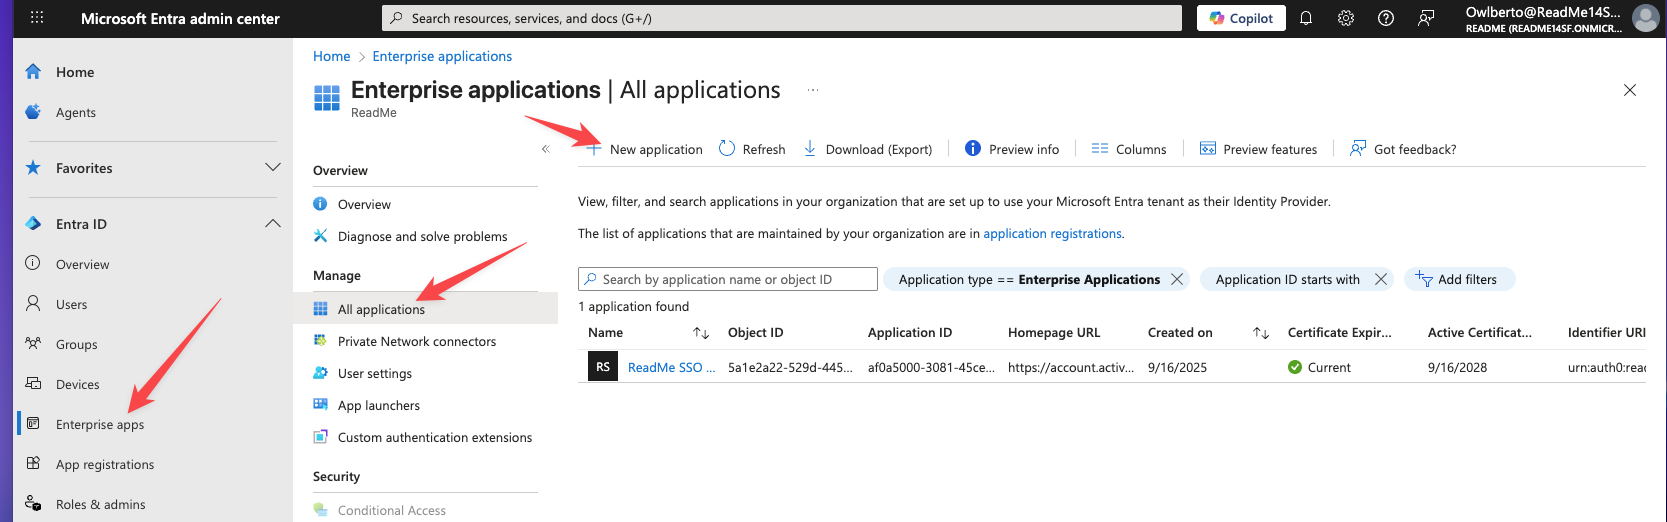
- Name it something like ReadMe SSO.
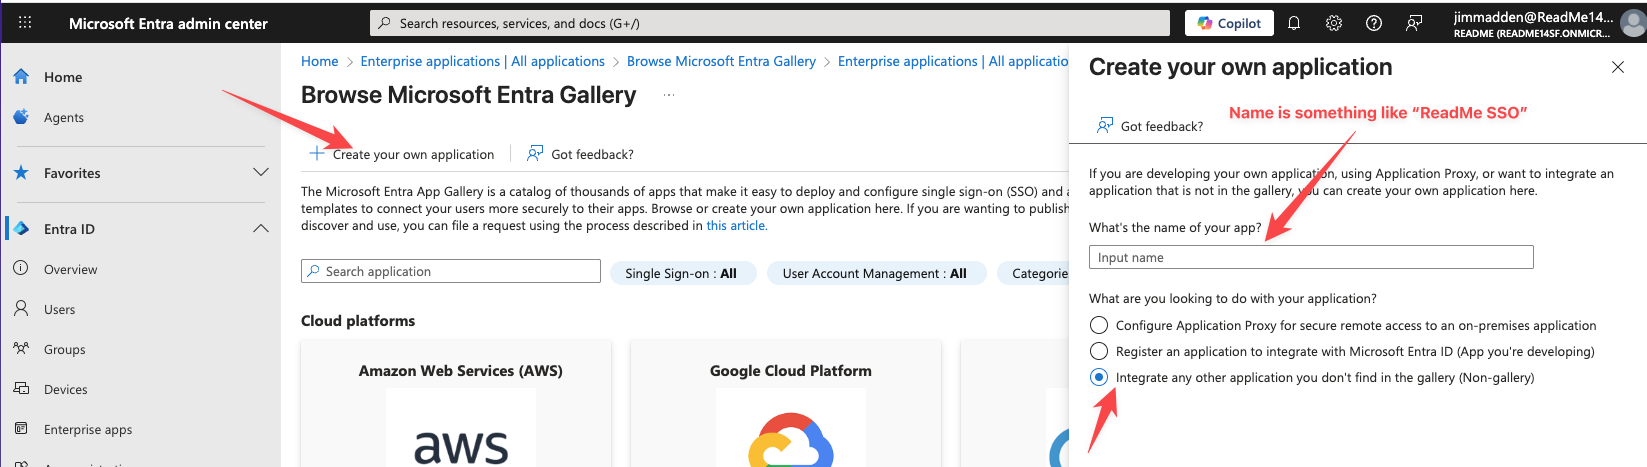
- Click "Create" to create your app.
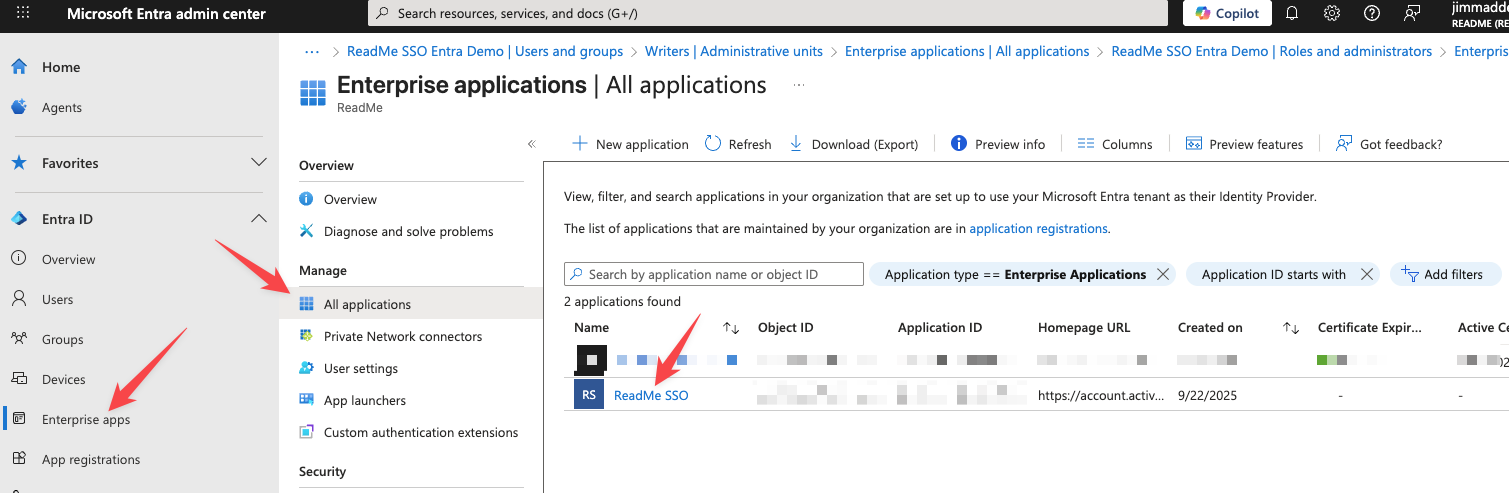
- Finally, make sure the app is set up as a SAML app by finding your app in all apps and clicking into it:
- Select Single Sign-on from the left side menu and select SAML as the option for your app:
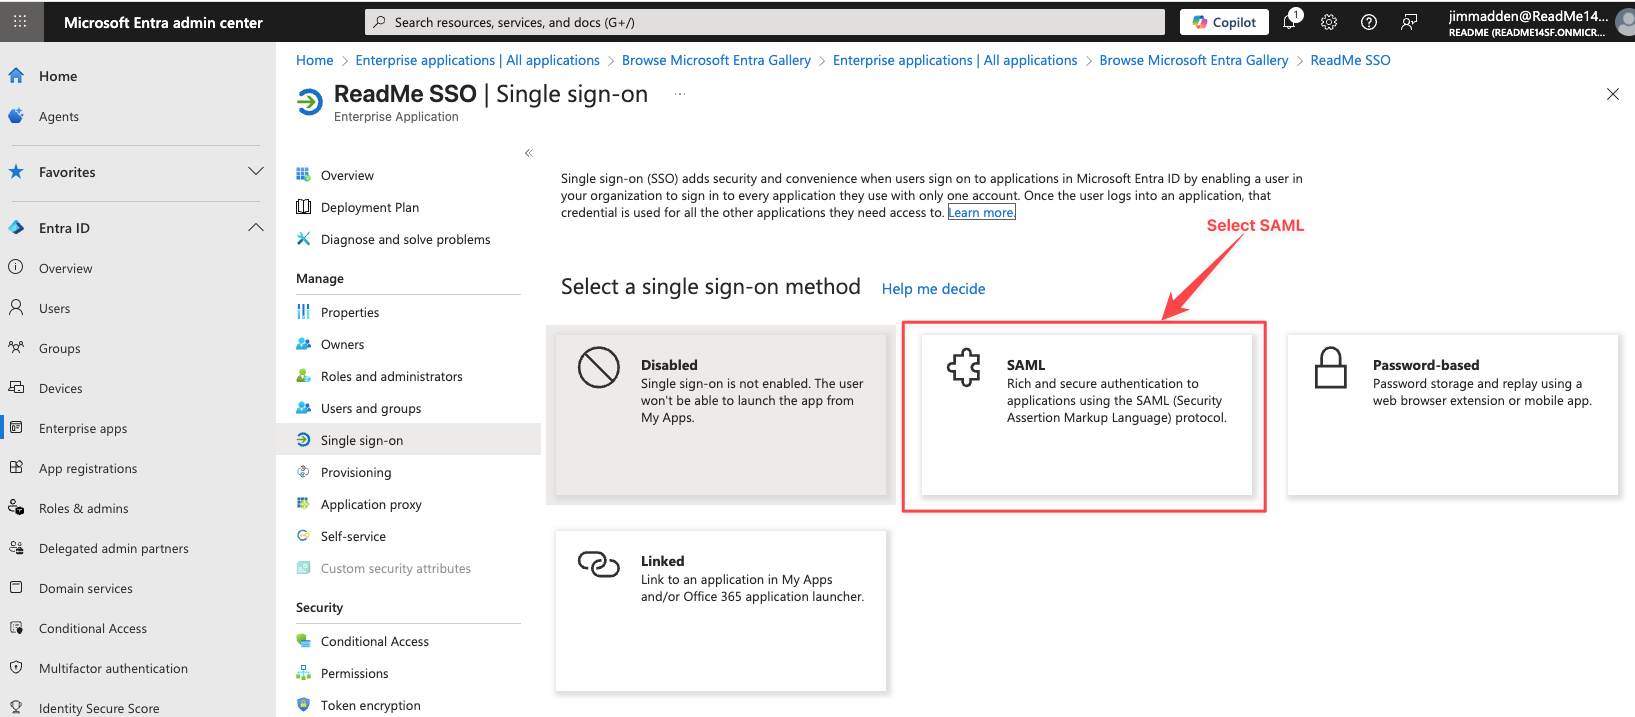
In step 2 we'll configure SAML to work with ReadMe.
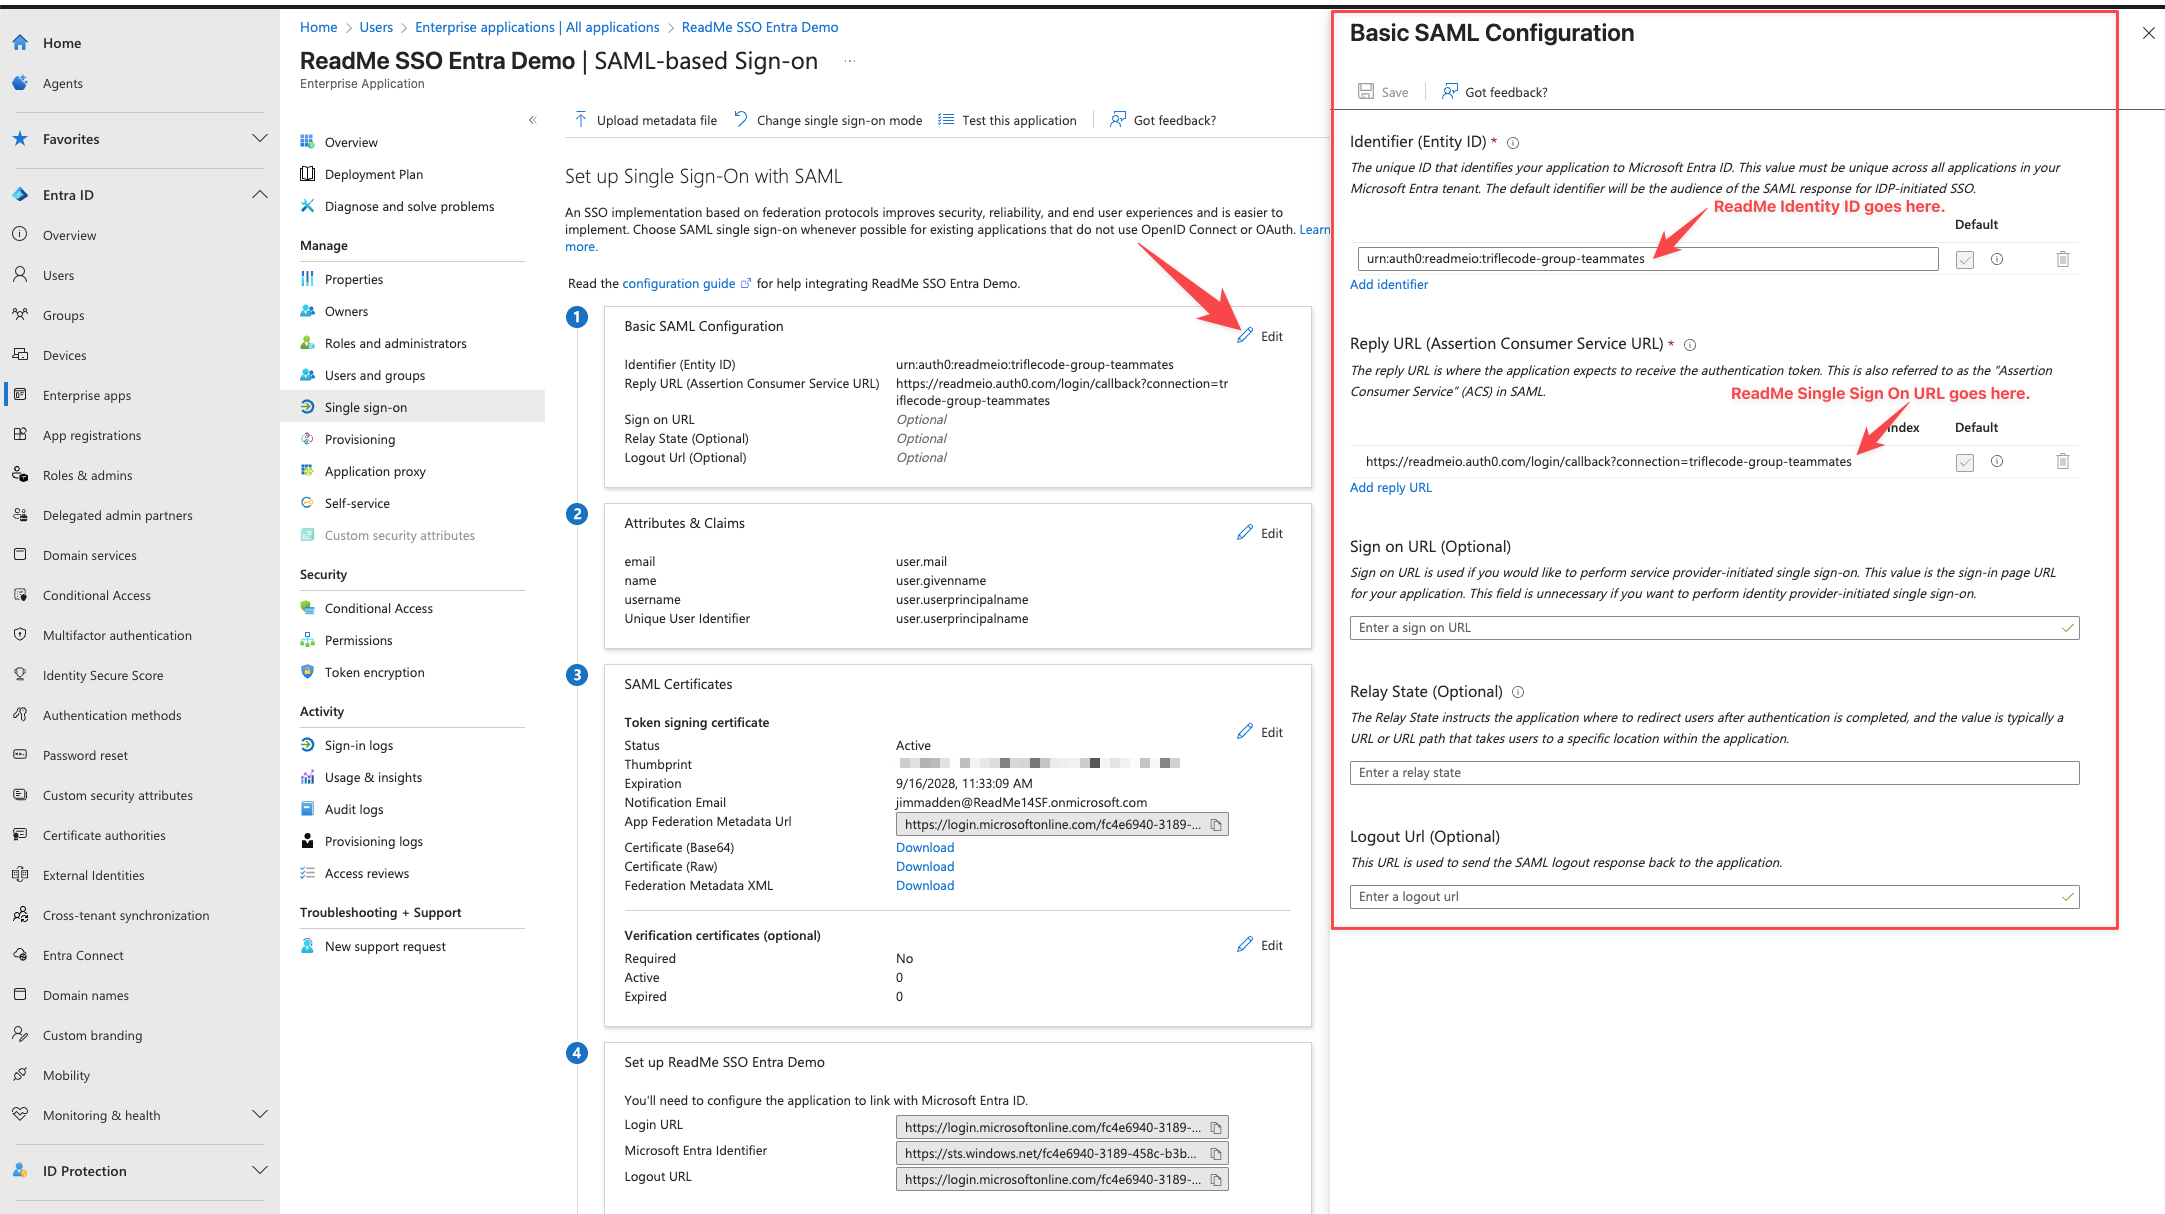
2. Configure Basic SAML Settings
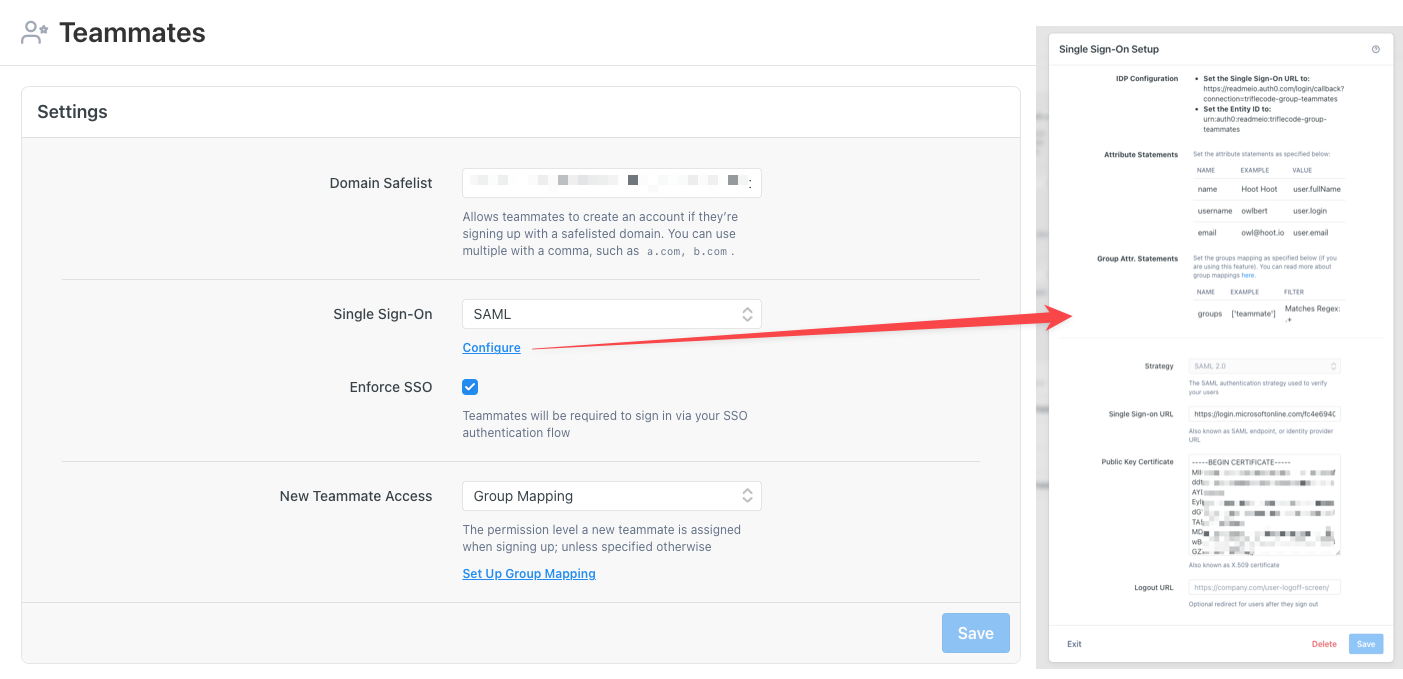
- Go to Teammates in your ReadMe group dashboard
- Select SAML from the Single Sign-On menu and then click the Configure link
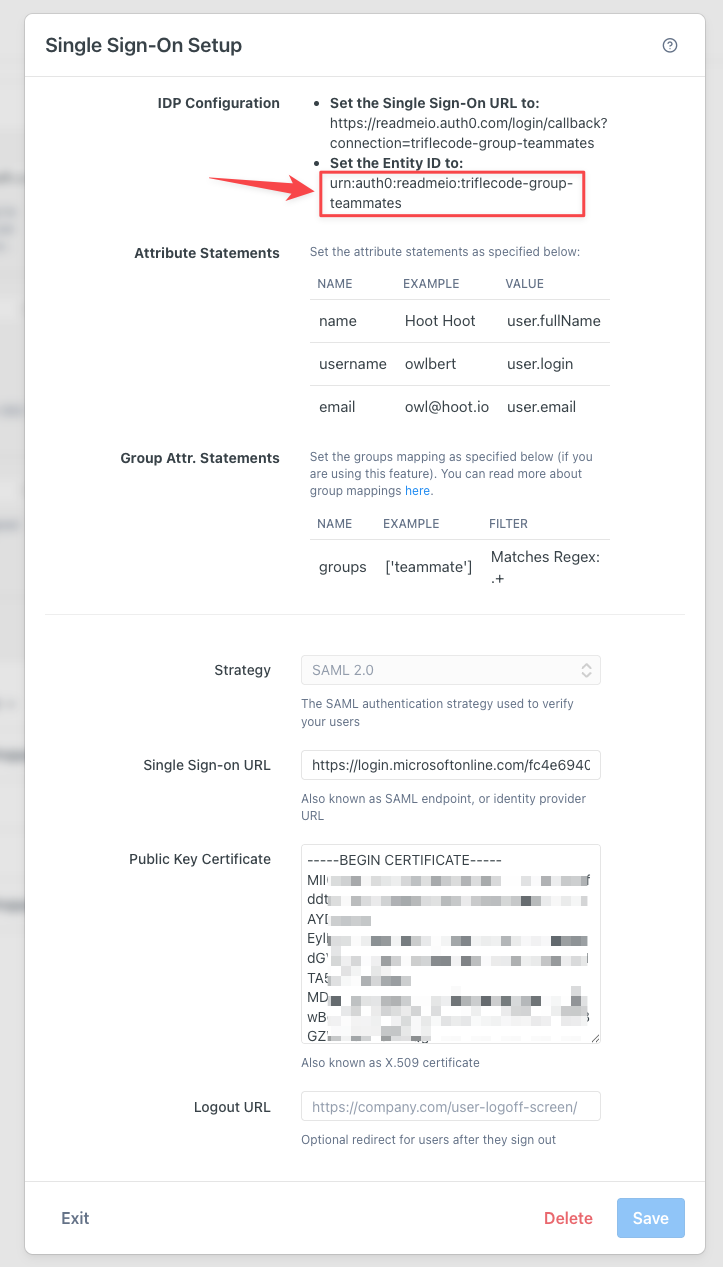
- Record your Identifier (Identity ID) value to be used in your Entra config:
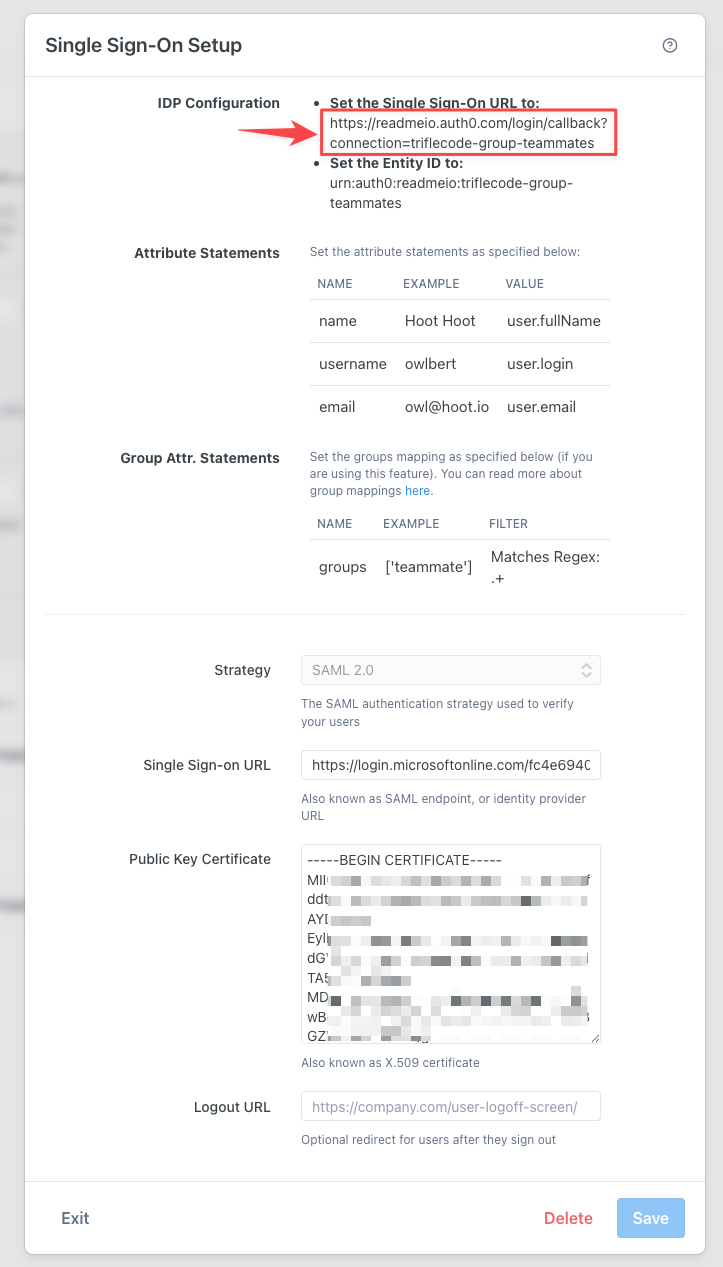
- Record your Single Sign-on URL to be used in your Entra config:
- Navigate back to your app in Entra and click Single Sign-on in the left nav and in the menu in the firs section click the edit icon.
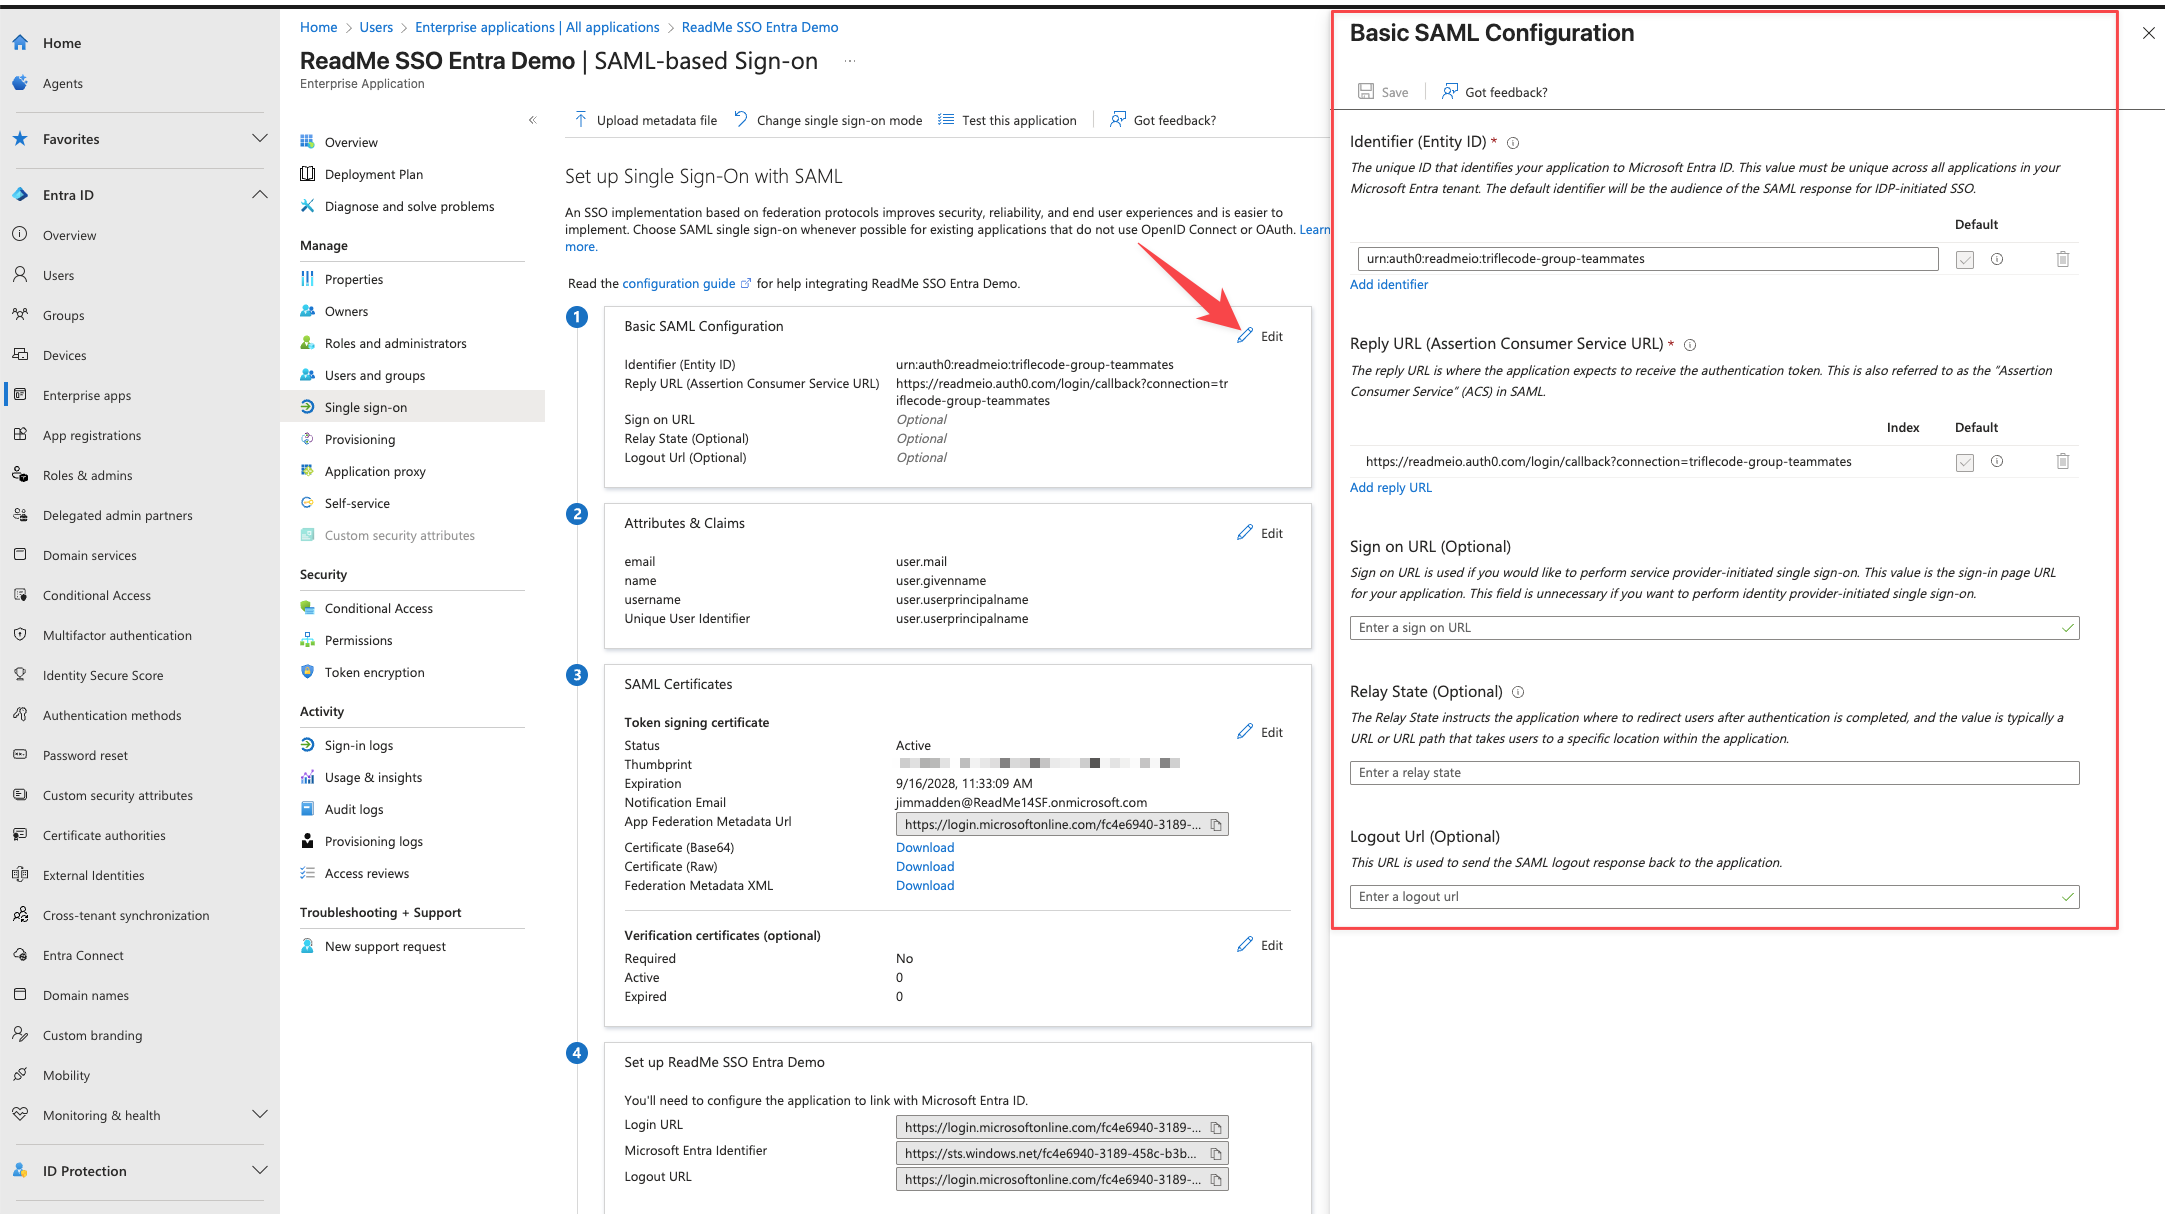
- Now fill out the Basic SAML Config form and save your settings. Your ReadMe Identity ID goes in the first field and your ReadMe login url goes in second field, just like in the following image.
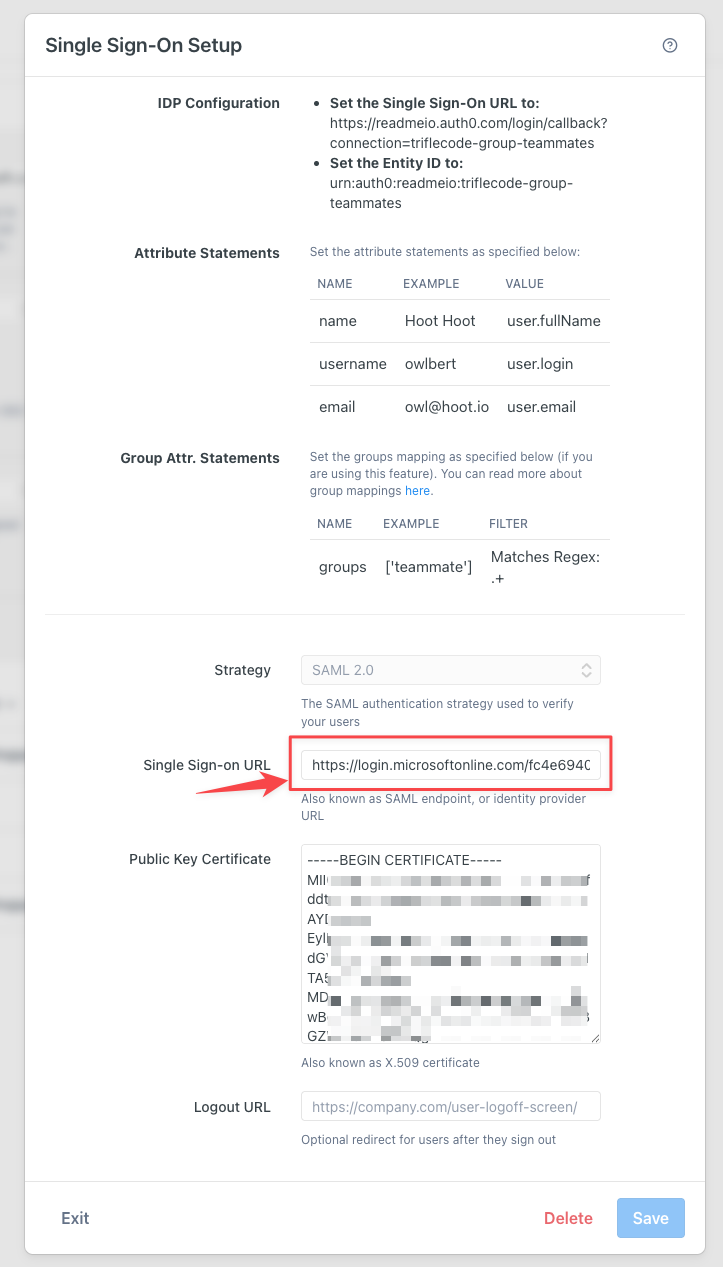
3. Configuring your CERT and Login URL
- While you are on this page in Entra (from the previous step), you should click to download your Certificate (Base64) and record your login URL to use on the ReadMe SSO config. See following image for details.

- Now navigate back to your ReadMe SSO configuration page and in the Single Sign-on URL put the value you recorded from the step above.
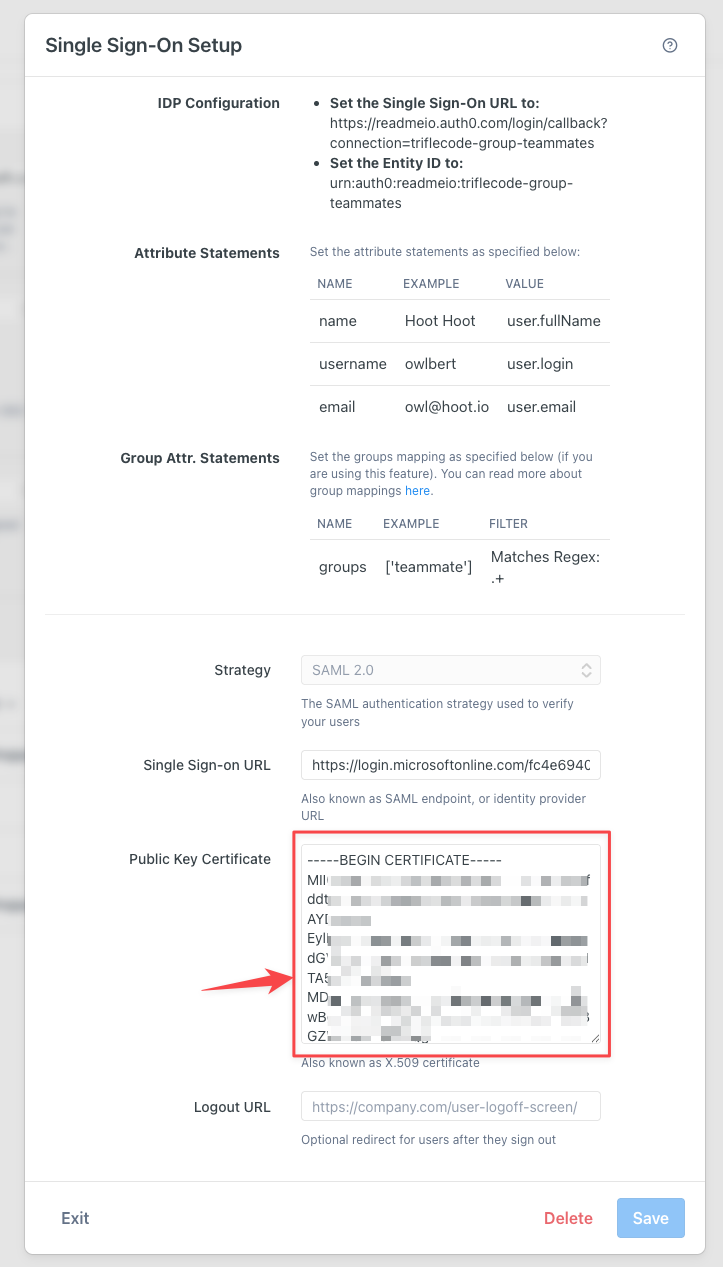
- Find the Certificate (Base64) you just downloaded and open it up in a plain text editor.
- Copy the value exactly as it is in the text file and paste it into the Public Key Certificate section of your ReadMe SSO config shown in the following image. Be sure to save all your changes!
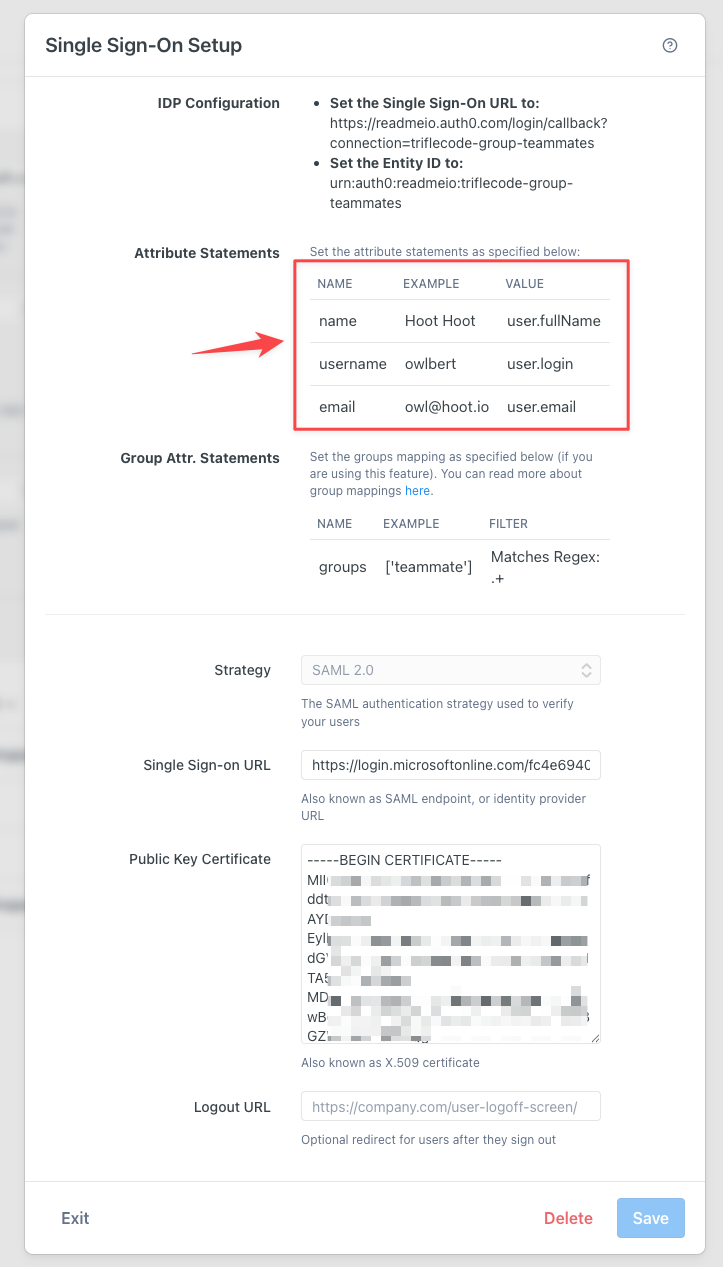
4. Attributes and Claims
- While you are in the ReadMe SSO config page make note of the values in the Attributes Statements section, noted in the following image. You will need these for the Attributes & Claims section in Entra.
-
Now navigate back to the Single sign-on setup in your Entra app. Locate the Attributes & Claims section and make sure it is configured just like this:
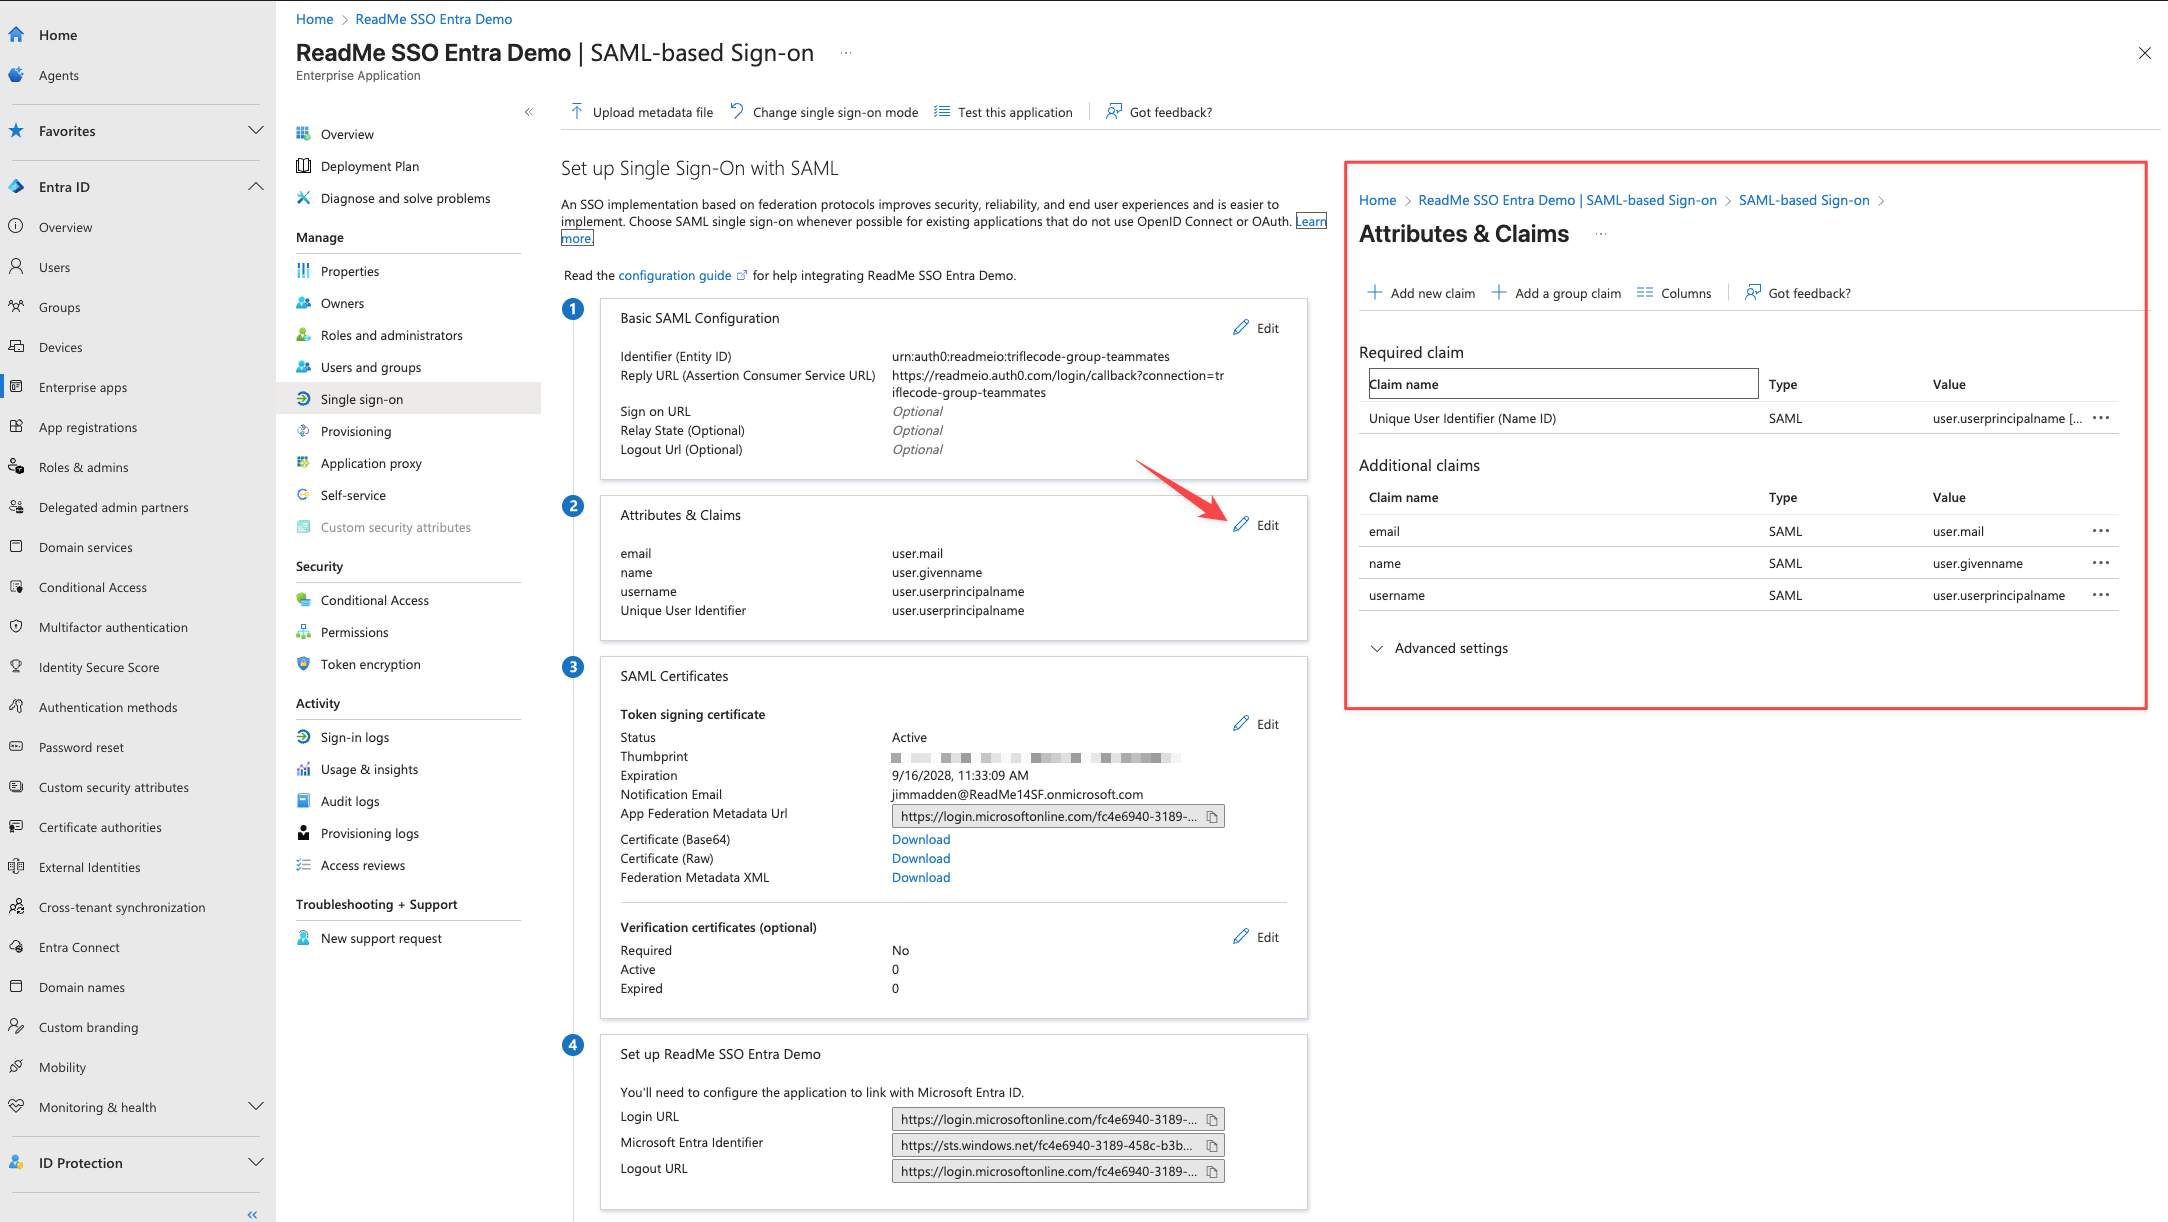
-
You should at least have
email = user.mail,name = user.givenname,username = user.userprincipalname. Save your changes.
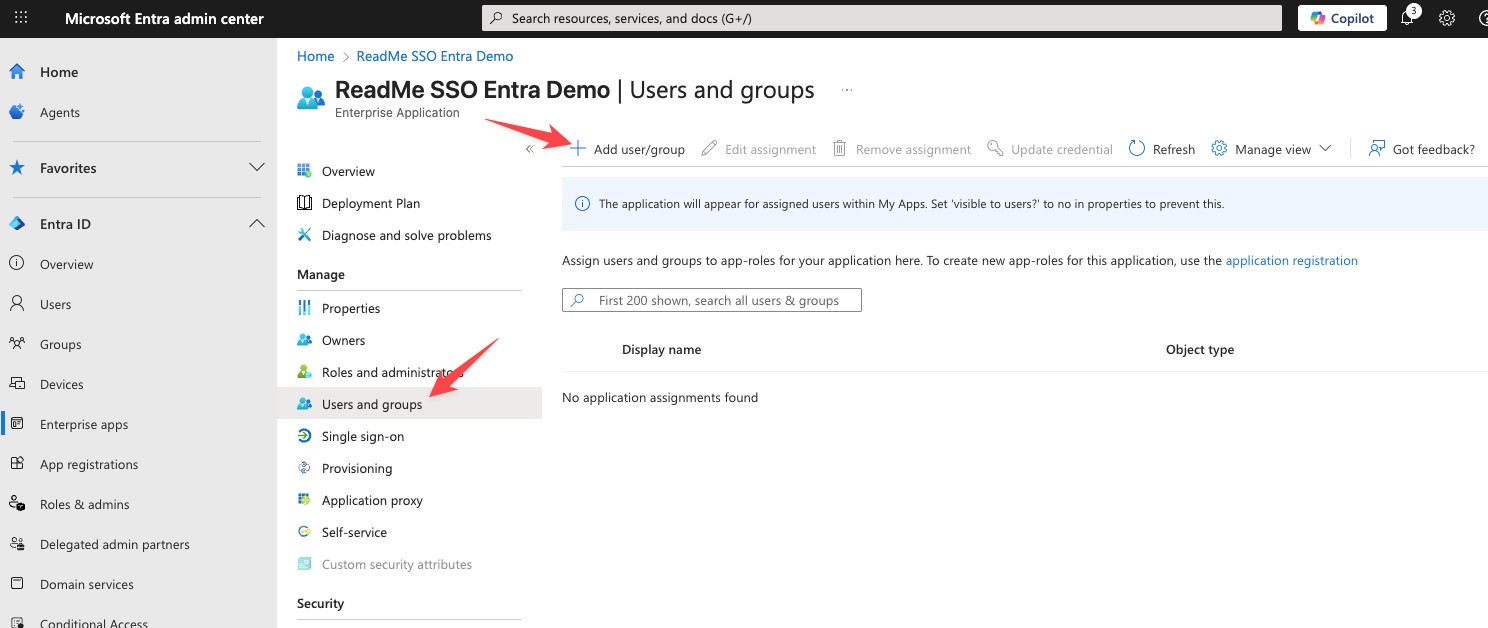
5. Add Users To The Entra App
- Log back into your Entra app and click on the Users and groups link in the left nav. Then click on Add user/group
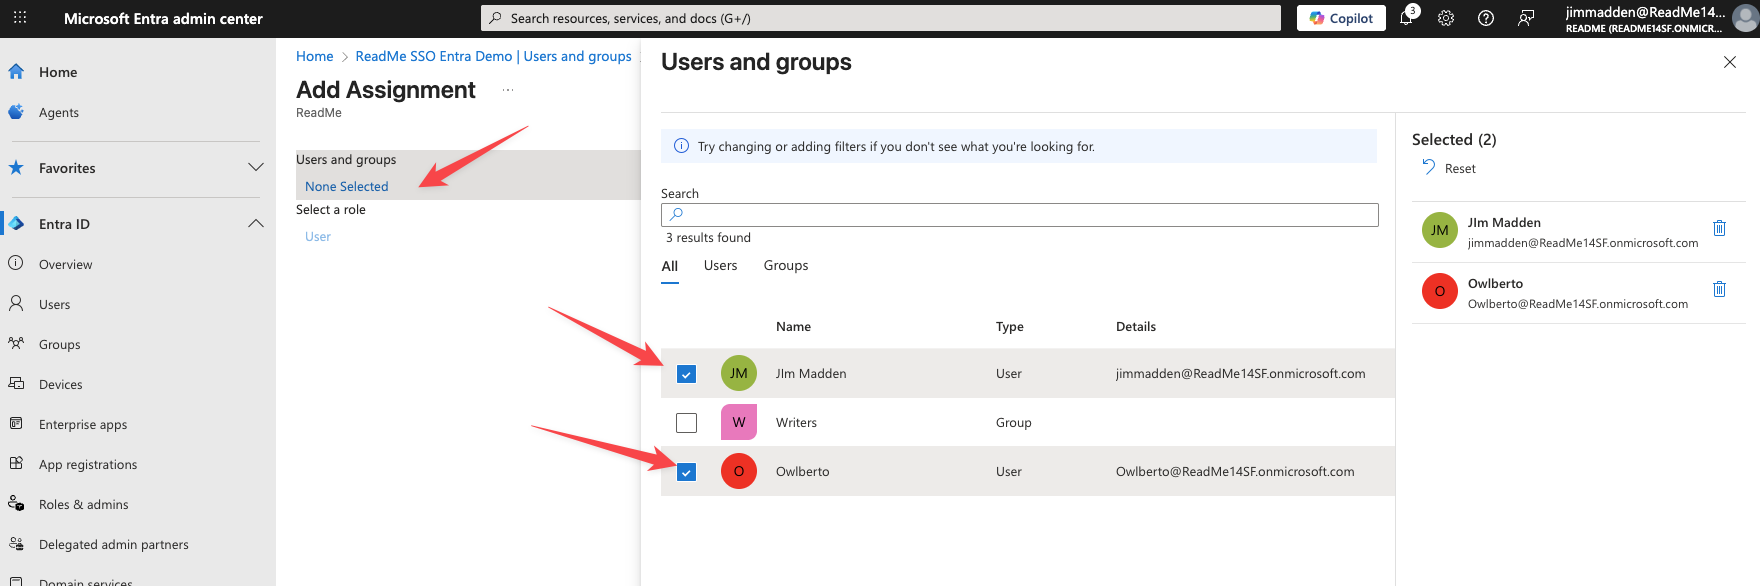
- Next select the users you want to give access to and save your entry.
- You can now see the users listed in the Users and groups section of your app.
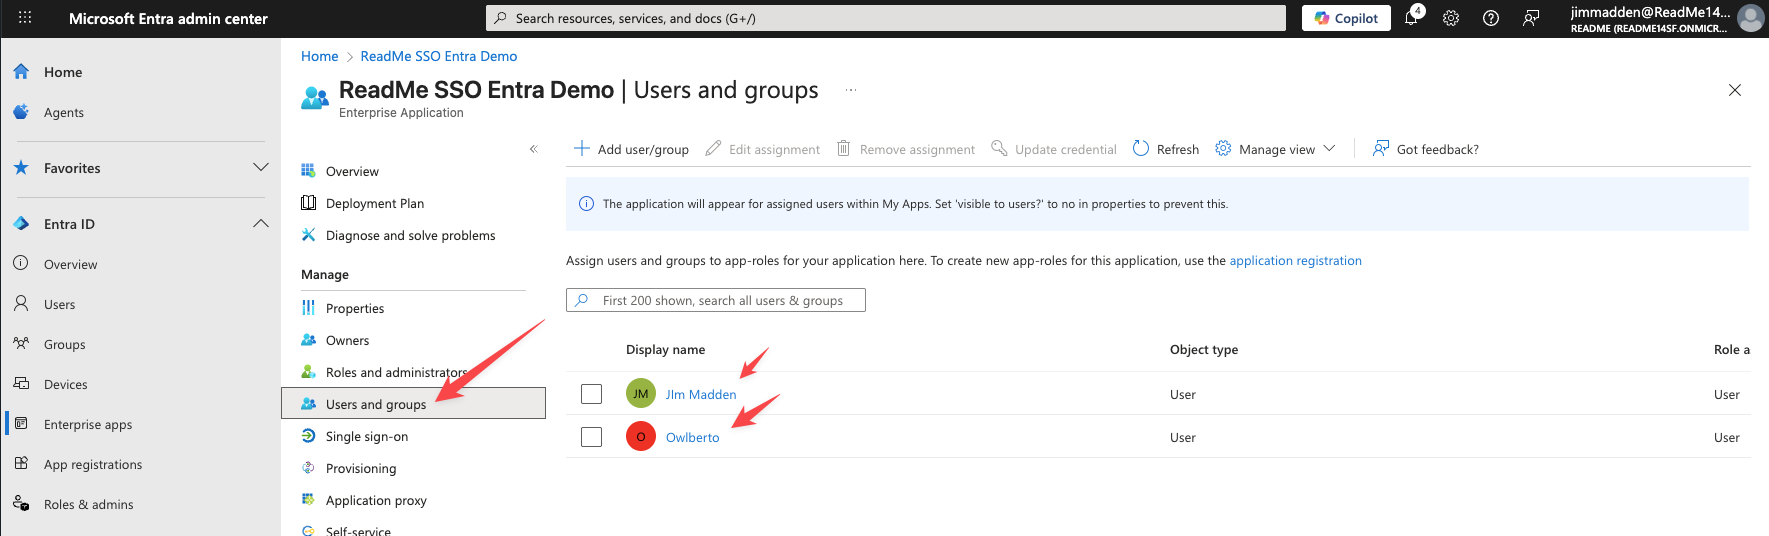
- If you look closer at Owlberto you can see he is type User and Role user:
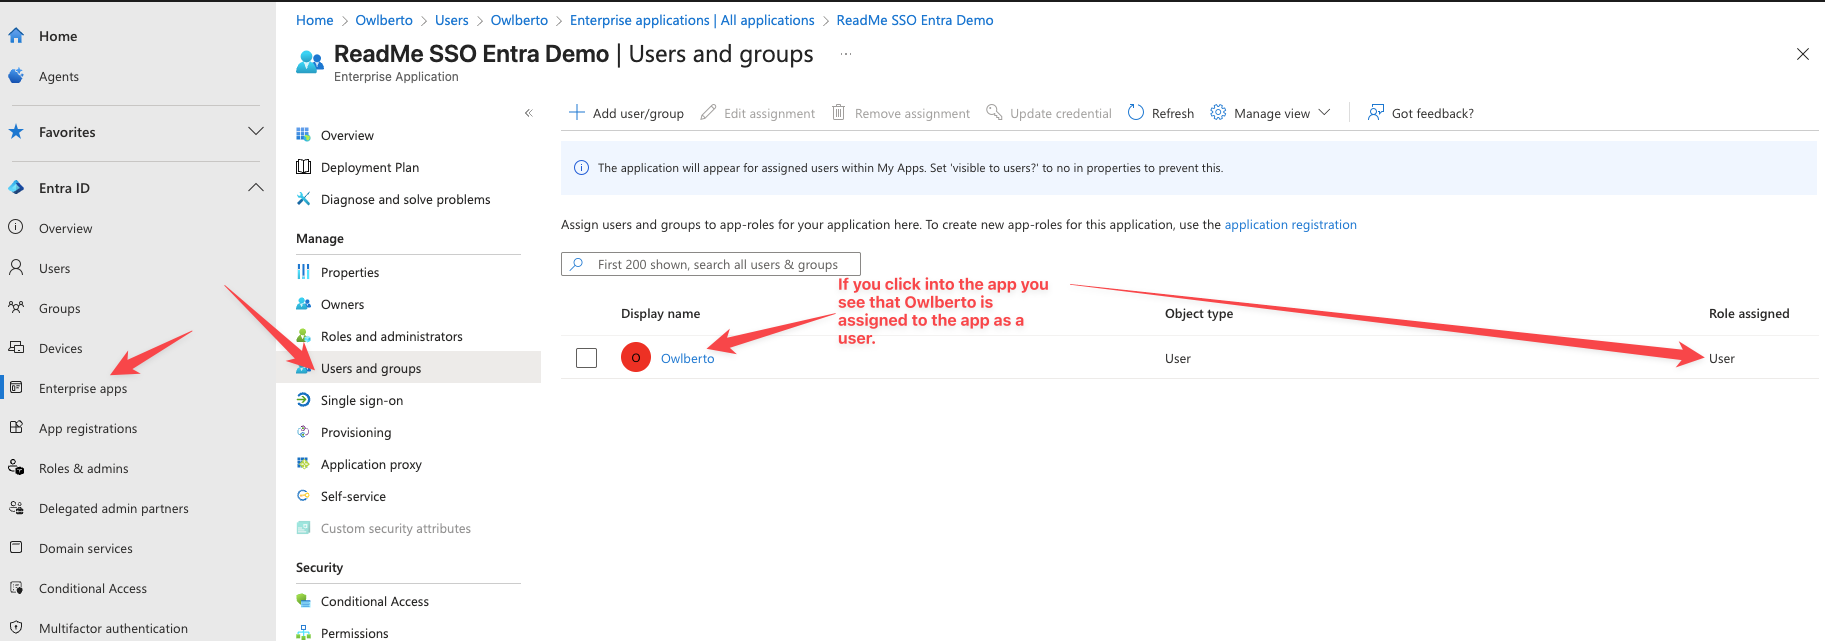
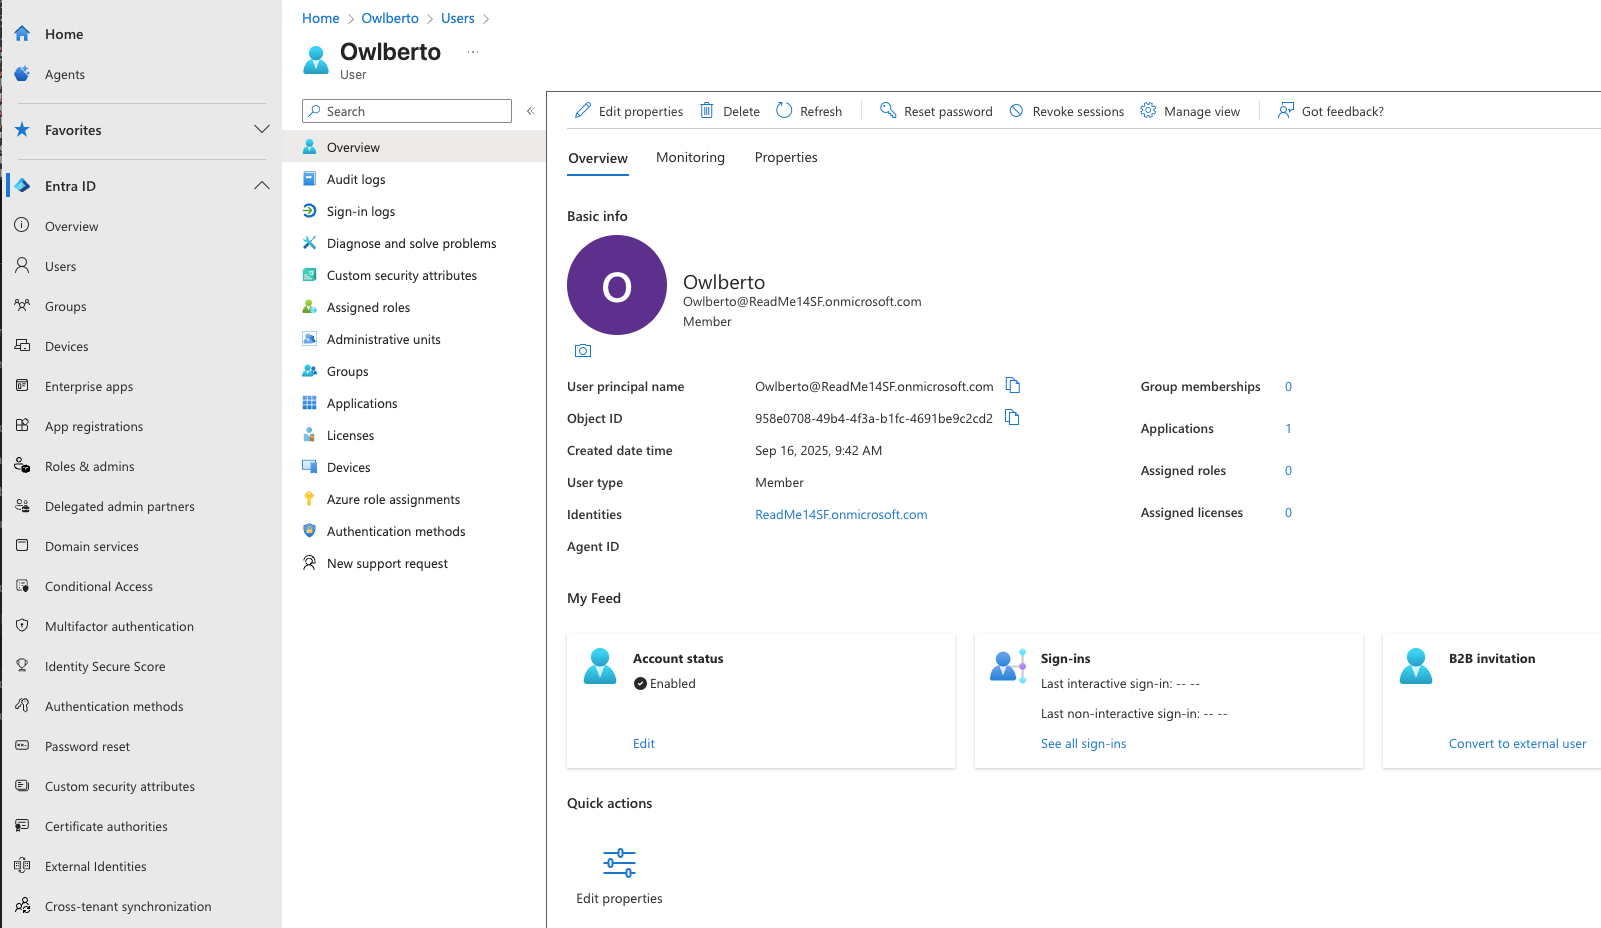
- Clicking into Owlberto you see his record and see that he has one application assigned to him.
Now the end user can access the Entra App tile and click it to log into ReadMe.
Updated last month