
Creating a Recipe
Overview
Ready to transform your code samples into developer-friendly learning experiences? This guide walks you through building your first Recipe from start to finish. You'll learn how to break down complex code into digestible steps, add helpful annotations, and customize the visual experience to match your brand.
Before You Start
- Have your code sample ready (or know which API endpoint you want to use as a starting point)
- Ensure the Recipes section is accessible in your ReadMe project
- Consider what programming languages your developers use most
- Think about the key learning objectives for this particular code walkthrough
Creating a Recipe
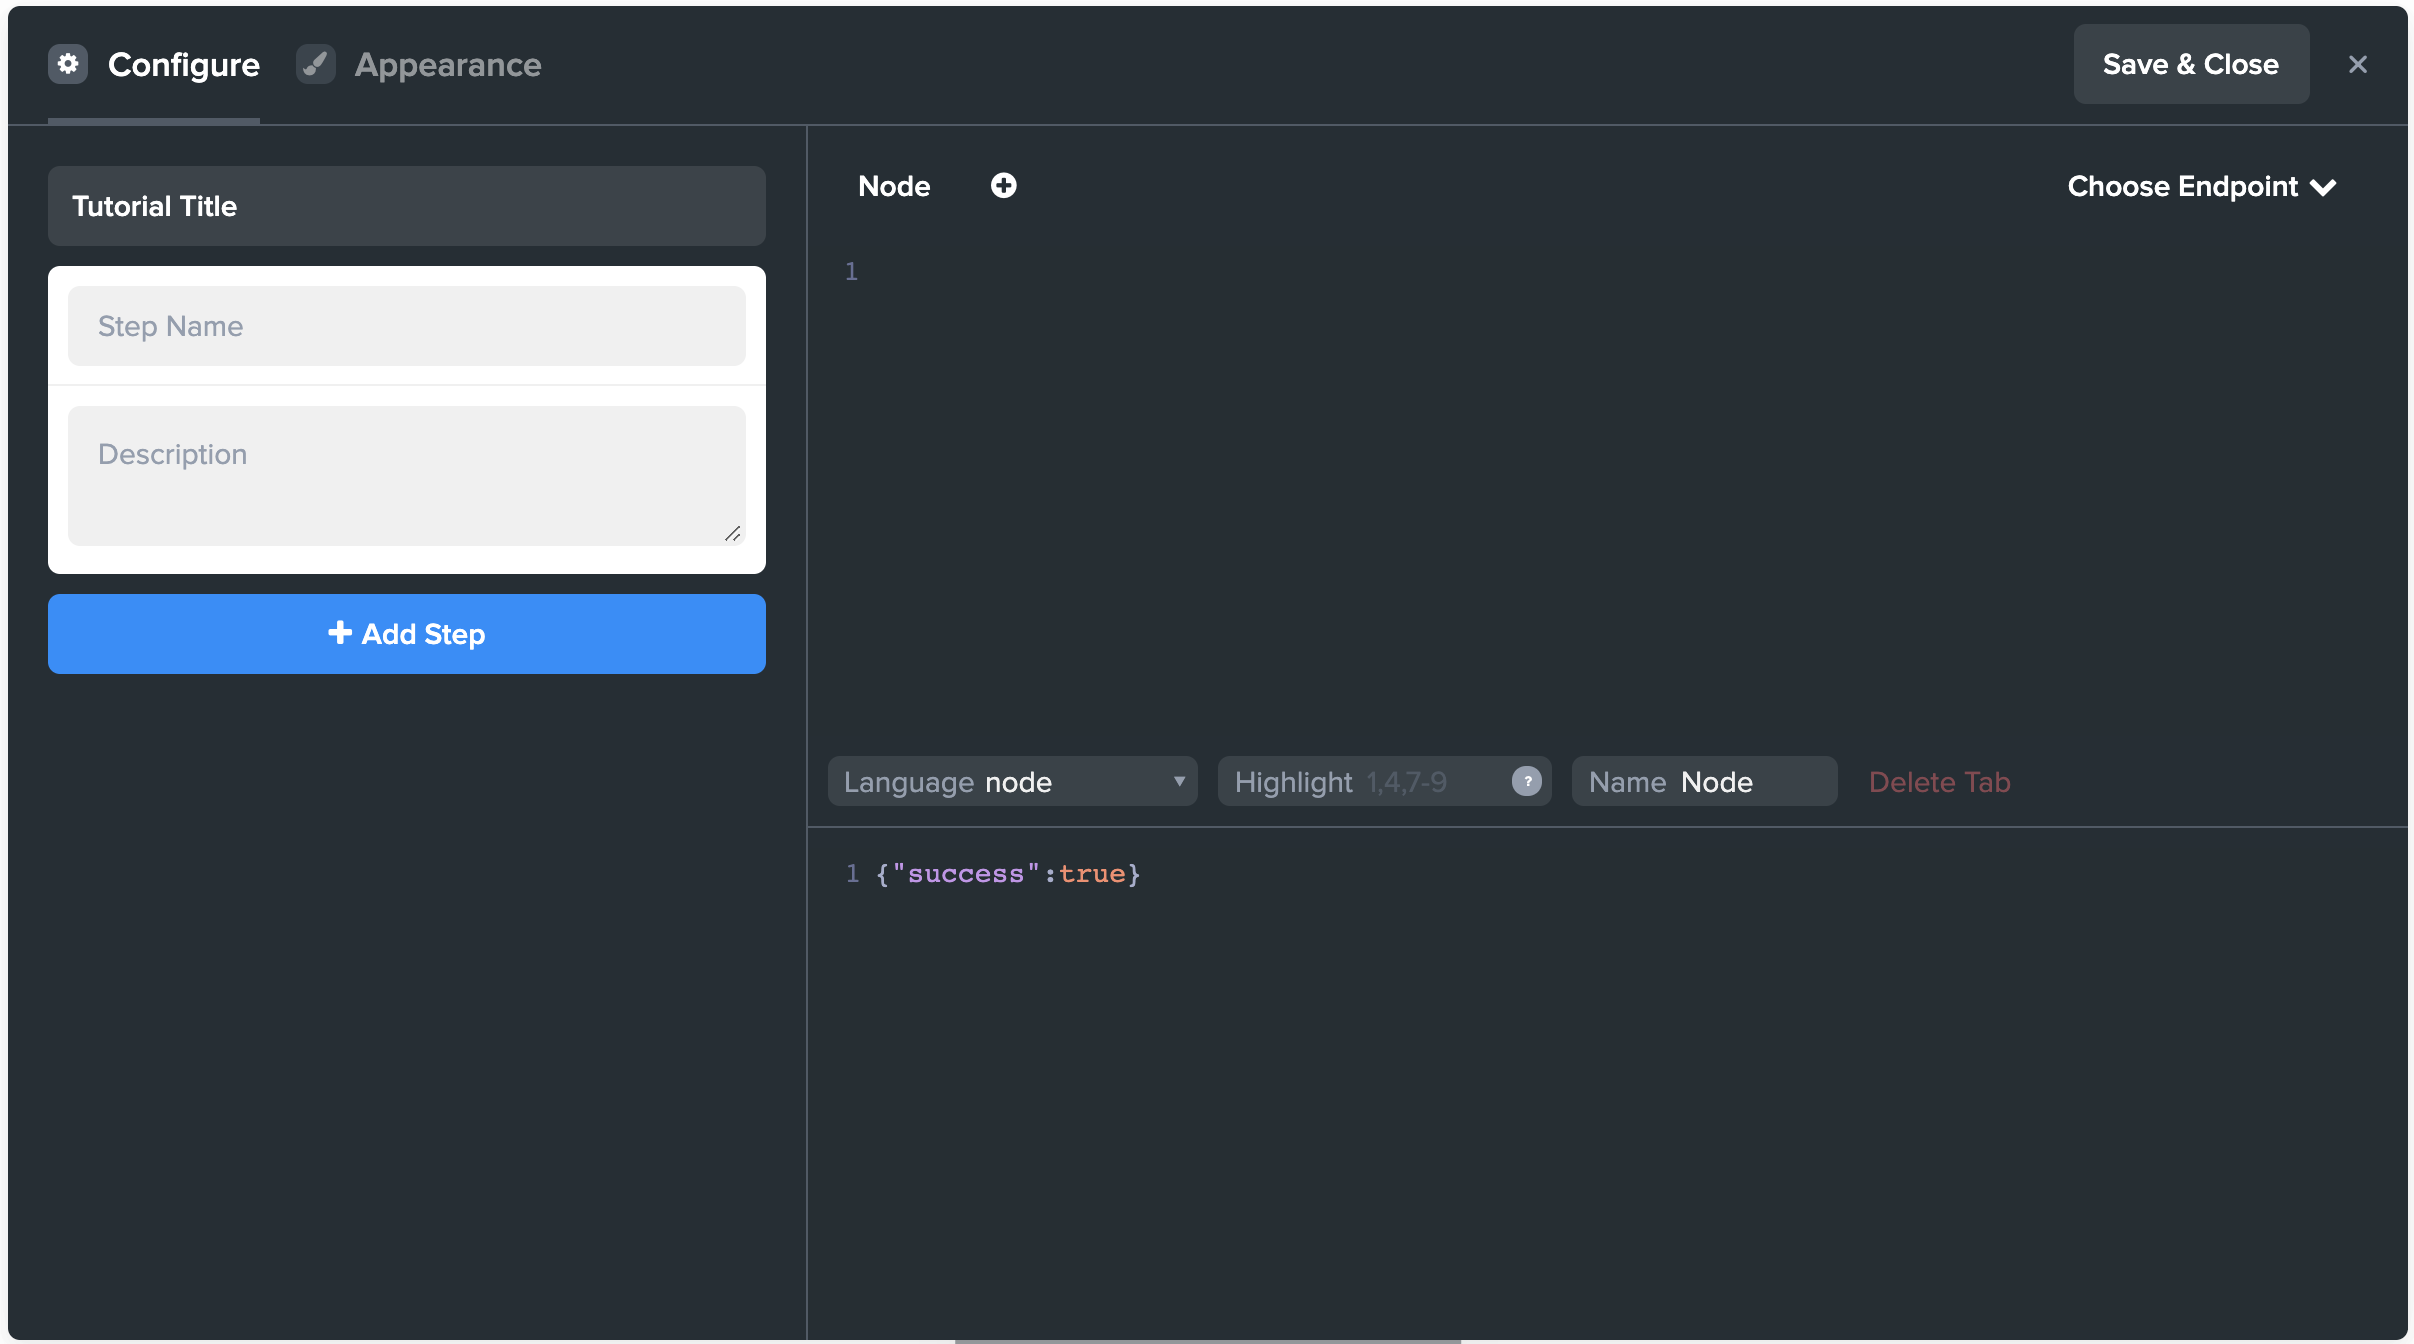
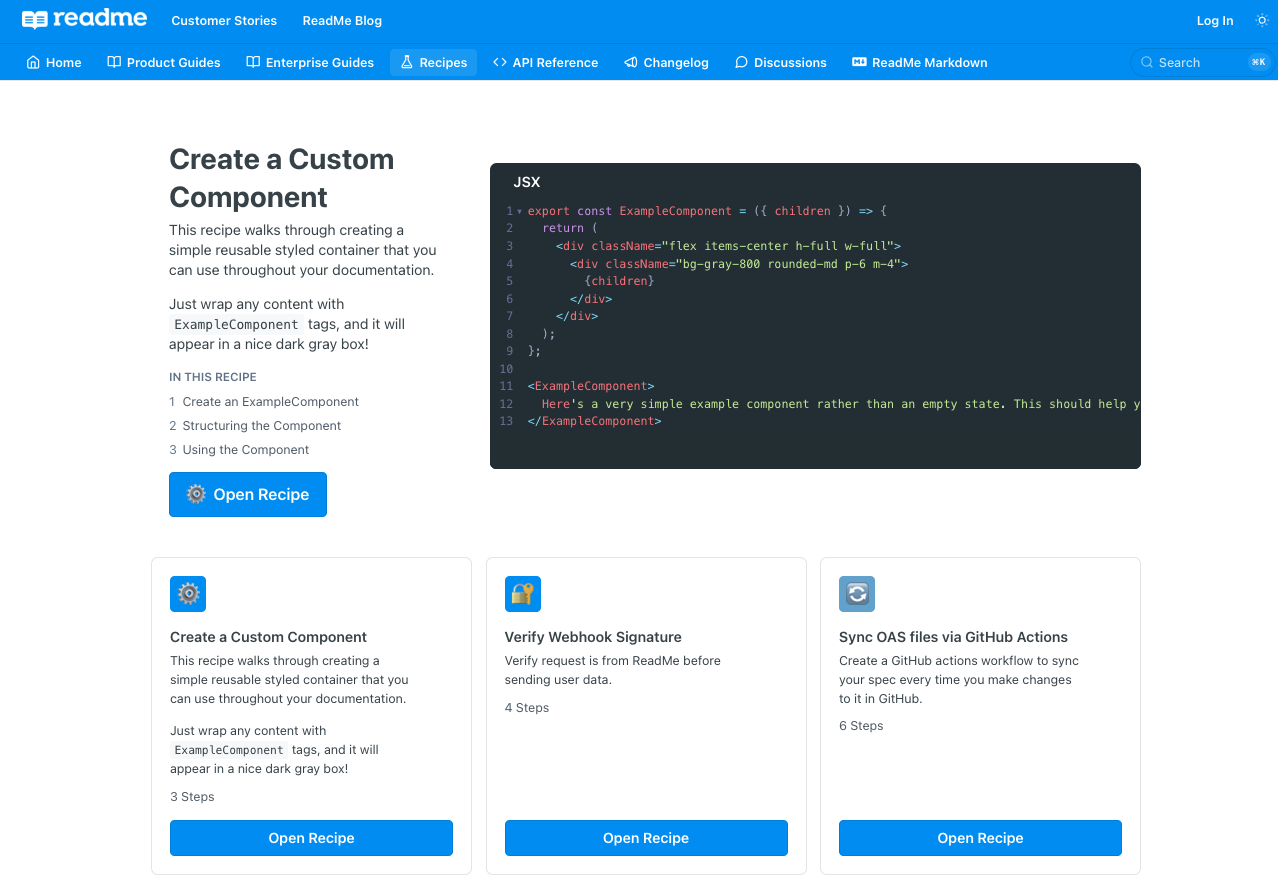
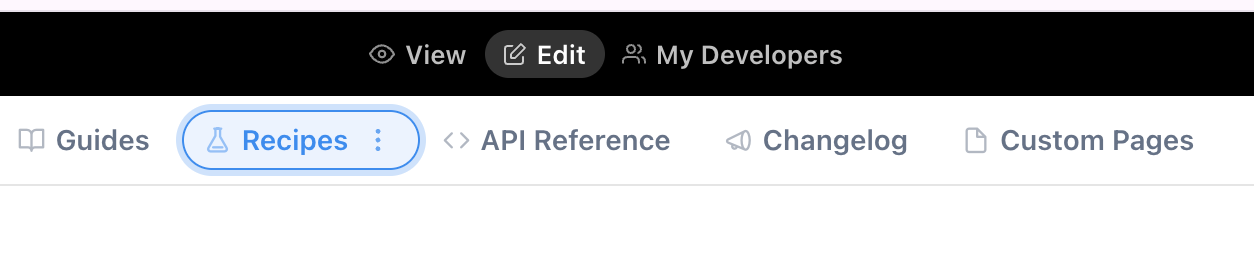
1. Access the Recipe Editor
Navigate to your ReadMe project and click Edit to enter the editing UI. From the main navigation, select Recipes to access the Recipe management area. Click the Create New Recipe button to launch the Recipe builder.
2. Configure Your Code Sample
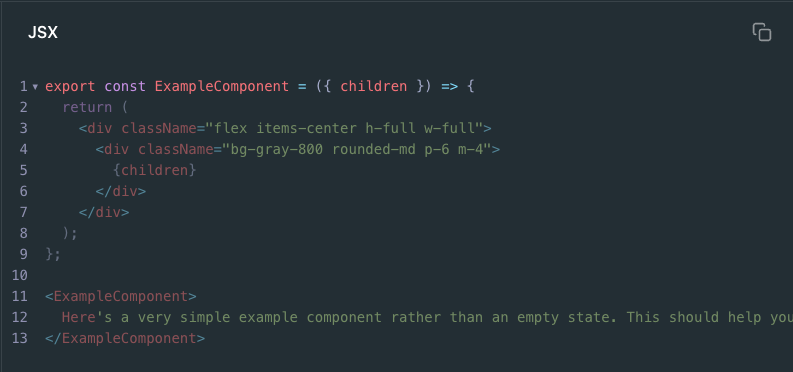
- In the upper right panel, select your programming language from the dropdown menu.
- Add your code sample and make sure it's properly formatted with syntax highlighting. This will be the foundation that your step-by-step annotations will reference.
Note: Each Recipe can support multiple programming languages, so you can add additional language versions after setting up your first one.
3. Build Your Step-by-Step Annotations
In the left sidebar, create your highlighted steps that will guide developers through your code. For each step:
- Write a clear, descriptive title that explains what this part of the code accomplishes
- Add detailed explanations that help developers understand the "why" behind each section
- Specify the line numbers that should be highlighted for this step
- Use conversational language that makes complex concepts approachable
Each step should focus on a specific concept or action within your code sample, building understanding progressively.

4. Add Response Examples
In the lower right panel, include the expected API response when your code runs successfully. This shows developers exactly what success looks like and helps them verify their implementation.
If your code doesn't generate a response (or if showing one isn't relevant), you can leave this section empty—it will automatically hide from the final Recipe.
Note: User data variables work in Recipes too! If you have personalized docs set up, you can include dynamic content in your responses.
User data variables work in Recipes!If you have variables in your documentation, for example passed in via the Personalized Docs Webhook, they'll work in Recipes too!
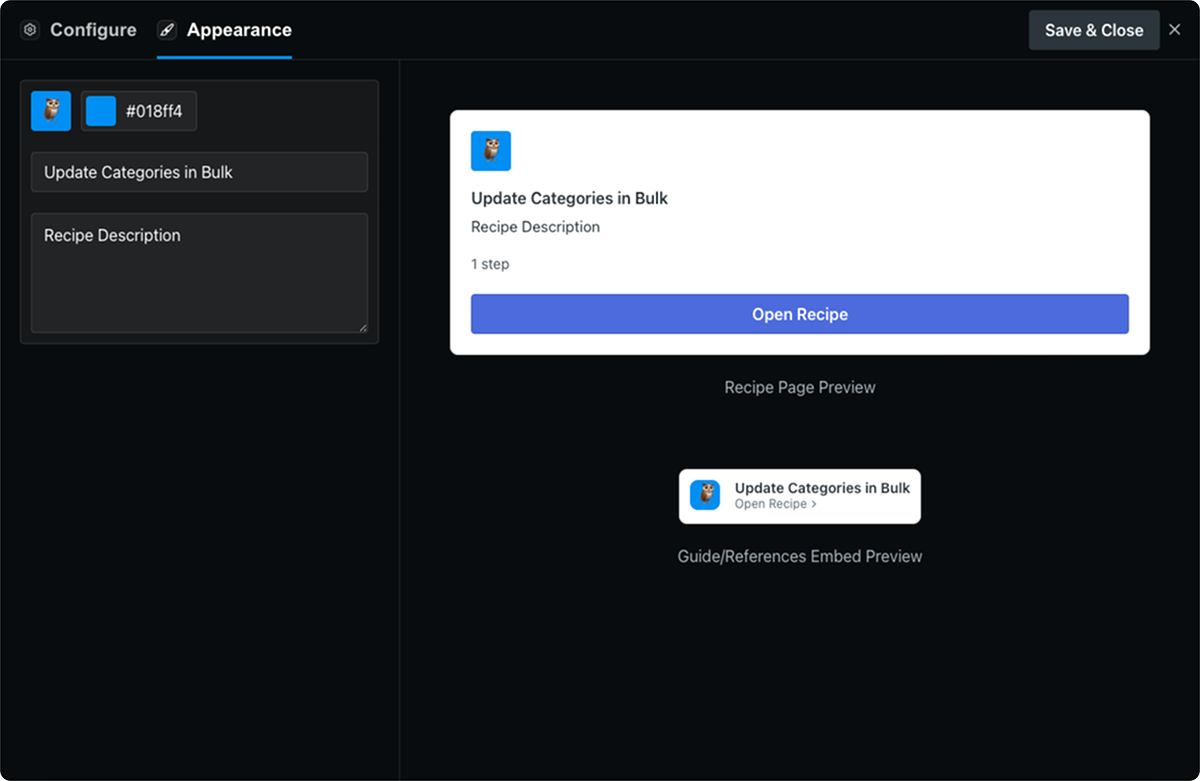
5. Customize Visual Appearance
Switch to the Appearance tab to make your Recipe uniquely yours:
- Select an emoji: Click the emoji icon to choose from the dropdown menu
- Set background color: Use the color picker to select a background that matches your brand (supports RGB, HSL, or HEX values)
- Write a description: Add a detailed description that will appear on the larger Recipe card in your Recipes section
The Open Recipe button color automatically inherits from your project's link color settings.
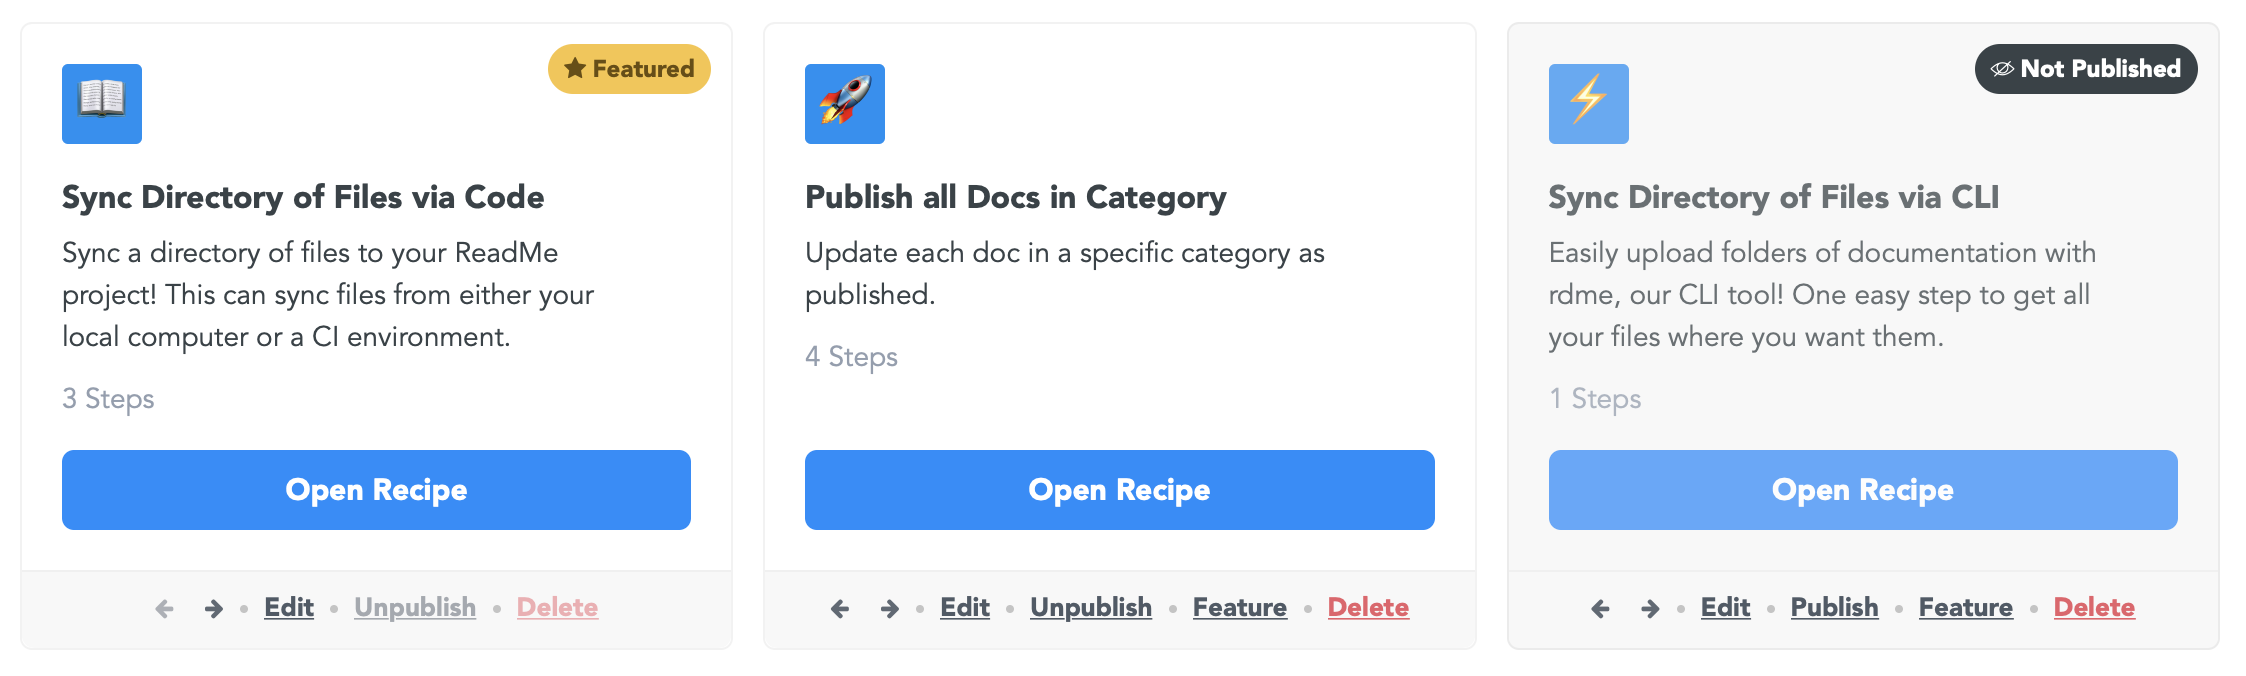
6. Set Publication Status
Choose your Recipe's visibility level:
- Unpublished: Only visible to project administrators and group editors (default for new Recipes)
- Published: Visible to all users in your Recipe collection
- Featured: Showcased prominently at the top of your Recipes section (only one Recipe can be featured at a time)
Start with "Published" to make your Recipe available to developers, or keep it "Unpublished" while you're still refining the content.
| Featured | This is the showcased Recipe at the top of the Recipe section. One Recipe must be featured if your Recipes page is public, and it must be in a published state. |
| Published | Visible to users in the card grid below the featured Recipe |
| Unpublished | Cannot be seen by customers. New Recipes are unpublished by default. |
7. Embed Recipes
Access all Recipes from the Recipes tab and ensure they are published to be visible in your docs. Embed any recipe across your Guides and API References.
Note: The Recipes section must be set to visible in Admin Settings > Navigation.
FAQ & Troubleshooting
Can I remove the Recipe icon in the nav bar?
This section is only visible to project admins. Your customers will not see this section unless you enable it to make it visible to them.
How do I change the color of the blue?
This button color is inherited from the Link Color you've set in the Theme in your project settings. To change it, you will need to change the Link Color for your entire ReadMe hub.
Can I rename the Recipe section like the other sections?
Yes! In Recipes, in editing mode, select the vertical menu beside Recipes to add a custom Display Name.
My code highlighting isn't working correctly?
Double-check that your line numbers are accurate and that you've selected the correct programming language. Remember that line numbers start from 1, not 0.
The Recipe widget doesn't appear in my guides?
Make sure the Recipes section is enabled in your site navigation settings. The widget won't be available until Recipes are activated for your project.
Updated 2 months ago