Recipes
Step-by-step code walkthroughs for your most popular API use cases
Overview
Recipes transform intimidating code blocks into friendly, step-by-step walkthroughs that actually make sense. Instead of dumping a wall of code on your developers and hoping for the best, Recipes break everything down into digestible chunks with clear explanations that guide them from "What does this do?" to "Got it, I'm ready to build!"
Key Features
Key Features
- Smart Code Annotation: Your code samples get the VIP treatment with line-by-line breakdowns that highlight exactly what's happening at each step—no more guessing games or Stack Overflow deep dives.
- Multi-Language Magic: One Recipe, multiple programming languages. Your developers can stick with their favorite syntax while following the same logical flow, making everyone happy.
- Contextual Embedding: Drop Recipes directly into your guides or API reference pages where developers need them most—it's like having helpful hints exactly when and where they matter.
- Live Response Previews: Show developers the payoff by including actual API responses alongside your code, so they know their implementation is working before they even run it.
- Brand-Forward Customization: Make your Recipes uniquely yours with custom emojis, colors, and descriptions that reflect your API's personality while keeping the experience engaging.
How It Works
Recipes are built around three core areas that transform complex code into guided learning experiences.
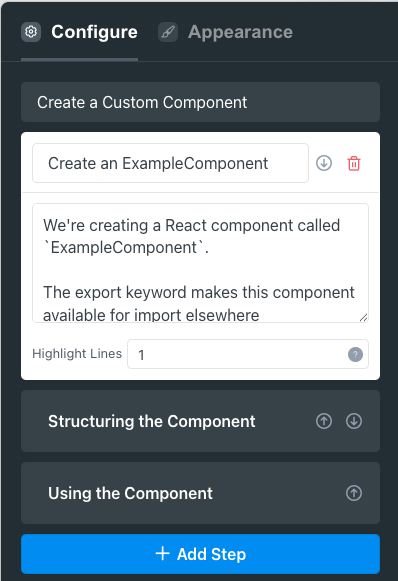
Highlighted Steps (Left Sidebar):
Your storytelling space where you break down code into logical chunks and explain what each section accomplishes. This narrative thread helps developers understand not just what to do, but why each step matters.

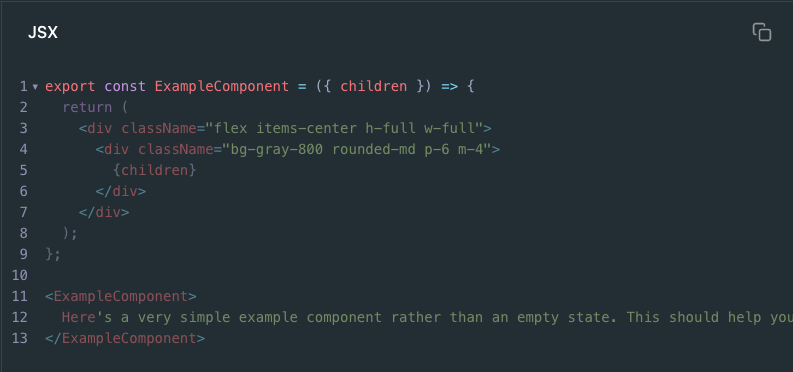
Code Panel (Upper Right)
Your actual code sample with syntax highlighting. Copy/paste your code, then map your explanations to specific line numbers.

Response Section (Lower Right)
Show the payoff with actual API responses developers will see when everything works. It's about building confidence and helping them recognize success.
The magic happens when developers encounter your Recipes throughout their docs journey. Whether embedded as cards in guides or placed contextually in API references, Recipes open as interactive modals that provide deep-dive guidance without breaking their flow.
Use Cases
- First-Day Success: Transform that overwhelming "Hello World" moment into a confident first integration with guided authentication flows and basic request patterns that actually work.
- Complex Workflow Mastery: Take multi-step processes like webhook configurations or advanced query operations and make them feel achievable with clear, progressive explanations..
- Feature Spotlight: When you ship new capabilities, Recipes turn feature announcements into hands-on tutorials that drive immediate adoption..
Getting Started
Ready to transform your code samples into developer-friendly experiences? Head to the Recipes section in your Editing UI and start building. You'll configure your step-by-step explanations, add your code with strategic line highlighting, and include those satisfying success responses. Customize the visual experience to match your brand, choose strategic embedding locations throughout your docs, and flip the switch to make your Recipes live. Your developers will thank you for turning documentation into an actually helpful learning experience.
Updated 9 months ago