Personalized API Docs Overview
Inject your users' API keys, server variables, and more!
Given the choice between a run-of-the-mill experience that’s the same for everyone and a personalized experience tailored just for you, which would you choose? It’s safe to say that most people would prefer the personalized experience that meets their unique needs, especially if it doesn’t come at the cost of time or resources. Similarly, this idea is important when it comes to introducing and onboarding new users to your API.
That’s why ReadMe’s Personalized Docs functionality allows you to surface custom data for your logged-in users (e.g., API keys, server variables, and more), so they can be successful with your API even faster.
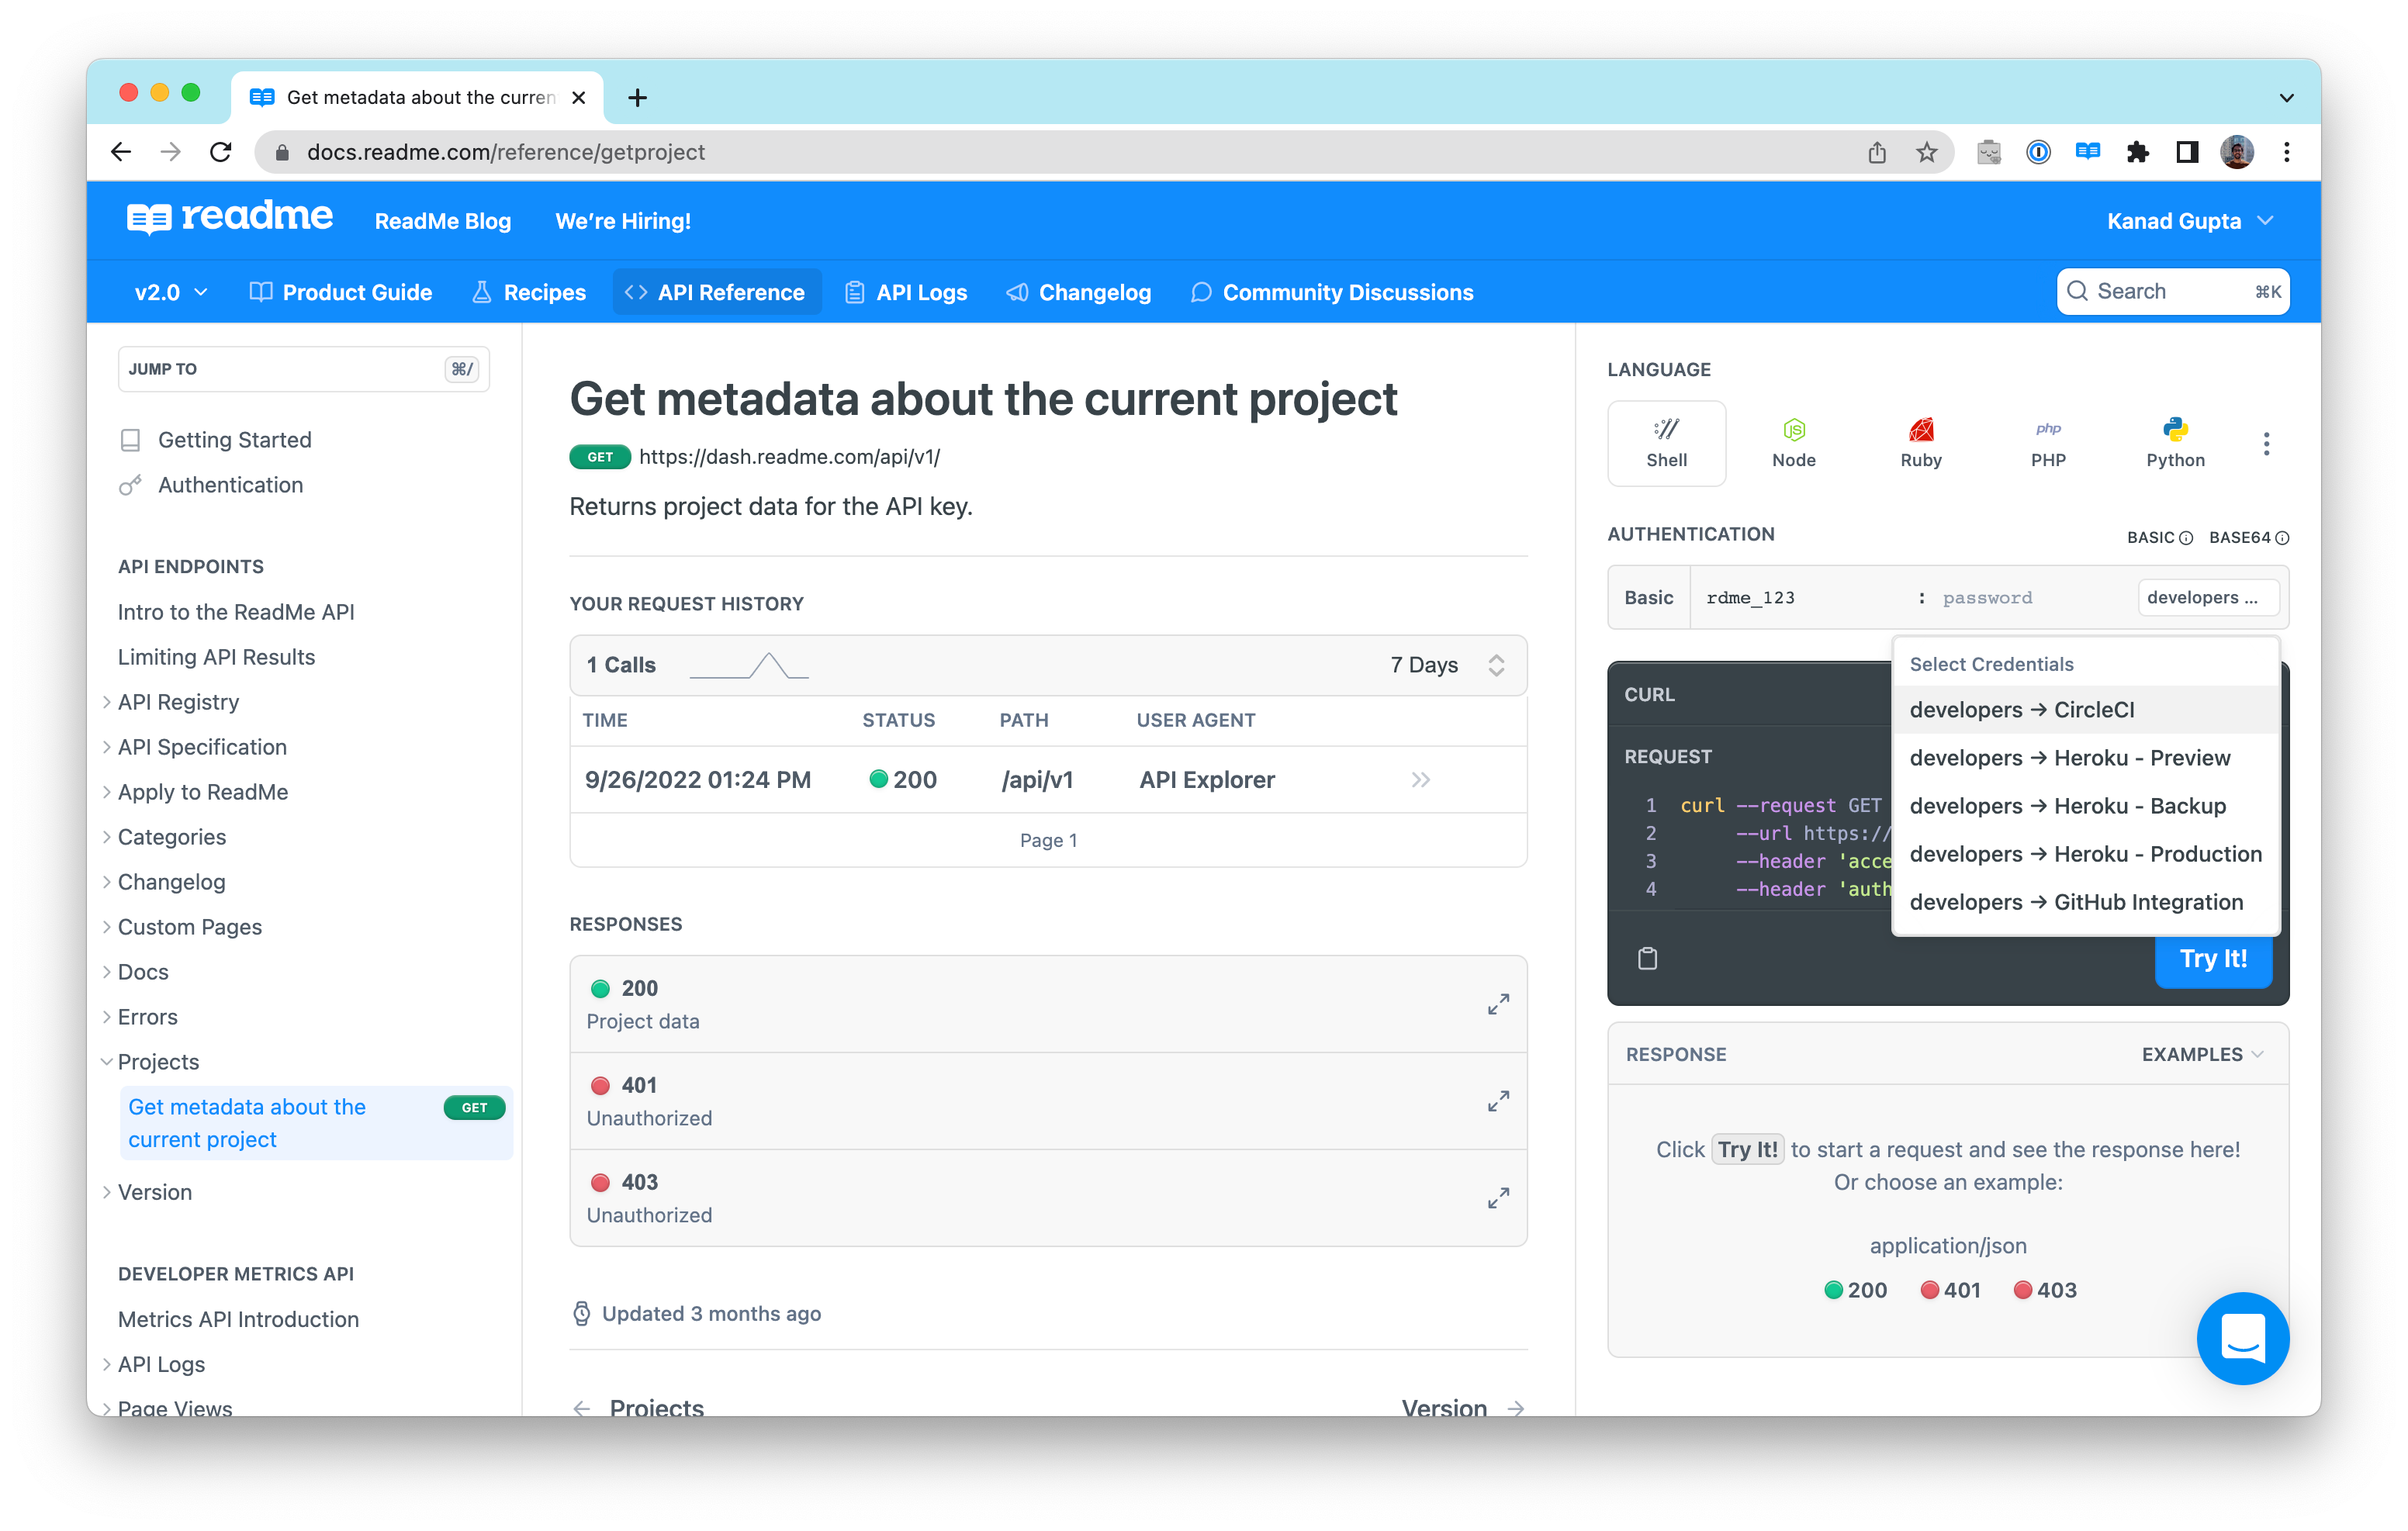
An API reference endpoint in ReadMe. Note the dropdown on the right-hand side. It contains the logged-in user’s list of API keys, which are automatically surfaced so the user can immediately start making authenticated API requests
ReadMe has several tools available to help you personalize your users’ documentation experience for every step of their journey. There are two key steps to achieve this: getting your users logged in to your hub, and then showing custom user data like API keys or server variables to each user. We’ll walk through both below.
Getting Your Users Logged In
In order for a user to have a personalized docs experience, we’ll first need to know… who that user is! So the first step is to log your users in to your developer hub. There are several different kinds of login options available:
Option 1: ReadMe-Powered Login
This is the awesome-by-default login method for your users when you set up a developer hub with us. Take an example company, like the Acme Corporation. This is what the login page for the Acme’s ReadMe-powered developer hub would look like, with zero configuration:
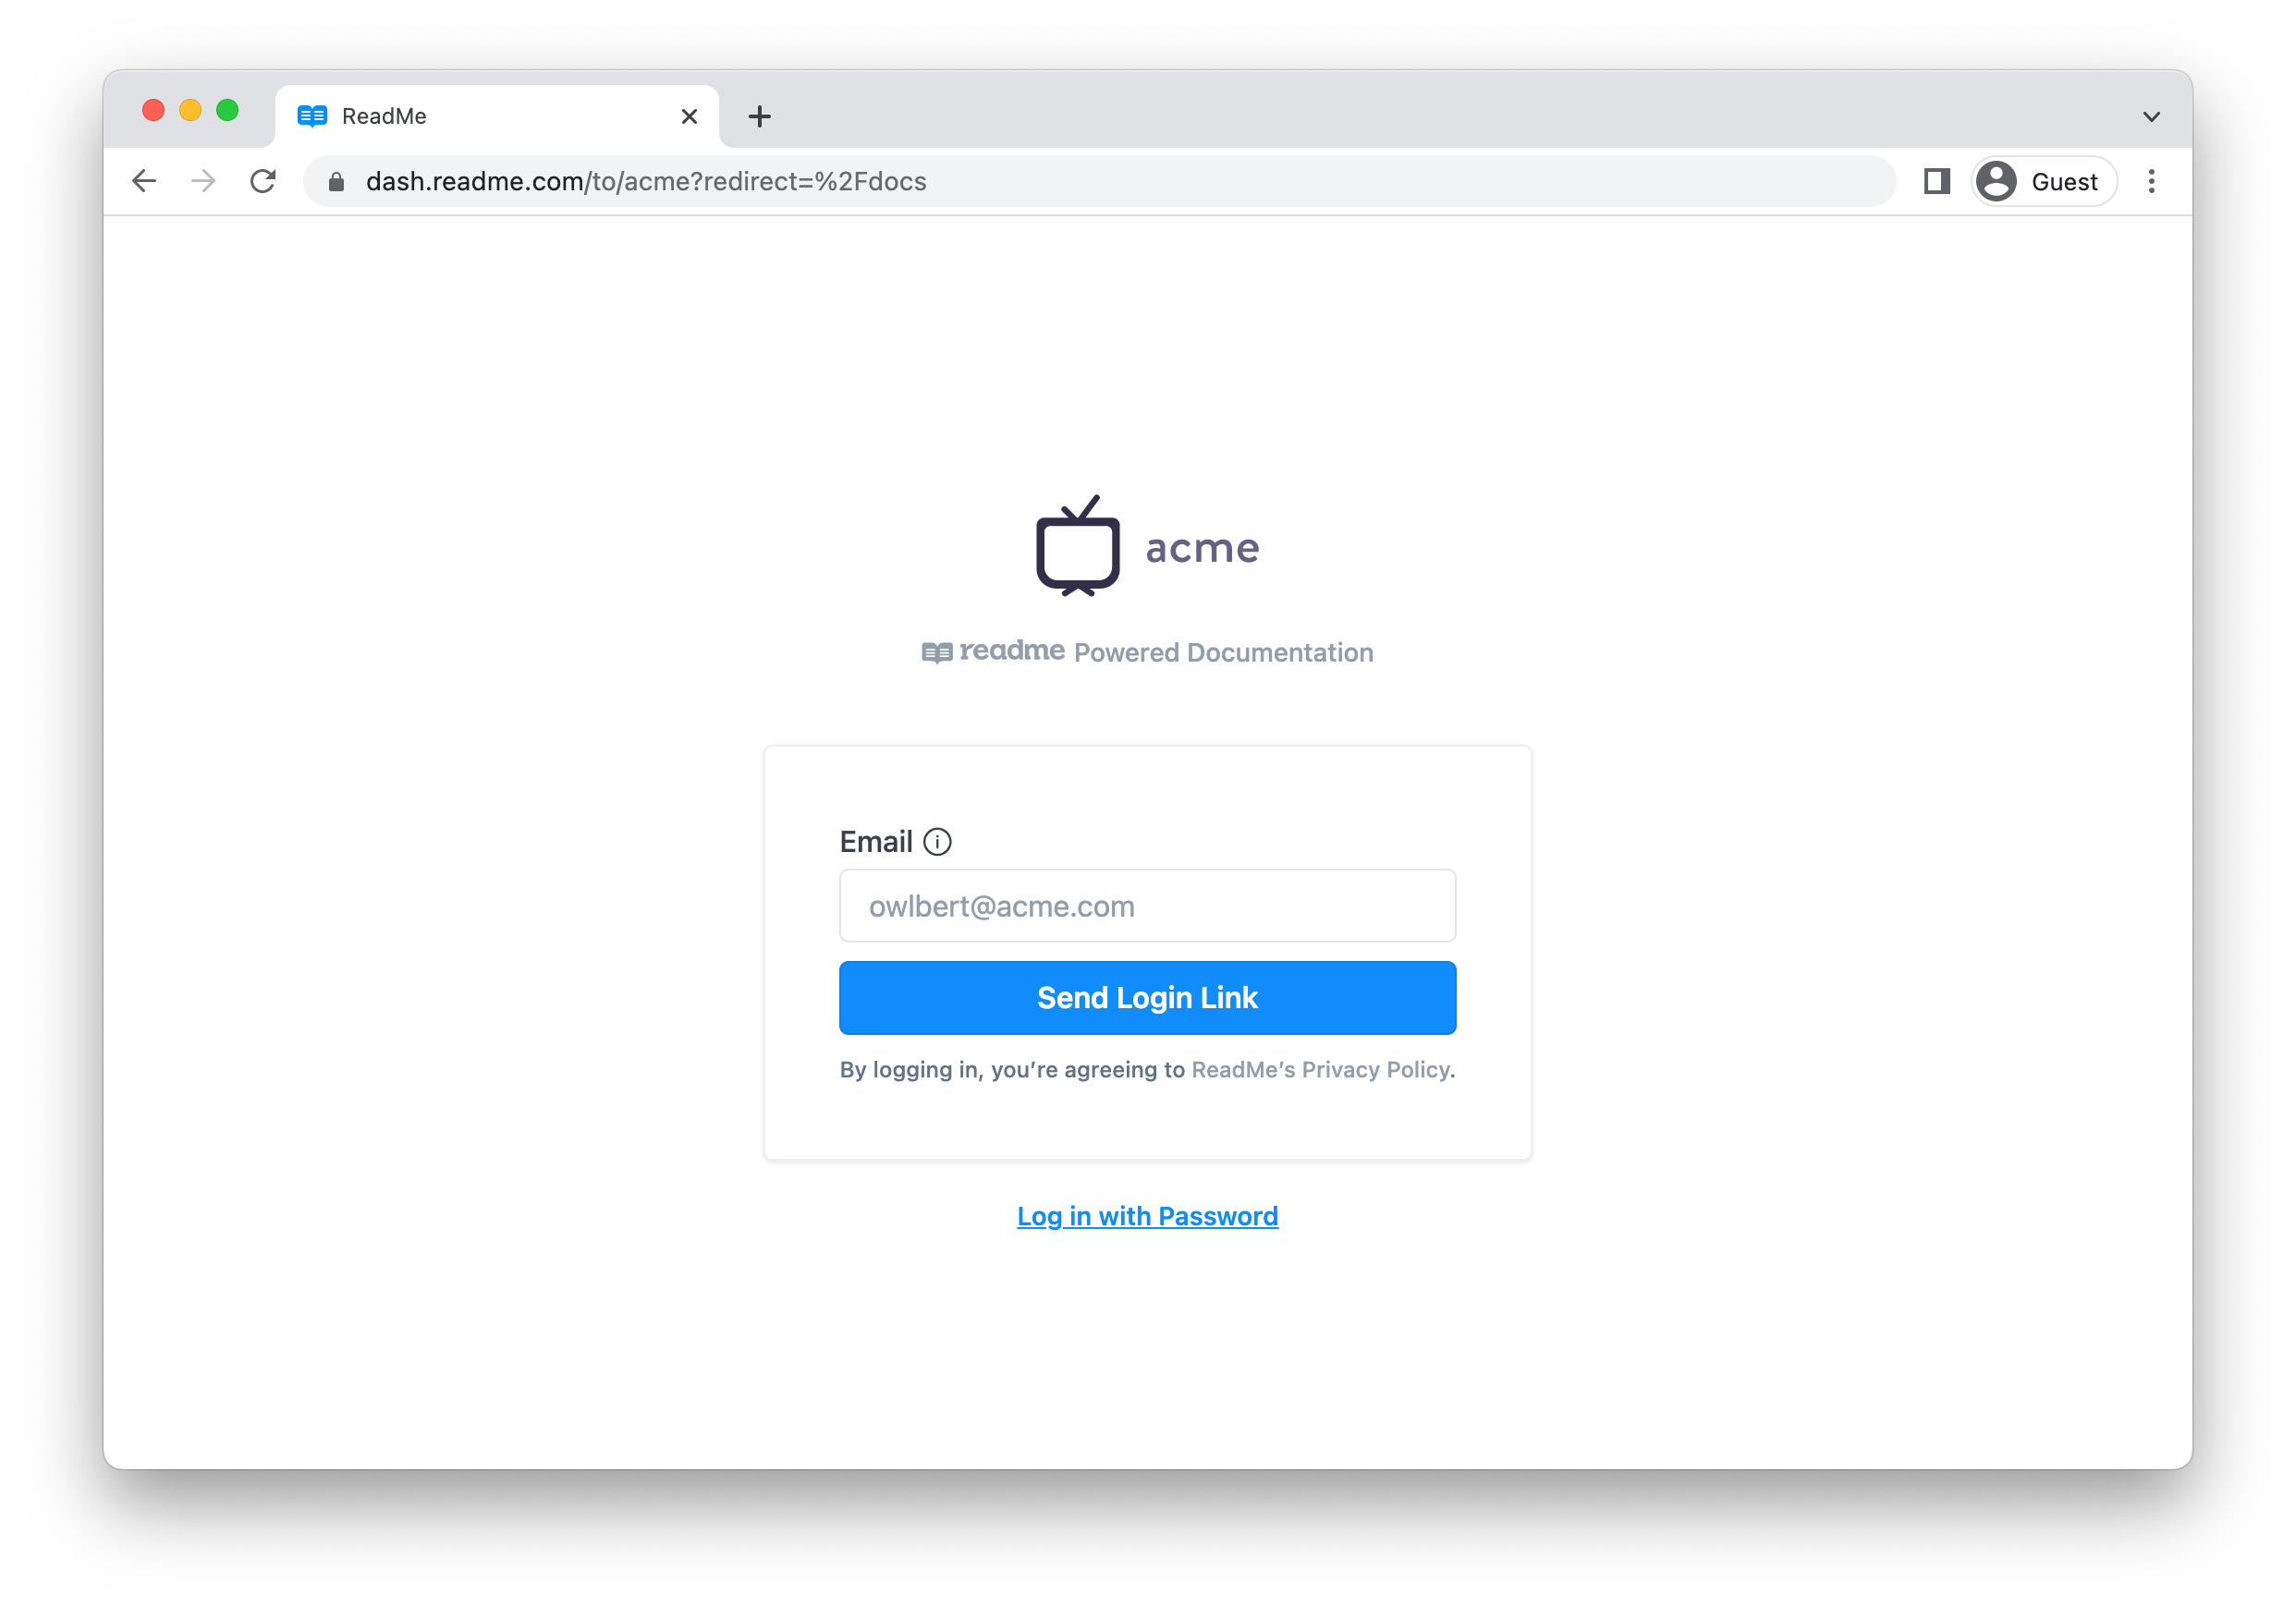
The login page for the Acme developer hub (powered by ReadMe)!
As you can see, it prominently features the Acme logo at the top, and has a simple form where users of the Acme API docs can log in with an easy login link (which will be sent to their email) or via a password. The password is for the user’s ReadMe account, not their Acme account. There are some helpful tooltips to explain this, and by default we encourage the login link approach since it’s unlikely that users of the Acme API will have an account with ReadMe.
We’re big believers in “awesome-by-default” here at ReadMe — which is why you’ll find that this approach is accessible, minimalist, and easy to set up. If you’re looking to build your own custom login page that more closely adheres to your brand, check out the following login option.
Option 2: Custom Login
This option requires a bit more work to set up, but is a great option if you wish to use your own login service and branding.
Behind the scenes, the login process is driven by a redirect URL that contains a special JSON Web Token (JWT) for that user. The encoded token should include a few basic pieces of data about the user, such as their name and email address. You can read more about Custom Login and JWT on its dedicated docs page.
If you wish to pass more user data into your documentation, such as API keys and other custom variables for the user (which we strongly encourage for a personalized docs experience!), you will need to set up a Personalized Docs Webhook, which we go over in the next section.
Option 3: Single Sign-On
This is spiritually similar to above, but if you’re looking for login options for project administrators, we also have support for many different SAML 2.0-based SSO providers! This feature is only available for our Enterprise customers, so contact your PXM (if you’re a current Enterprise customer) or our Sales team for help on getting this set up.
Surfacing Custom User Data
So your user is now logged in — amazing! Now that we know who the user is, let’s level up their docs experience by personalizing it using custom user data.
The Personalization Possibilities Are Endless
But what does personalization look like in practice? Here are a few examples:
-
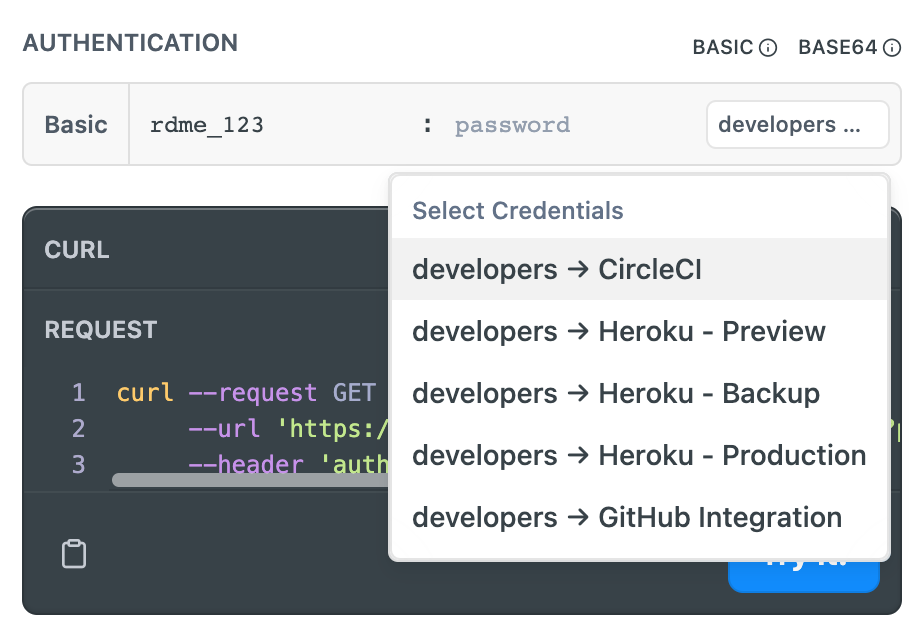
API Keys When your users are attempting to make their first call to your API, authentication is often one of the biggest headaches. What if you were able to save your users the trouble and have their API keys automatically pre-filled for every endpoint? By including their API keys in the user data payload, your users can select their API key from a dropdown list and get to that successful first call even faster.
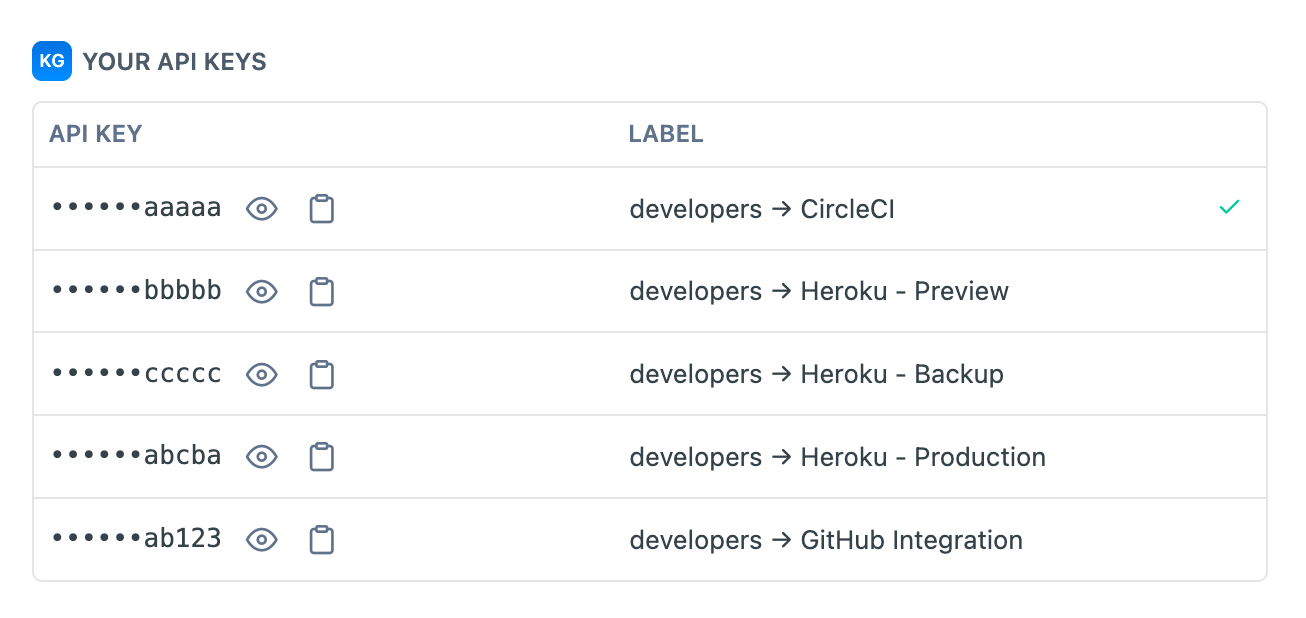
Plus, with some upcoming improvements (stay tuned 👀), your users will be able to see all of their API keys at a glance when they enter your API reference:
-
Server Variables 🔗 Say your API uses server variables for regional endpoints that vary depending on the user’s geographic area. Your templated server URL might look like this:
https://{region}.api.example.comThankfully, ReadMe already has great server variable support and your users can select their region from a dropdown:
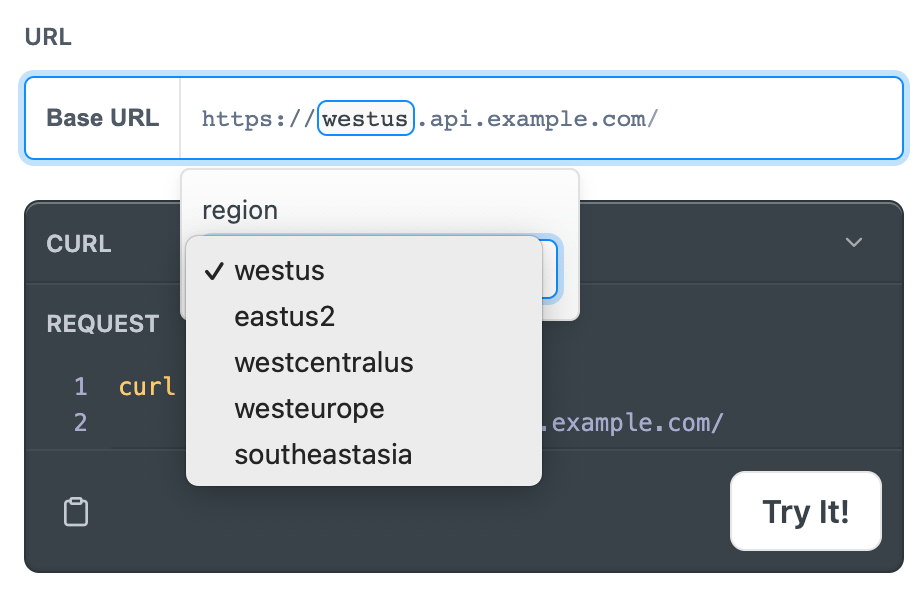
But what if your docs were able to go above and beyond by automatically pre-filling the southeastasia option for any users that lived in Southeast Asia? By including a region value in the user data payload, you’ll be able to save your users yet another click and get them even closer to that successful first call.
- And so much more! Email addresses (like [email protected], which is an actual example of a Personalized Docs-powered variable with a default value of user@example for logged-out users), API versions, body parameter values, important dates… the possible use cases for custom user data in the docs are endless. If there’s any piece of data that’s required to use your product, you can pass it into the user data payload and subsequently render that data in your documentation, like so:
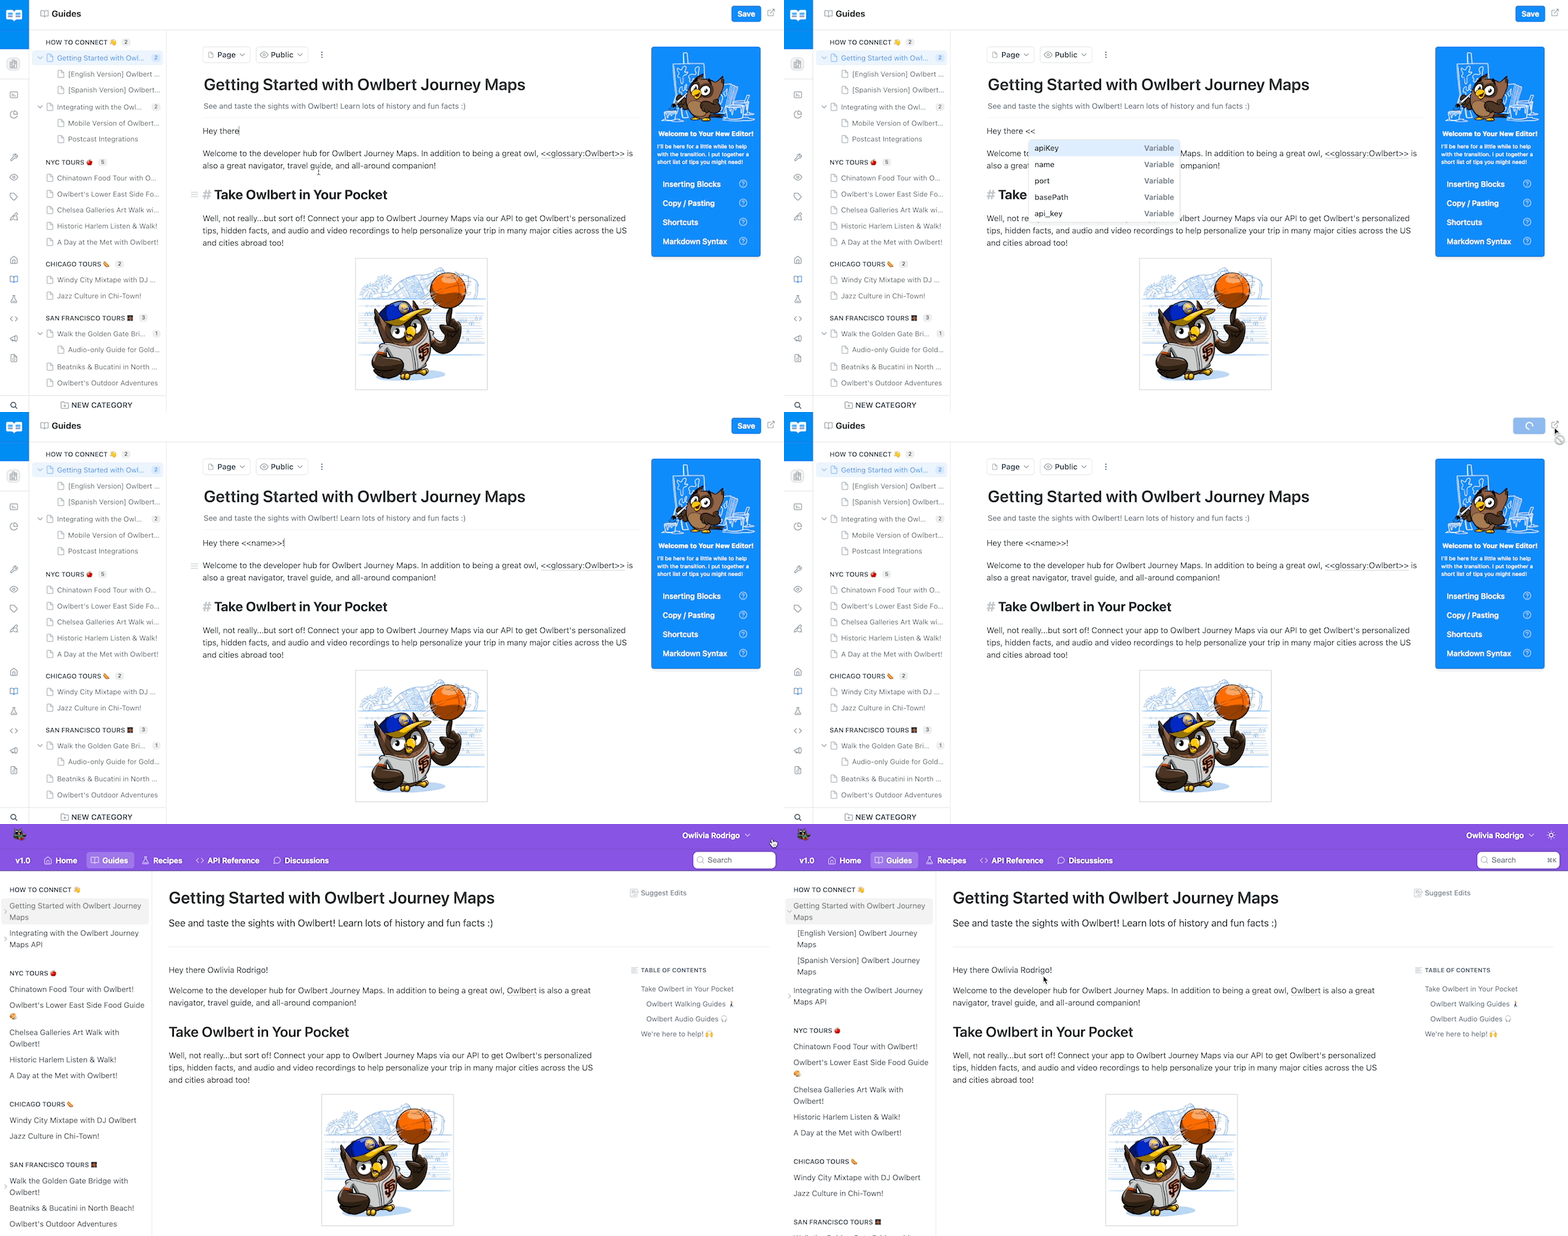
Your onboarding experience will feel much more magical, and your users and your support staff will thank you.
Hooking It All Up
Now you’re probably asking yourself: “this whole personalized docs thing sounds all good and fun, but how do I actually populate my users’ data into my docs”? The answer: webhooks!
Webhooks are “user-defined HTTP callbacks”. They are triggered by some event in a web application (in this case, when a user logs into your docs) and can facilitate integrating different applications or third-party APIs (like ReadMe!).
When you set up a Personalized Docs Webhook in the ReadMe dashboard, we’ll send you secure API calls any time a user logs into your docs. Configure your webhook to validate our requests and respond with the corresponding data for that user and they’ll immediately see their data appear in the docs. See below for a little preview of what the Personalized Docs setup page looks like in the dashboard:
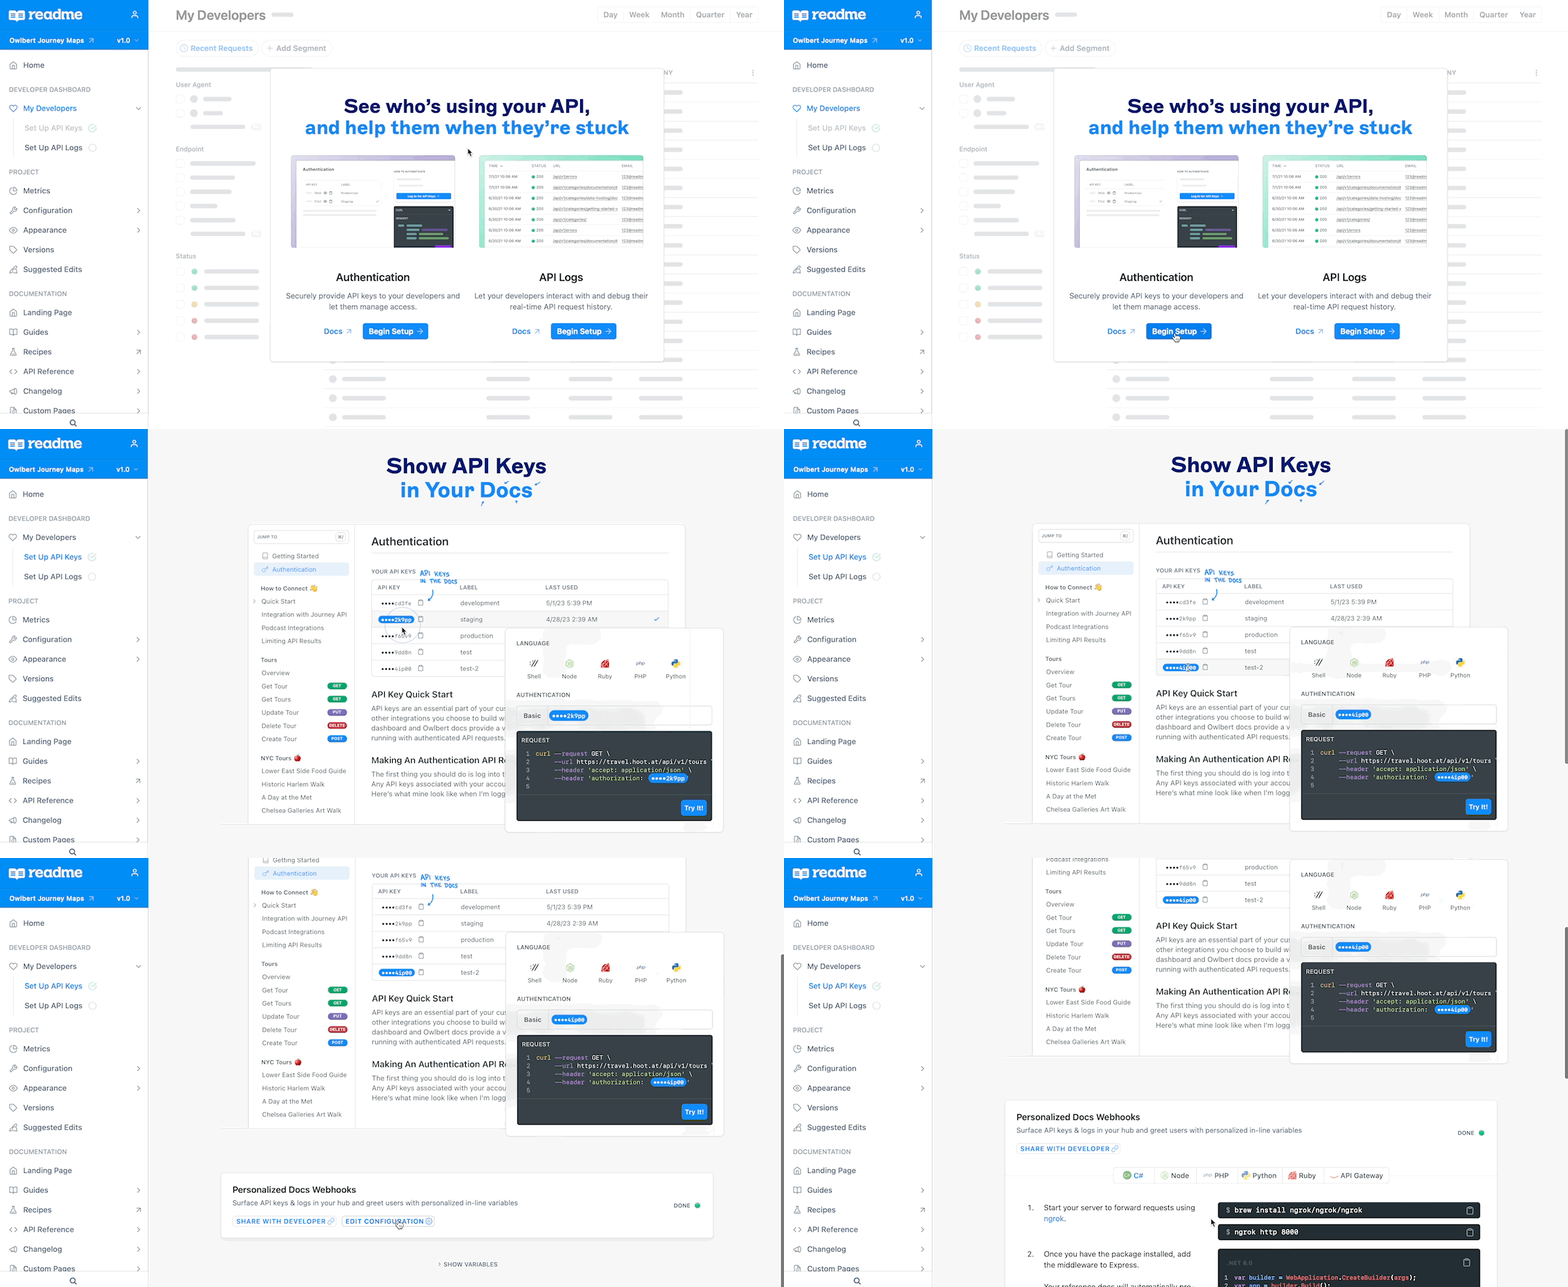
You can read more about setting up the Personalized Docs Webhook on its dedicated docs page. We also have a walkthrough of the setup process available on YouTube:
This video was recorded in September, 2022. Please note that the setup location has changed in your ReadMe project dashboard, however, all of the instructions and steps that Kanad walks you through are up-to-date!
Further Reading
- For more information on setting up the Personalized Docs Webhook, check out this page.
- If you're an Enterprise customer looking to set up the Personalized Docs Webhook, check out this page.
- For more information on setting up a custom login page, check out this page.
- For more information on the structuring your custom user data in your webhook payloads and how it renders in your documentation, check out this page.
- For more information of using Amazon API Gateway to set up the Personalized Docs Webhook, check out this page.
Updated 4 days ago