API Reference Landing Pages
Overview 🌎
When it comes to building a developer hub that your developers love, providing them with a solid on-ramp into your developer platform goes a long way. One way to do this is by surfacing their actual user data like API keys, server variables, etc. to them in real time.
The Getting Started and Authentication pages in your API Reference section help you do just that — and create a much more interactive and personalized experience for your developers. Once configured, these pages allow you to easily surface API keys to your logged in users, so they don’t have to consult a separate settings page on your website before getting started.
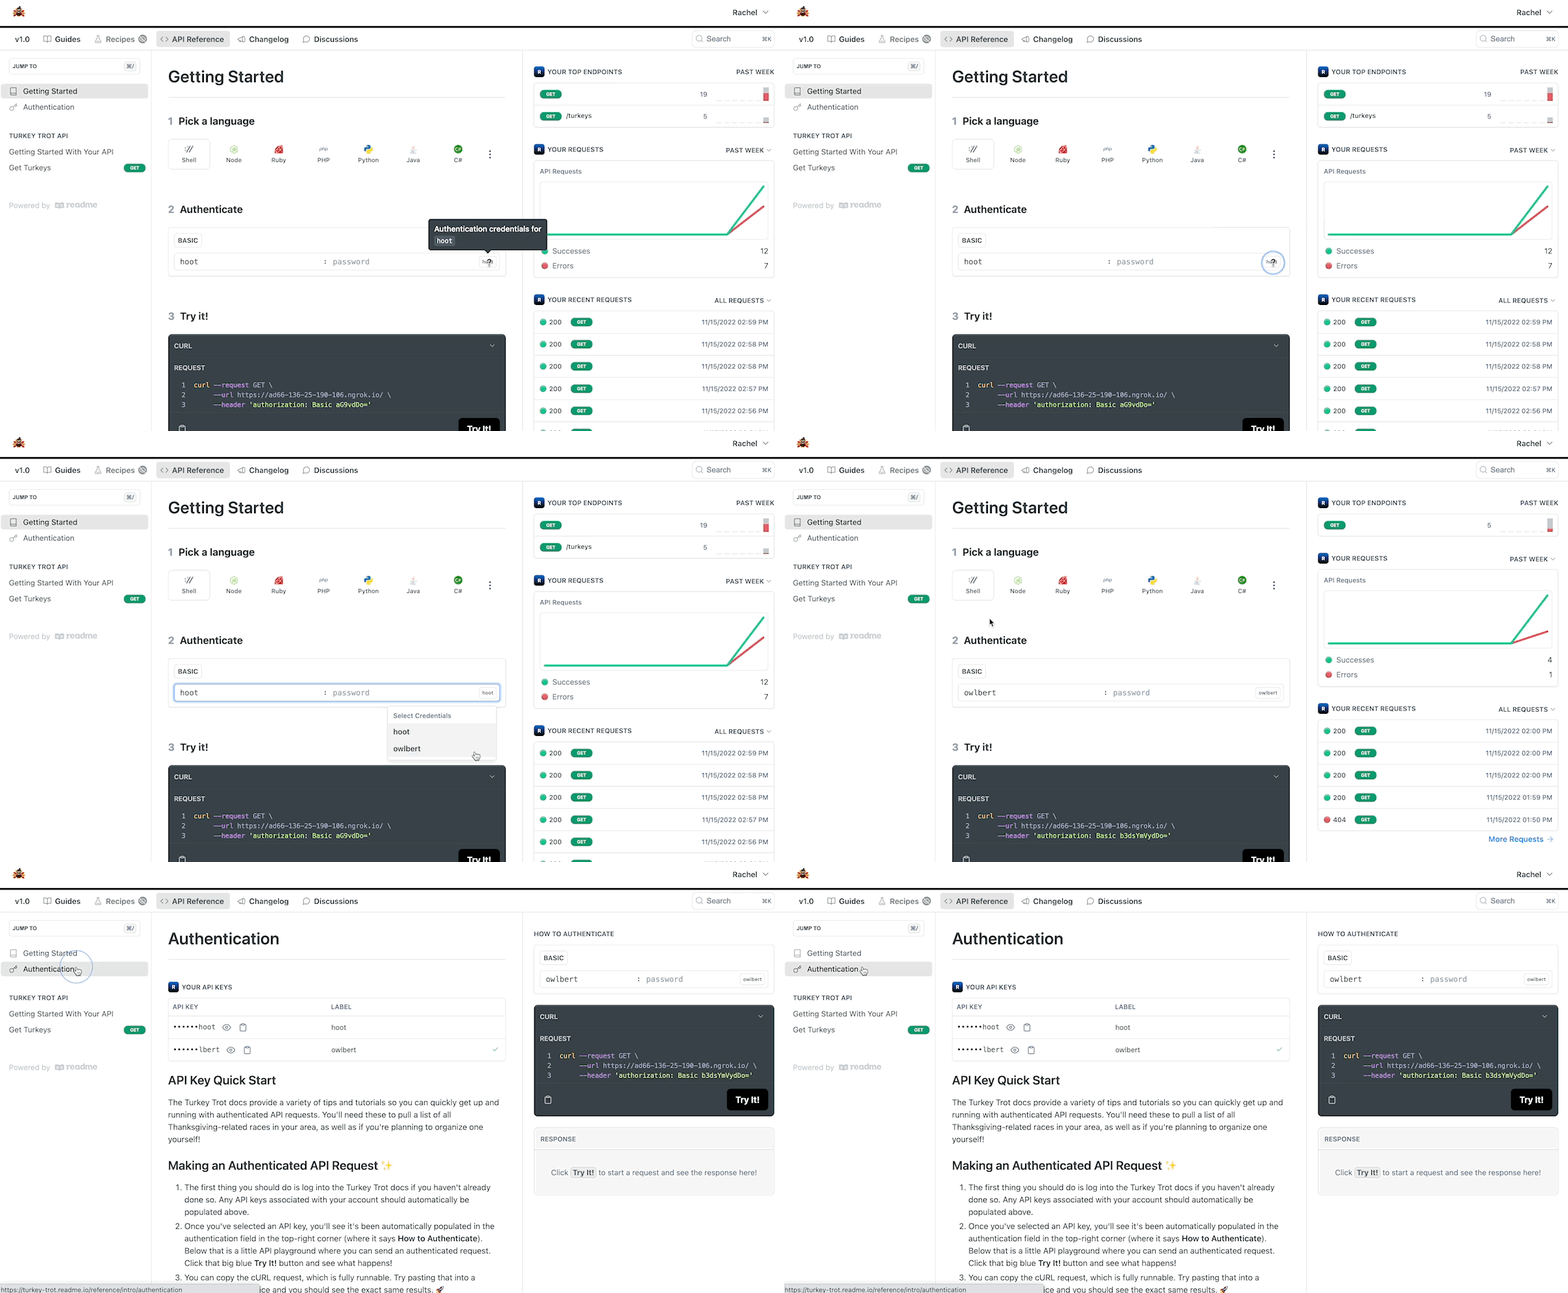
In these pages your logged-in developers will find their API keys, a snapshot of their recent activity (for each API key), and be able to immediately make an authenticated API request using any of the available API keys 🚀
Read on to learn more about how to configure these pages in your project’s dashboard so that your developers can easily locate their API keys and get started even faster with your API!
Why Use These Pages ✅
Show vs. Tell 🪄
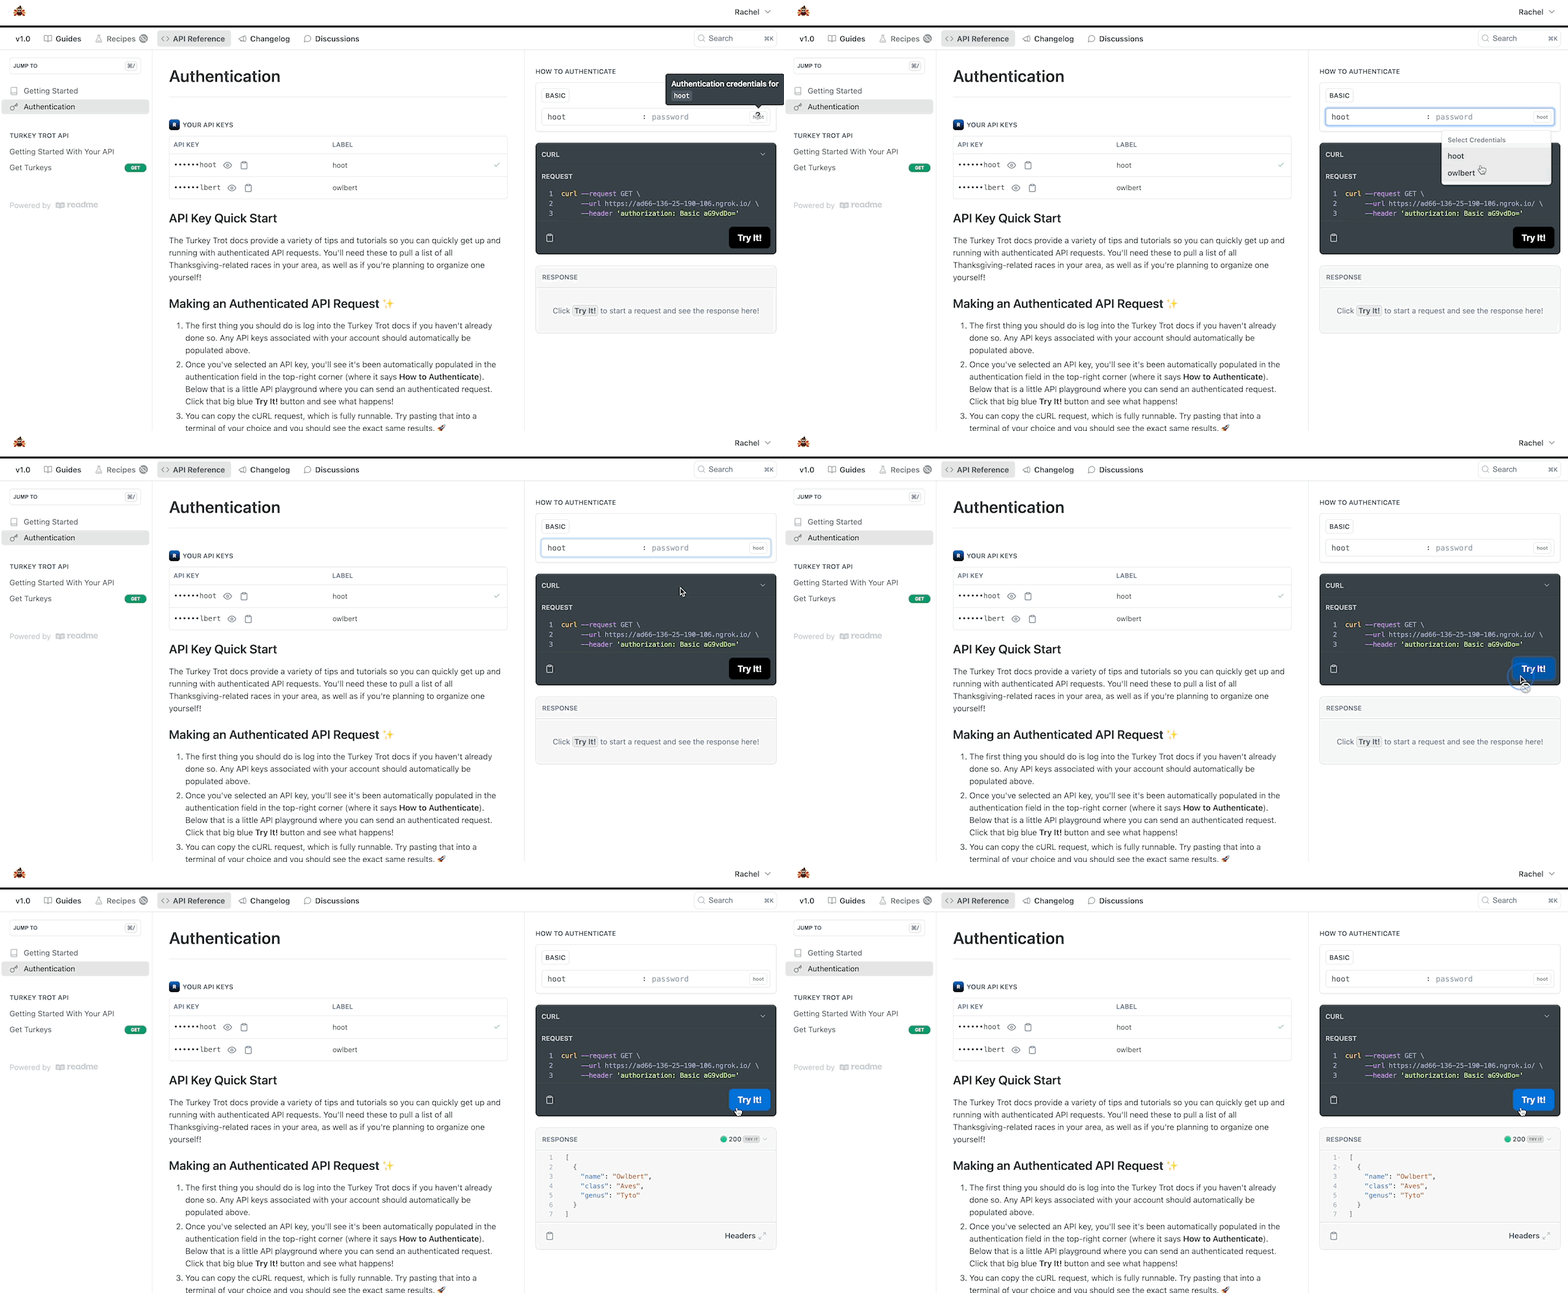
Rather than telling your developers how to authenticate and make a request from your API reference, give them the API key itself to do it instantly, and make their first call faster! With their API keys listed front and center, your end developers can easily use the API playground to send an authenticated request. They just need to be logged in to your docs 😉
Similar to the functionality available in your API endpoint pages, there is a Try It playground in both of the Getting Started and Authentication pages. Logged-in users can click the input in the Authenticate section on each page to see the authentication credentials for all of their available API keys. Using the Try It playground, they’re able to make an authenticated request, and instantly see a response, with their real API keys.
Even More Customization ✨
Thanks to the Personalized Docs Webhook, Project Admins can safely share user data with ReadMe to provide users with their custom data when they log into the hub. Once a user logs in, variables will be automatically populated with custom information tied to that specific user. So in addition to logged-in developers being able to see a list of their API keys in the Your API Keys section, they’ll also be able to see server variables, API versions, their names, email addresses, and more — lots of possibilities!
Enhanced Insights 🔍
On the Getting Started page, logged-in users can see a snapshot of their recent activity for each of their API keys, including details on their Top Endpoints, Requests, and Recent Requests. If you have Metrics enabled, the counts in each section will reflect total calls made to your endpoints, within and outside of your developer hub. If Metrics isn’t enabled, developers will just see counts that correspond to calls made via the Try It playgrounds.
Interested in Setting Up Metrics For Your Project?Learn how to send your API request data to ReadMe and choose the setup option that works best for you here.
Configuration Details 🔗
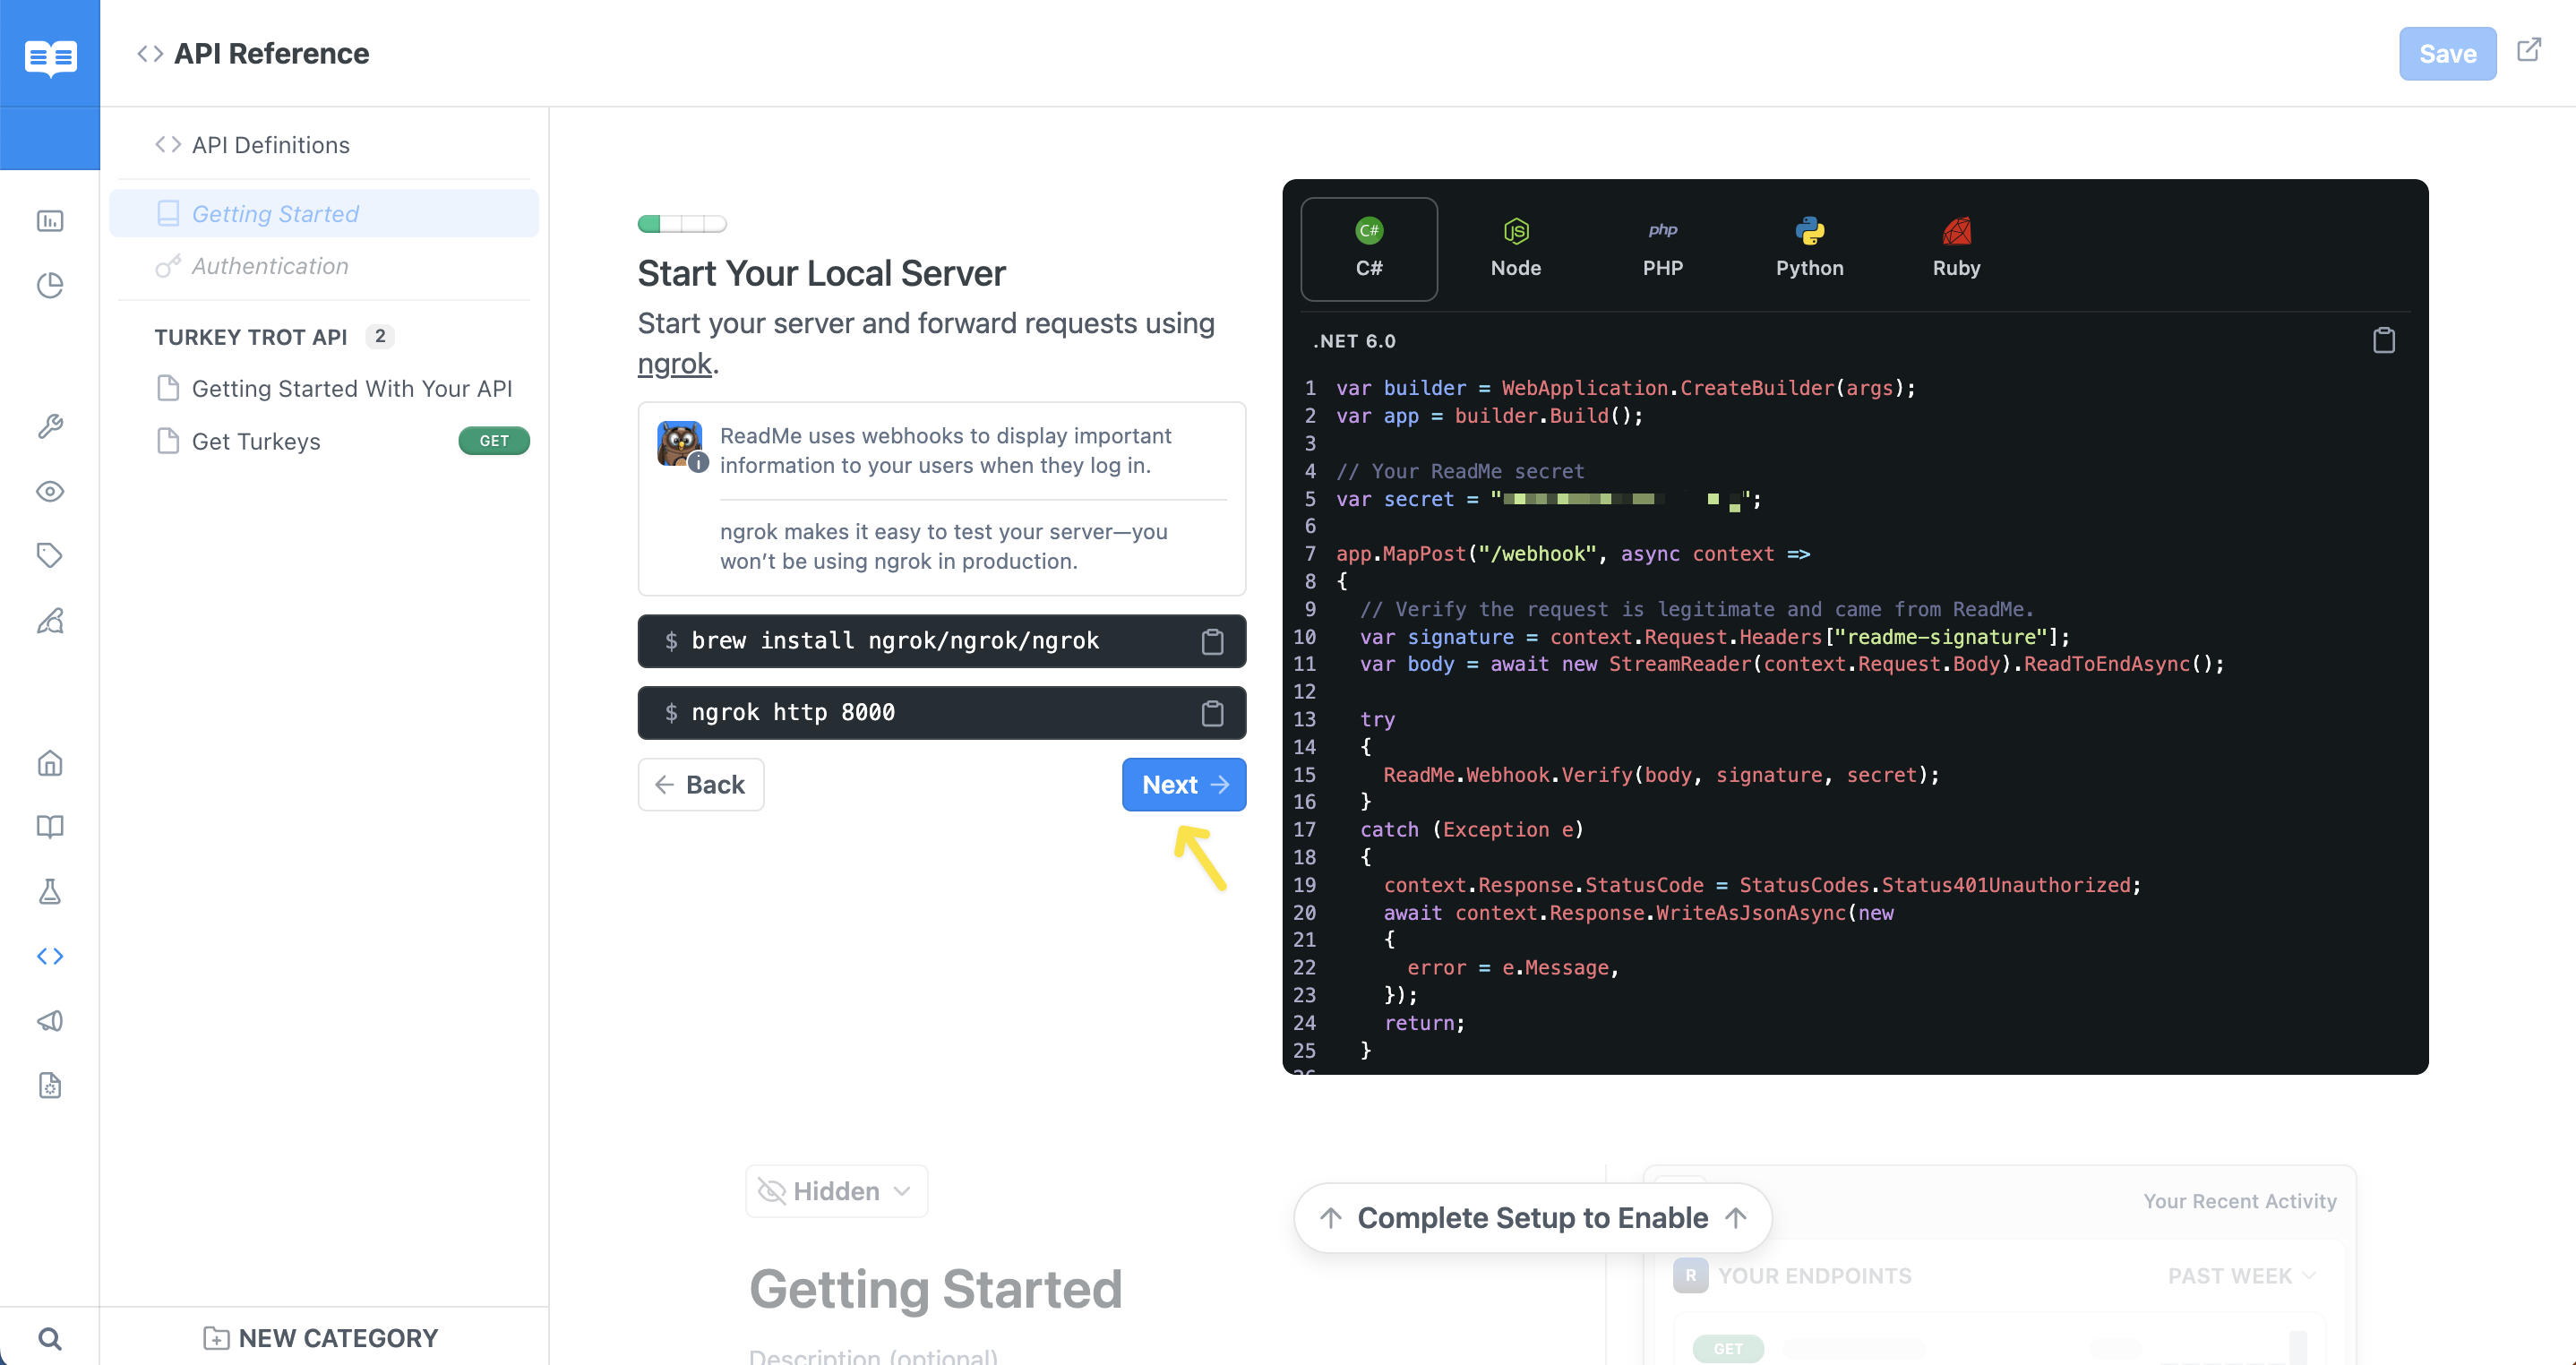
The first time you arrive at the Getting Started or Authentication page in your project’s dashboard, you’ll see a setup flow that will prompt you through a series of actions. You’ll only need to complete the setup flow once, and both pages will automatically update once you’ve completed it:
- Deploy the server which will enable the Personalized Docs Webhook
- For step-by-step instructions on how to enable the Personalized Docs Webhook, head here
- If you’ve already enabled the Personalized Docs Webhook in your project’s Personalized Docs page, this portion of the setup flow will reflect that the server is already deployed — no need to set it up twice!
- Add an API definition so that you can choose an API endpoint for developers to use in the Try It playground on the Getting Started and Authentication pages:
- If you already have an API definition added, the setup flow will skip to the recommended endpoint step. For instructions on importing an API definition, including all available methods that ReadMe offers, head to this page of our docs
- The recommended endpoints are GET endpoints in your API definition that do not have any required parameters, so the developer’s first call is as minimal as possible. A
pingor a “Hello World” type of endpoint works great here! - To simplify the onboarding experience for your developers, you can only choose one endpoint in this step.
- Once you’ve completed the setup flow in the Getting Started page, the page will show the 3-step Getting Started widget on the left and the Recent Activity widget on the right, with the ability to add Markdown below
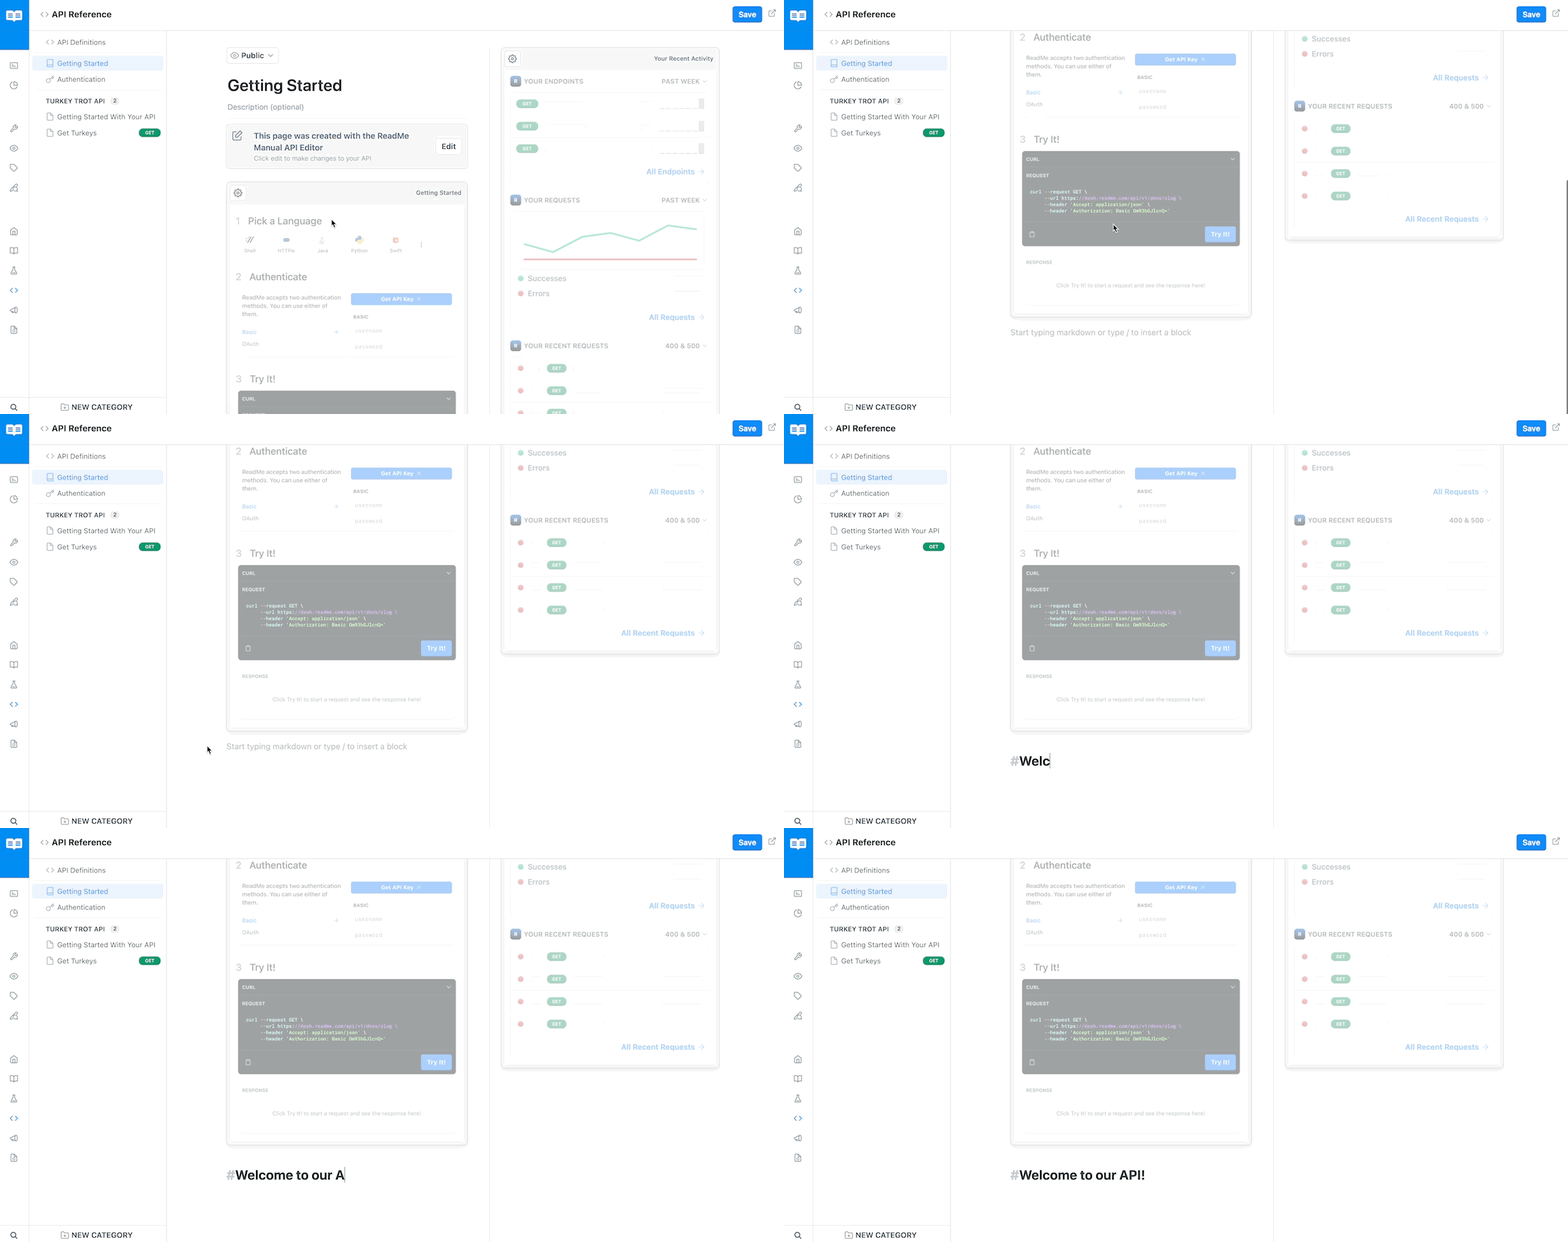
⚠️ Note: the Getting Started and Recent Activity widgets cannot be edited.
Once the Setup flow has been completed, the Authentication page will reflect how it will appear in the hub. You cannot edit the content of the API Key Table, Authentication, and Code Example widgets, however the gears in each widget are clickable, allowing you to change the Server URL of the Personalized Docs Webhook or change the selected endpoint. You can also add more details below using the new Markdown editor:
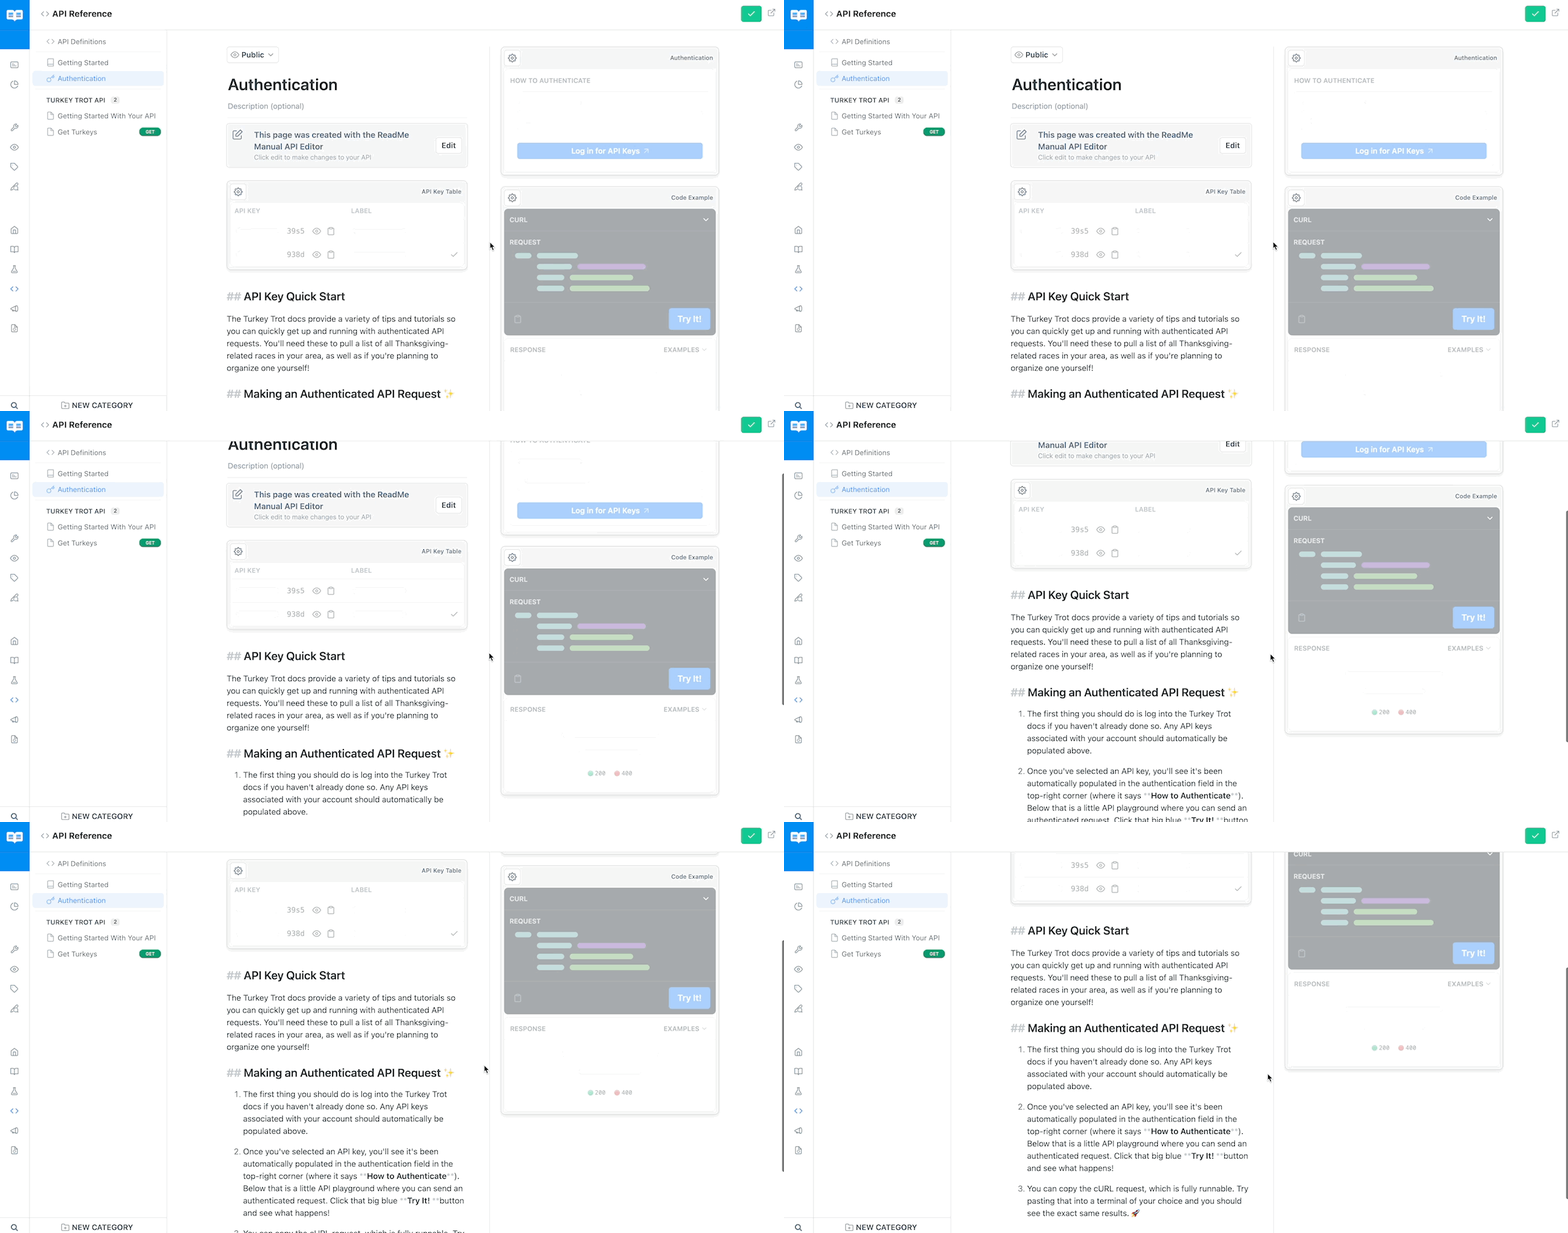
⚠️ Note: the API Key Table, Authentication, and Code Example widgets cannot be edited.
Looking to Set This Up for Your Enterprise Group?The Getting Started and Authentication pages setup flow for Enterprise customers is slightly different. Check out this page for step-by-step setup instructions on enabling the Getting Started and Authentication pages for each of your Enterprise child projects.
Updated 8 months ago