Bi-Directional Sync
Bi-directional sync creates a two-way connection between your ReadMe project and a GitHub or GitLab repository. This optional workflow keeps content consistent across both platforms:
- Write in your preferred environment whether that’s ReadMe or your local development setup.
- Developers, engineers, and technical writers can collaborate using tools they prefer.
- Changes sync automatically between ReadMe and Git creating a single source of truth.
| Free | Startup | Business | Enterprise |
|---|---|---|---|
Setting Up Bi-Directional Sync
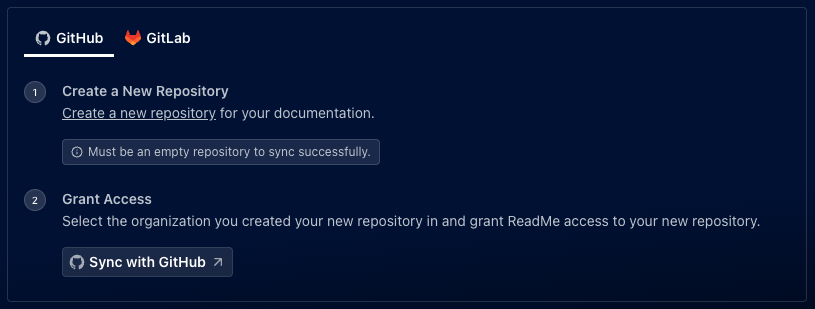
ReadMe supports bi-directional sync with both GitHub and GitLab.
For syncing with GitHub, you can connect to GitHub Cloud. If you are on the Enterprise plan, ReadMe supports bi-directional sync to GitHub Enterprise Server.

The repository you’re syncing to must be empty—no commits or files (e.g., README.md)—before connecting to ReadMe. You can add or remove files after setup.
Documentation Versioning
If your ReadMe project uses multiple Versions, only the Main Version is initially synced when you first enable Bi-Directional Sync. After successfully enabling Bi-Directional Sync, any changes to the other versions will sync to your Git repository.
Editing Your Docs
Once your Git Connection is set up, all changes made in the ReadMe editor will automatically sync to your Git repository, and vice versa. When editing documentation in Git, you can use your preferred code editor or Git tools
To ensure successful syncing from Git to ReadMe, follow these structure guidelines:
Markdown Files:
- Files must include required frontmatter:
titleandsummary - Content should be written in standard Markdown format
- File names must match the intended URL slug for proper routing
Navigation:
- Page order is defined using
_order.yamlfiles - Each category folder can have its’ own
order.yaml - Navigation structure in Git, mirrors your ReadMe project hierarchy
- The initial commit from ReadMe is to establish branch synchronization with GitHub
- Branch names must exactly match the version names defined in ReadMe
- Any mismatched version and names will exist in GitHub and will not sync with ReadMe.
Handling Conflicts
When a conflict is detected while saving in ReadMe, the system will immediately prompt you to Overwrite Git changes or Cancel the save and continue editing. Changes saved in ReadMe, will always match what goes live.
When merging from GitHub, the user can resolve conflicts via the GitHub editor or the merge tool of their choice locally before pushing.
FAQ
How does ReadMe integrate with GitHub and what permissions are required?
ReadMe uses a GitHub App with rep-level access: read-only for metadata(required) and read/write for syncing content. Webhooks handle syncs, change detection, and conflict resolution.
Why aren't my branches showing up in GitHub or GitLab?
New branches you create after enabling bi-directional sync automatically creates a corresponding branch on Git tools, but existing branches will not create a corresponding branch on Git tools until you save a change to that branch in ReadMe.
What permissions are required when syncing with GitLab?
ReadMe requests access to:
read_apifor listing projectsread_userandread_profileto display user informationread_repositoryto sync content in GitLab to ReadMewrite_repositoryto sync contnotion ent in ReadMe to GitLab
Updated 4 months ago